


1/7 Scale Blackburn Buccaneer All Composite Scratch Build


The following 2 users liked this post by nick0231:
David J Ruskin (09-12-2022),
Halcyon66 (09-13-2022)
 09-12-2022, 03:52 AM
#704
Junior Member
Fan-Dabi-Dozi !!!
I'd become slightly concerned that the long gap in updates here might mean you had lost motivation, so your latest update is fantastic news. Taking on a project as daunting as this is no mean feat. Persevering to do it three times, indicates that you are either quite bonkers, or incredibly driven
Well done, mate.
The following users liked this post:
yeahbaby (09-12-2022)


The following 4 users liked this post by JSF-TC:

The following users liked this post:
grbaker (09-18-2022)
09-27-2022, 06:04 PM
#717

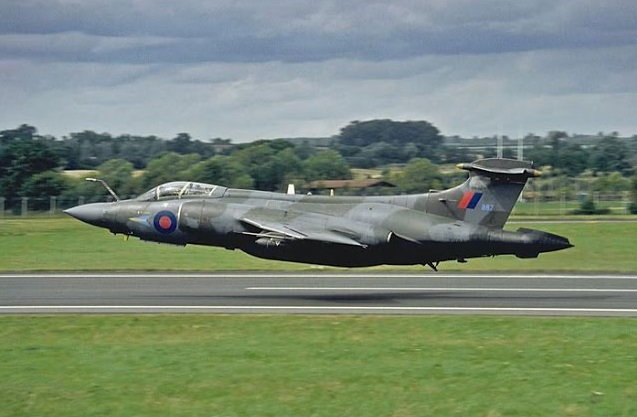
Having flown the jet in question for 8 years (including the one nick0231 posted a picture of), I have followed this thread with great interest and a not insignificant amount of nostalgia! You have done a fantastic job Paul; your perseverance and attention to detail is commendable and, like many others I can't wait to see her finished, especially as a 208 Sqn jet . Very glad third time was a treat, just so sorry for results one and two!
. Very glad third time was a treat, just so sorry for results one and two!
The following users liked this post:
JamesKNMA (09-28-2022)
02-05-2023, 04:34 PM
#718

A great day of flying in Waco after a long absence due to work. Great to see everyone and especially Paul�s bad ass Buccaneer. He�s expanding the flight envelope with each outing and refining the approach and landing of the bird. I took a few videos that hopefully he can compress and upload. Well done amigo.
02-06-2023, 05:41 PM
#720
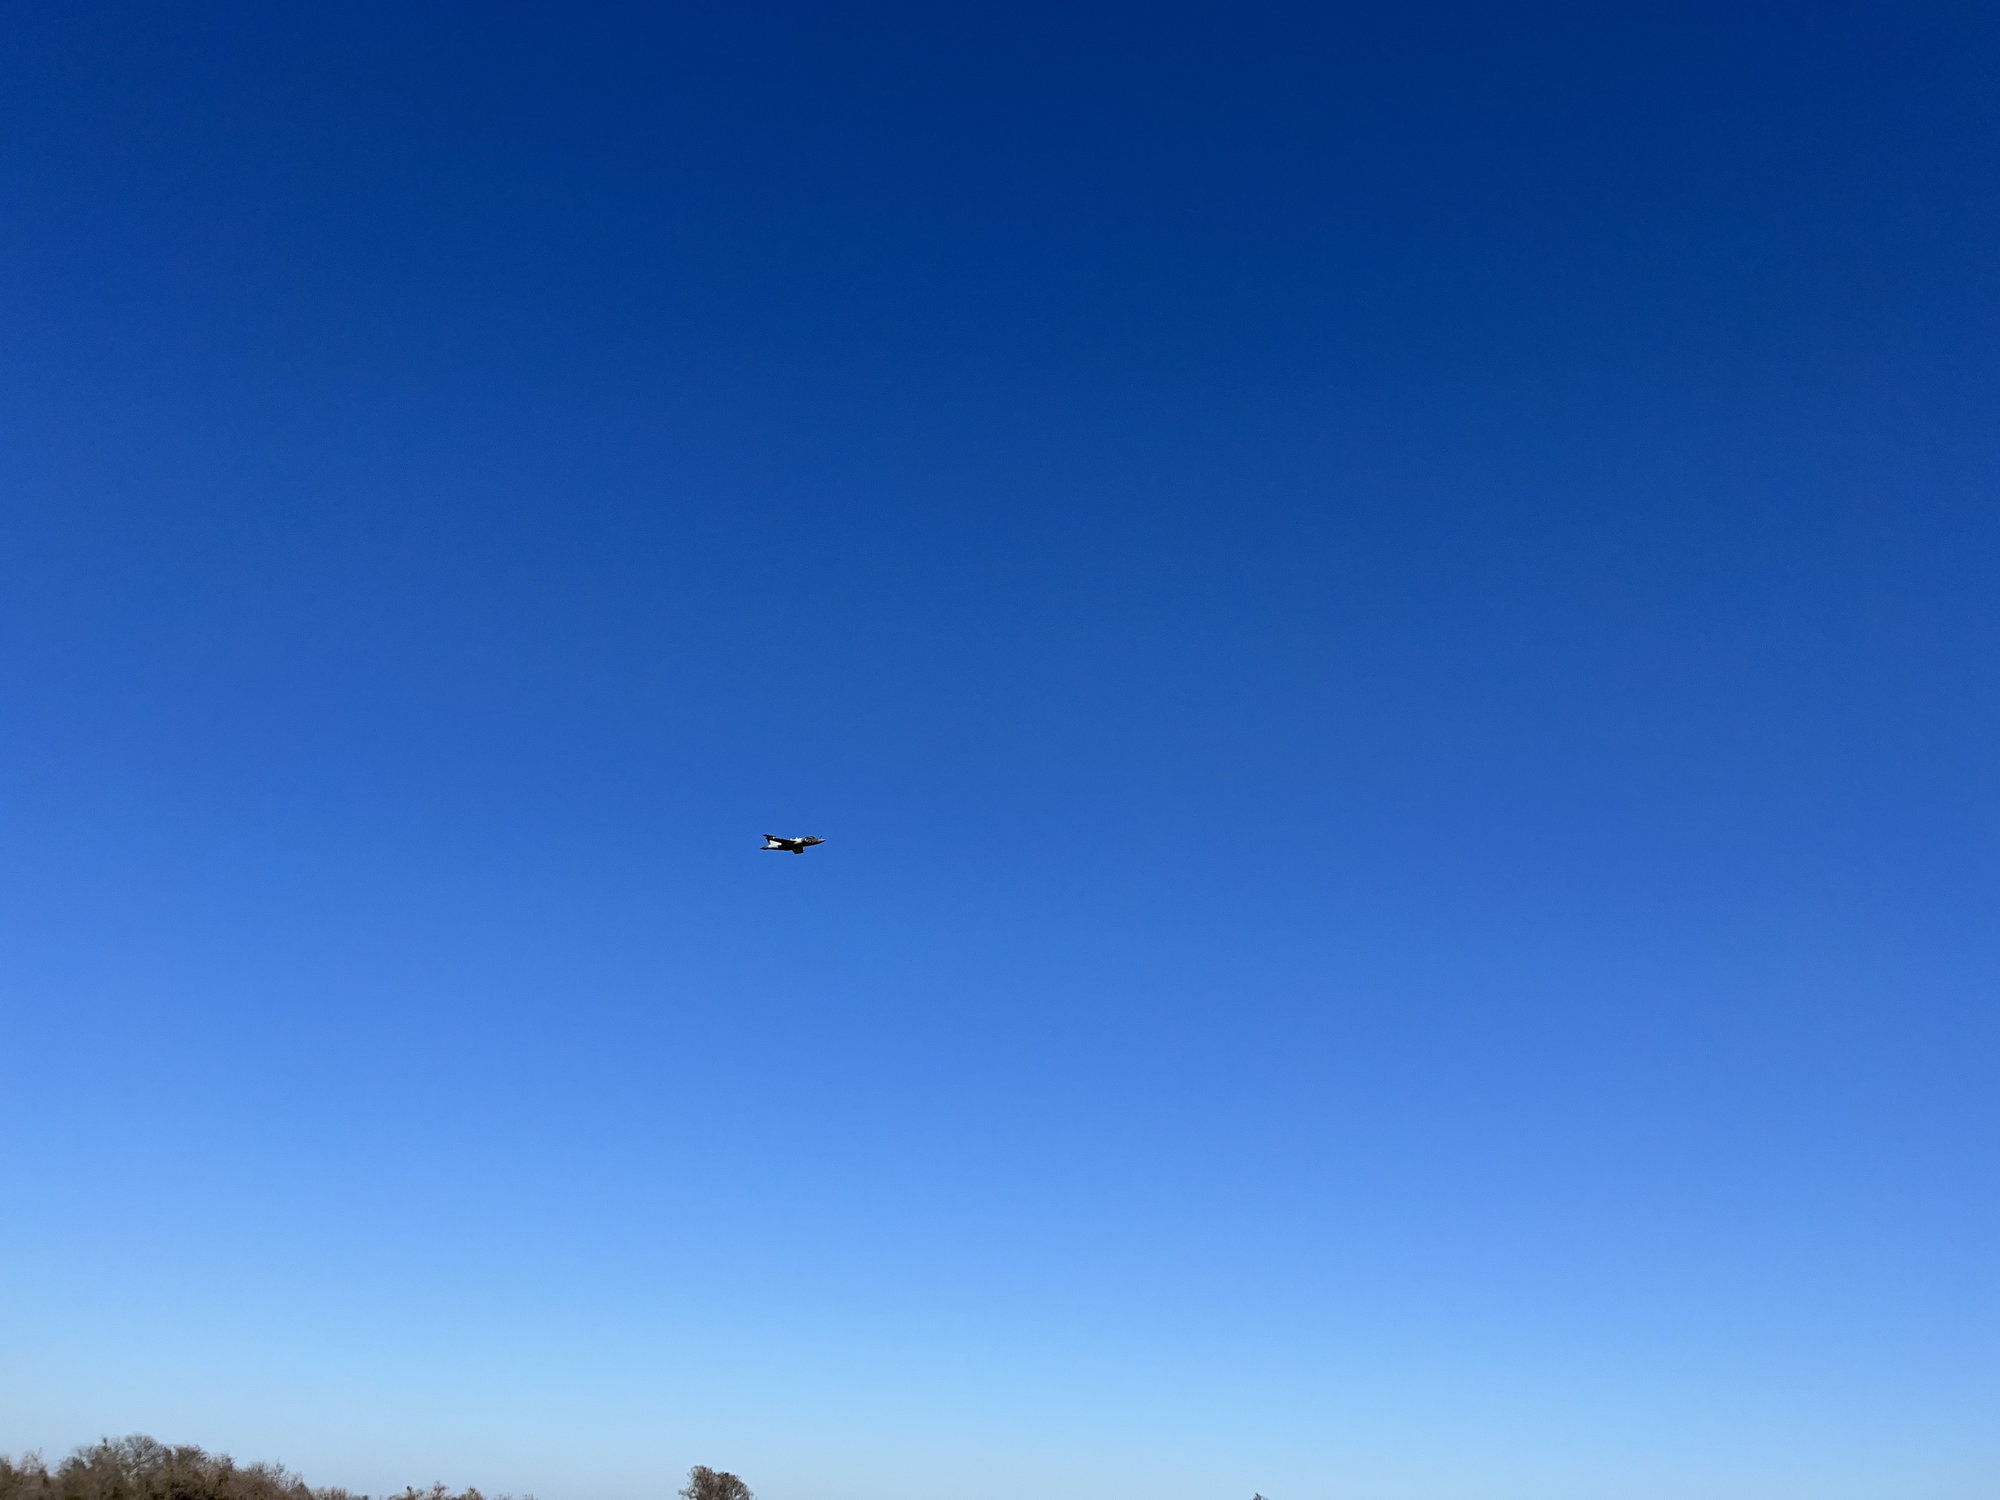
Thomas/ Buck, many thanks, and it's long overdue for an update to the build, so here goes. I'll break it up into digestible pieces.I now have 19 flights on it and based on the last 3 flights I think I have it fairly well dialed in.
A significant amount of learning has been achieved over these initial flights and adjustments made in a number of areas.
The initial flights were flown with a 5%mac static margin, based on calculation. While it flew well, I got the feeling that it was a little pitchy, but as I got more comfortable with it I found that it would want to ‘rear-up’ if it got too slow. This got me a couple of times on landing where during the flair it would continue to pitch up and I would be feeding in a lot of forward stick to try to control it. This led to a couple of untidy landings and a little damage including ripping out the nose gear. During the repairs I took the opportunity to fully finish the forward fuselage, filling the seams and adding the paint and clear windshield parts.
The repairs added a bit of weight to the forward fuselage which helped pull the c.g. forward, but I also added a ballast mount in the tail and a couple of steel plates so that I could better fine tune the c.g. I initially set the new c.g. at 6%mac static margin and then after a couple of flights removed all the tail ballast which set the c.g. at a 7% mac static margin. This has completely eliminated any tendency to pitch up when slow and I am happy with this as the definitive c.g. position although it does need significant forward stick for sustained inverted flight.
The following users liked this post:
grbaker (02-07-2023)
02-06-2023, 05:47 PM
#721
The early flights were flown with the tailplane flap fixed at 0deg. I wanted to replicate the full scale and have the entire wing trailing edge acting as a flaperon and drooping down with the flaps deflected. This trailing edge droop generates 2 very distinct characteristics.
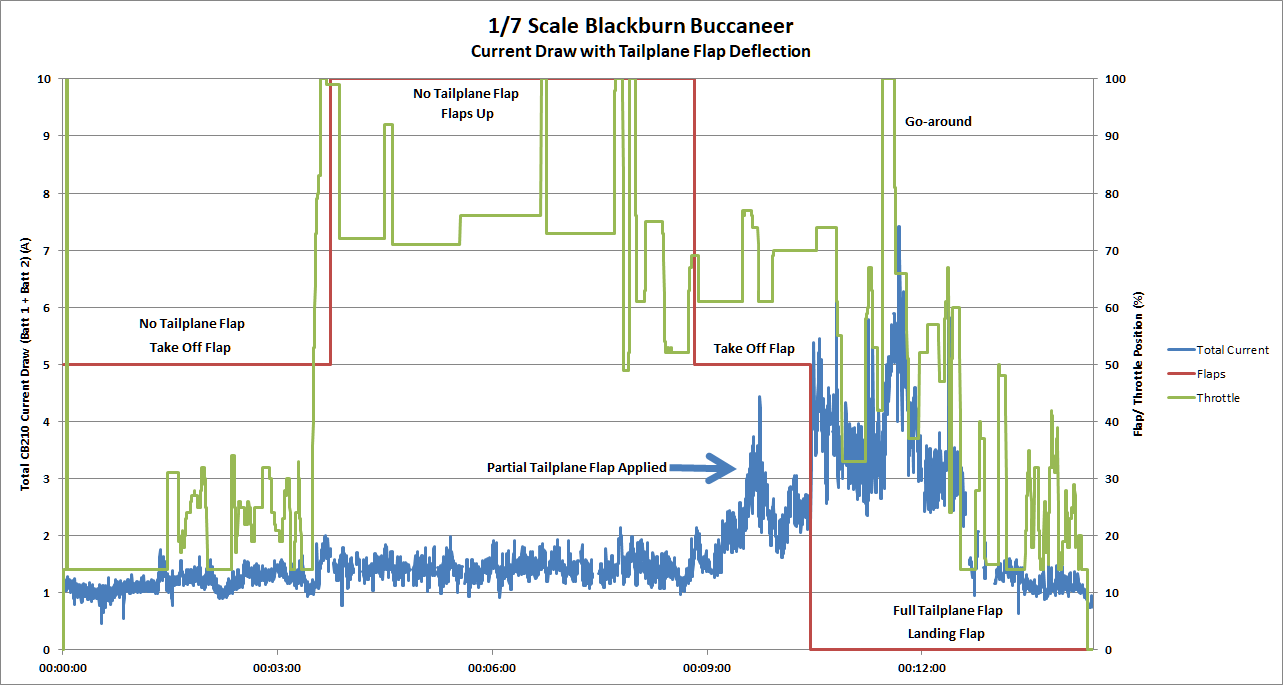
One is a significant nose down pitch change. While this can be countered with nose up trim in the take-off and landing flight modes, with the c.g. at the favorable 7% mac static margin I found that you would end up running out of nose up elevator authority, especially when turning finals., not a pleasant experience. This is entirely corrected by the use of the tailplane flap. Initially I had the tailplane flaps set on a rotary knob, and I started off partially deflecting the flap and then re-trimming before setting them up as part of the flight modes. I now have the tailplane flap as part of the flight modes and I have very little actual tailplane deflection when the wing flaps deflect, all the nose pitching moment is taken out by the tailplane flap. This then leaves the full normal travel of the elevator and it has not caused any issues with elevator authority.
As part of setting up the tailplane flap, I did confirm the cause of the loss of the very first model when I lost all elevator response. When the tailplane flaps deflect, the load on the elevator servo increases causing a current increase. In normal flight, total current draw is less than 2A, but with landing flap and tailplane flap deflected, I see current draws up on the 6-8A range. The higher the speed, the higher the current draw.
With the first model, it pitched down and entered a high-speed dive when the flaps and tailplane flaps were deflected, which would have driven the current draw very high, thereby tripping the CB400 protective fuse, which is rated at only 5A. The model ended up in a death dive with no way out. I now run a CB210 without protective fuses, and I have also written a LAU script for my Jeti DS-24 to combine both battery current draws into a total current draw and to call out an alarm when over a set (6A) level. This acts as a speed warning and so far, it works very well.
The following users liked this post:
grbaker (02-07-2023)
02-06-2023, 05:48 PM
#722
The other characteristic of the trailing edge droop is a very strong rolling moment with sideslip. With the flaperons drooped, when banked into a turn, on releasing the roll stick, the model has a very strong tendency to roll wings level. This makes flying the pattern very untidy as you are always fighting the model in the turn. With the droop removed, this effect goes away. I also confirmed that with the flaperons drooped, a slight application of rudder causes a very strong proverse roll. I tried roll heading hold on my Cortex Pro gyro, but I did not like it, as it again tried to keep the wings level. My current set up is with reduced aileron deflection and differential and I noted on the last few flights that I can now just hold in full roll stick and the model will stop rolling at around 45deg bank and flying the pattern was much tidier. It took a little bit to adjust to the new technique, but with full flap it now flies with roll stick effectively commanding bank angle, not roll rate.
With regard to the Cortex Pro gyro, after adjusting gains I have settled on full internal gains (set to 20) on all axes and 20% transmitter gain for flaps up, 60% gain for take-off flap and 100% transmitter gain for landing flap. In this configuration, the model is smooth and well damped, but without any artificial feel to it.
Speedbrake use is very neutral with zero pitch change. Once on downwind with landing flap I select partial speedbrake to the rotary slider mid detent and then adjust power as required. This then gives a very positive way to control glideslope just using throttle I then deploy full speedbrake on touchdown.
The following users liked this post:
grbaker (02-07-2023)
02-06-2023, 05:55 PM
#723
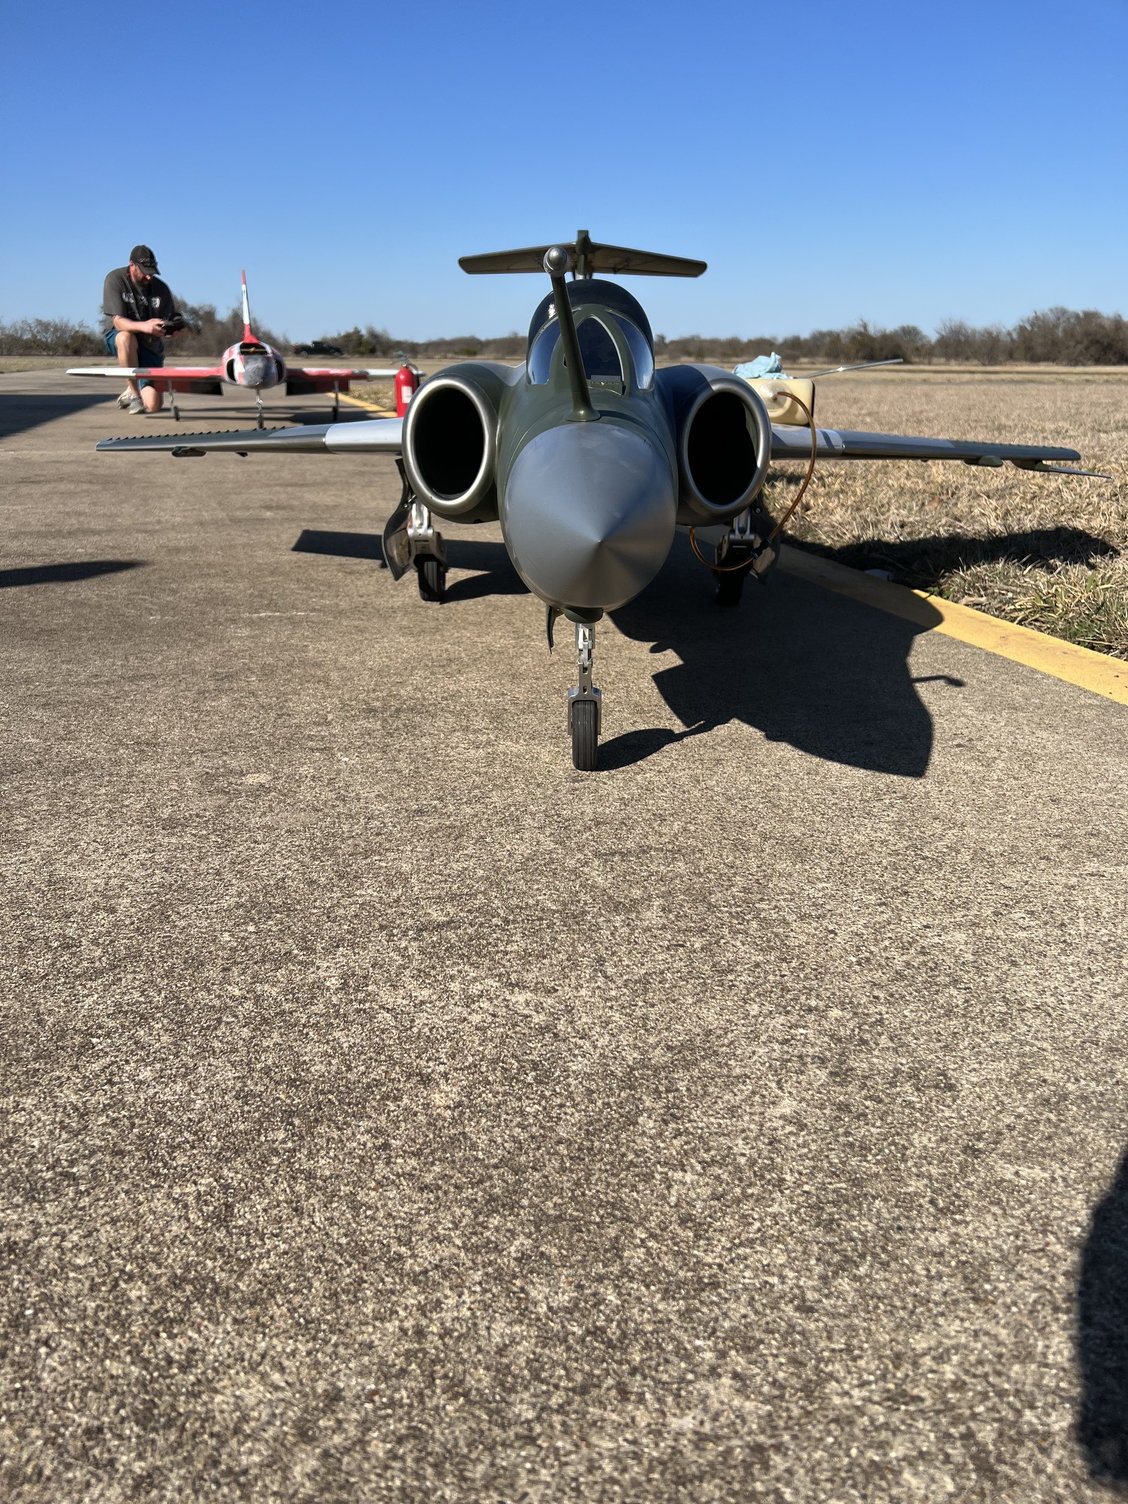
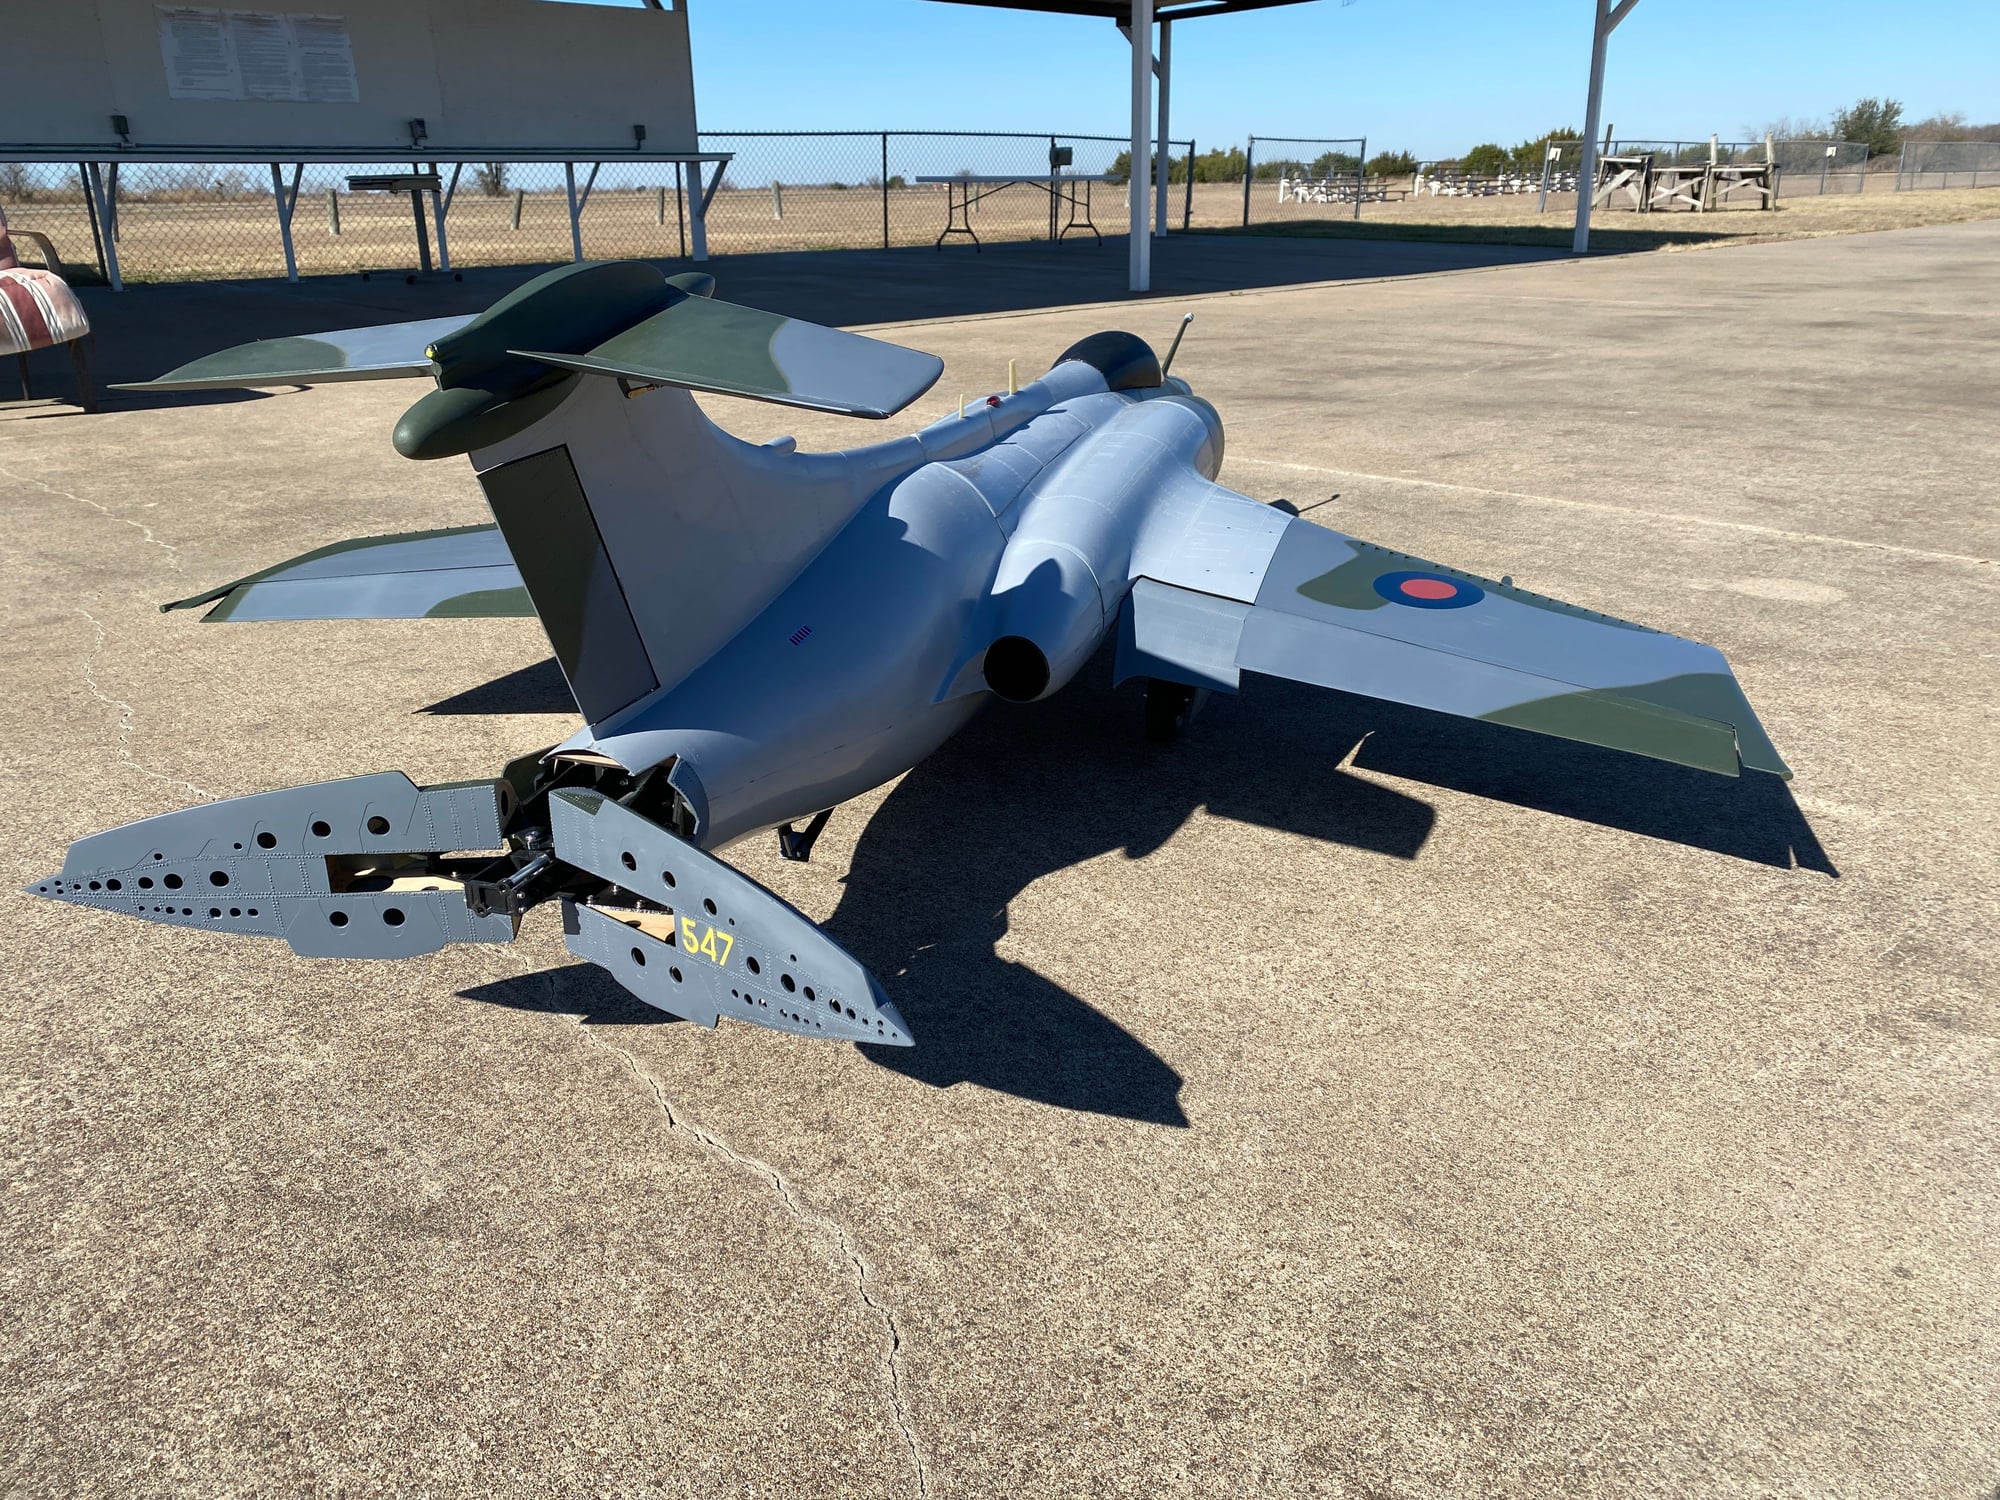
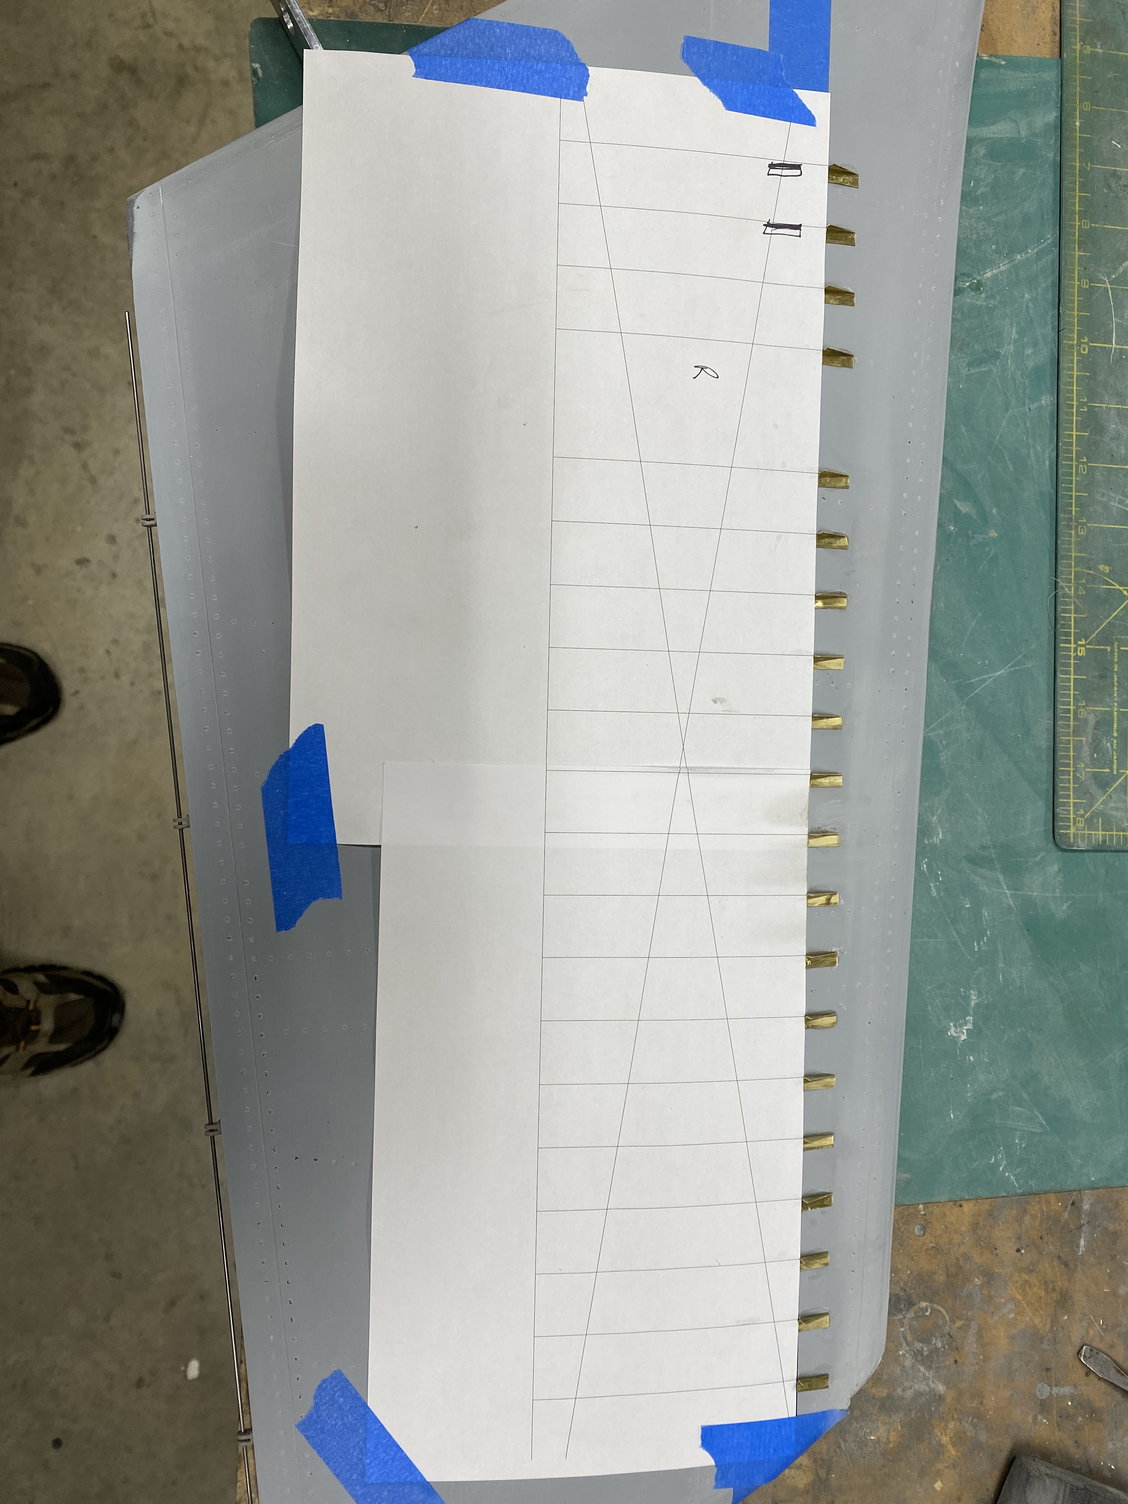
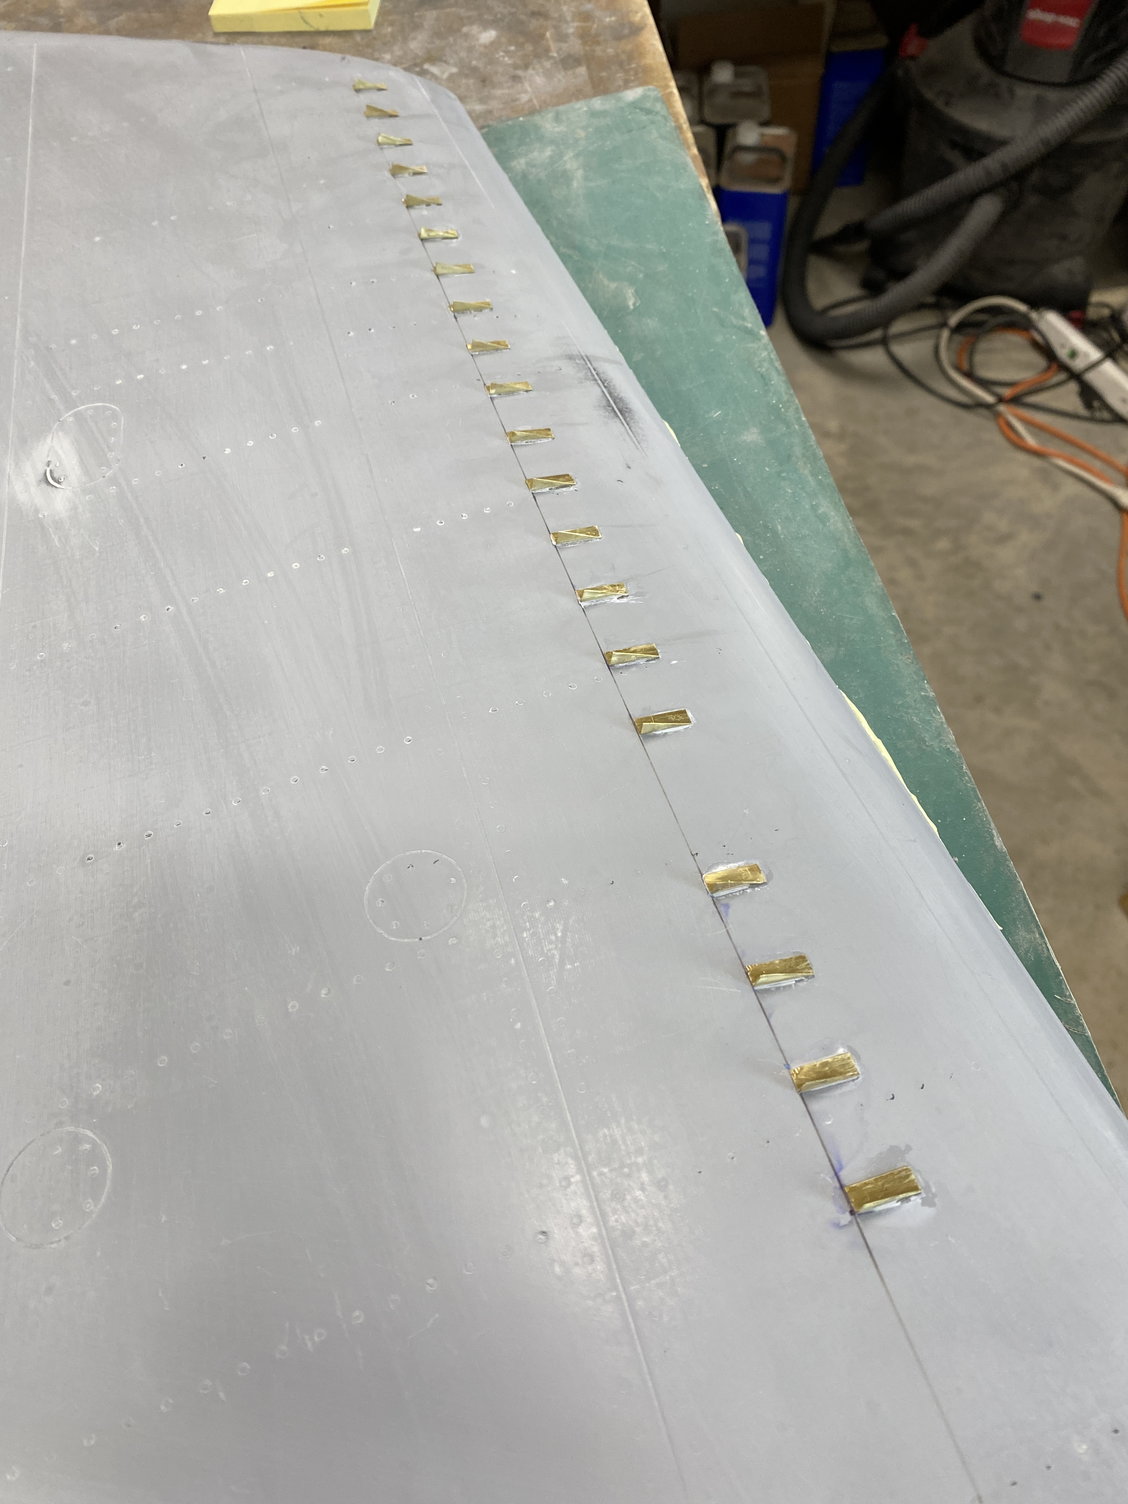
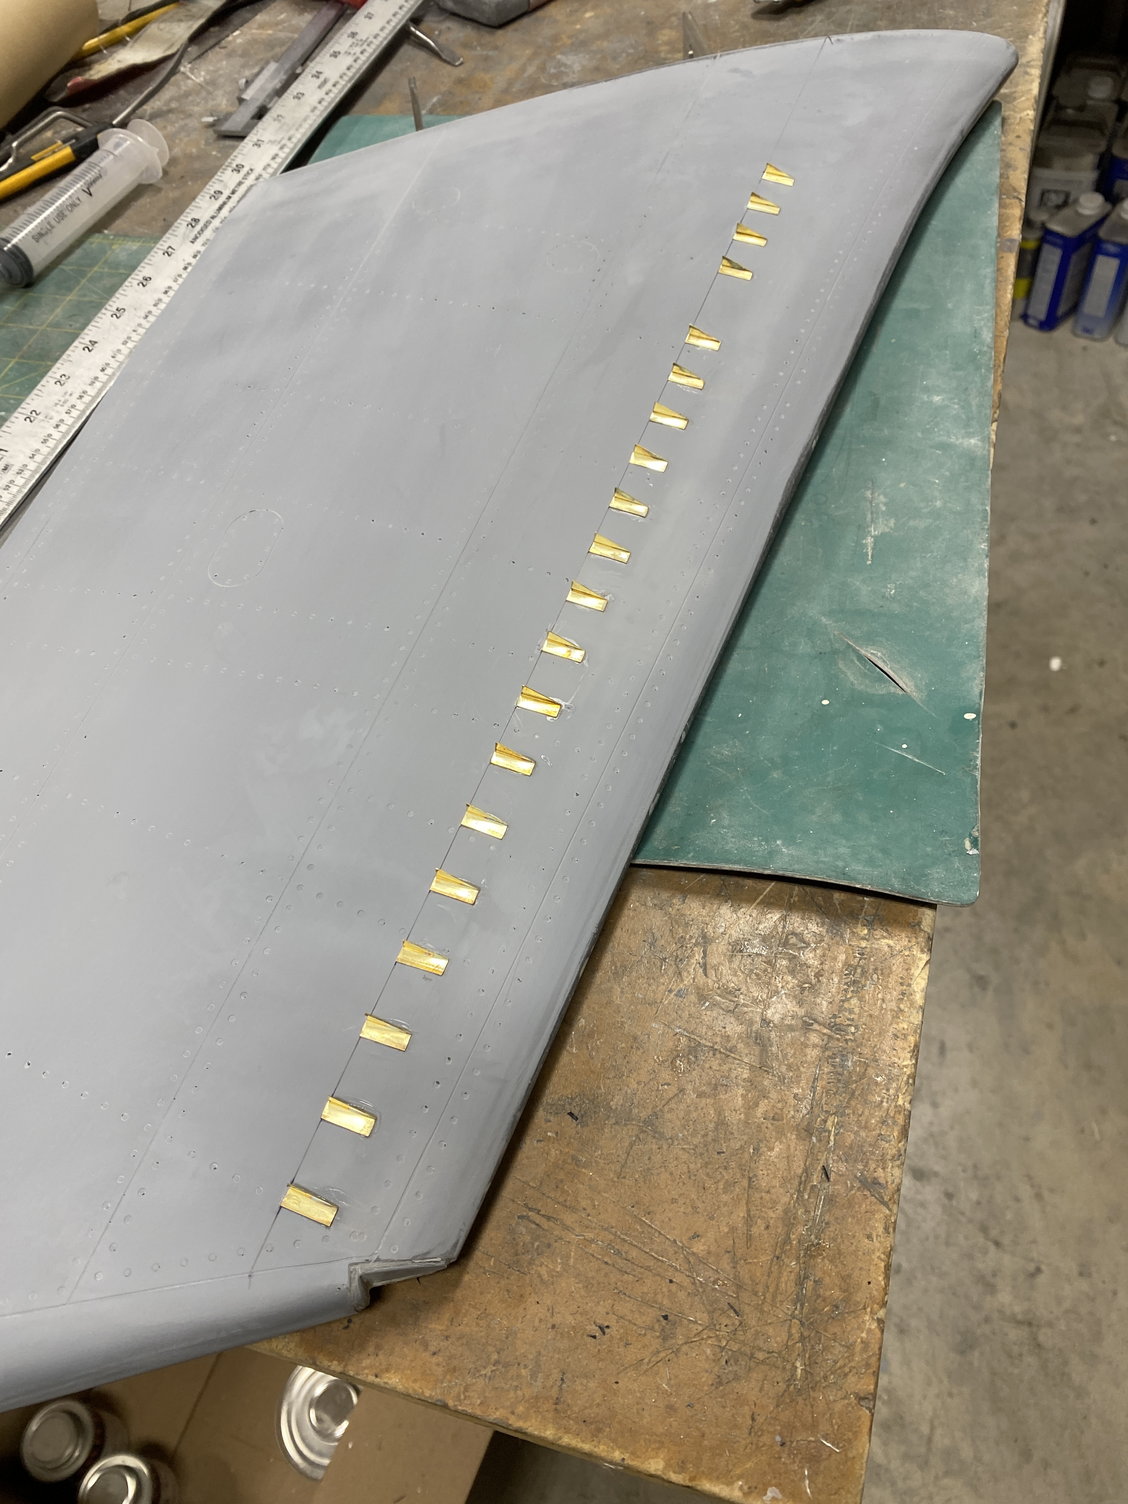
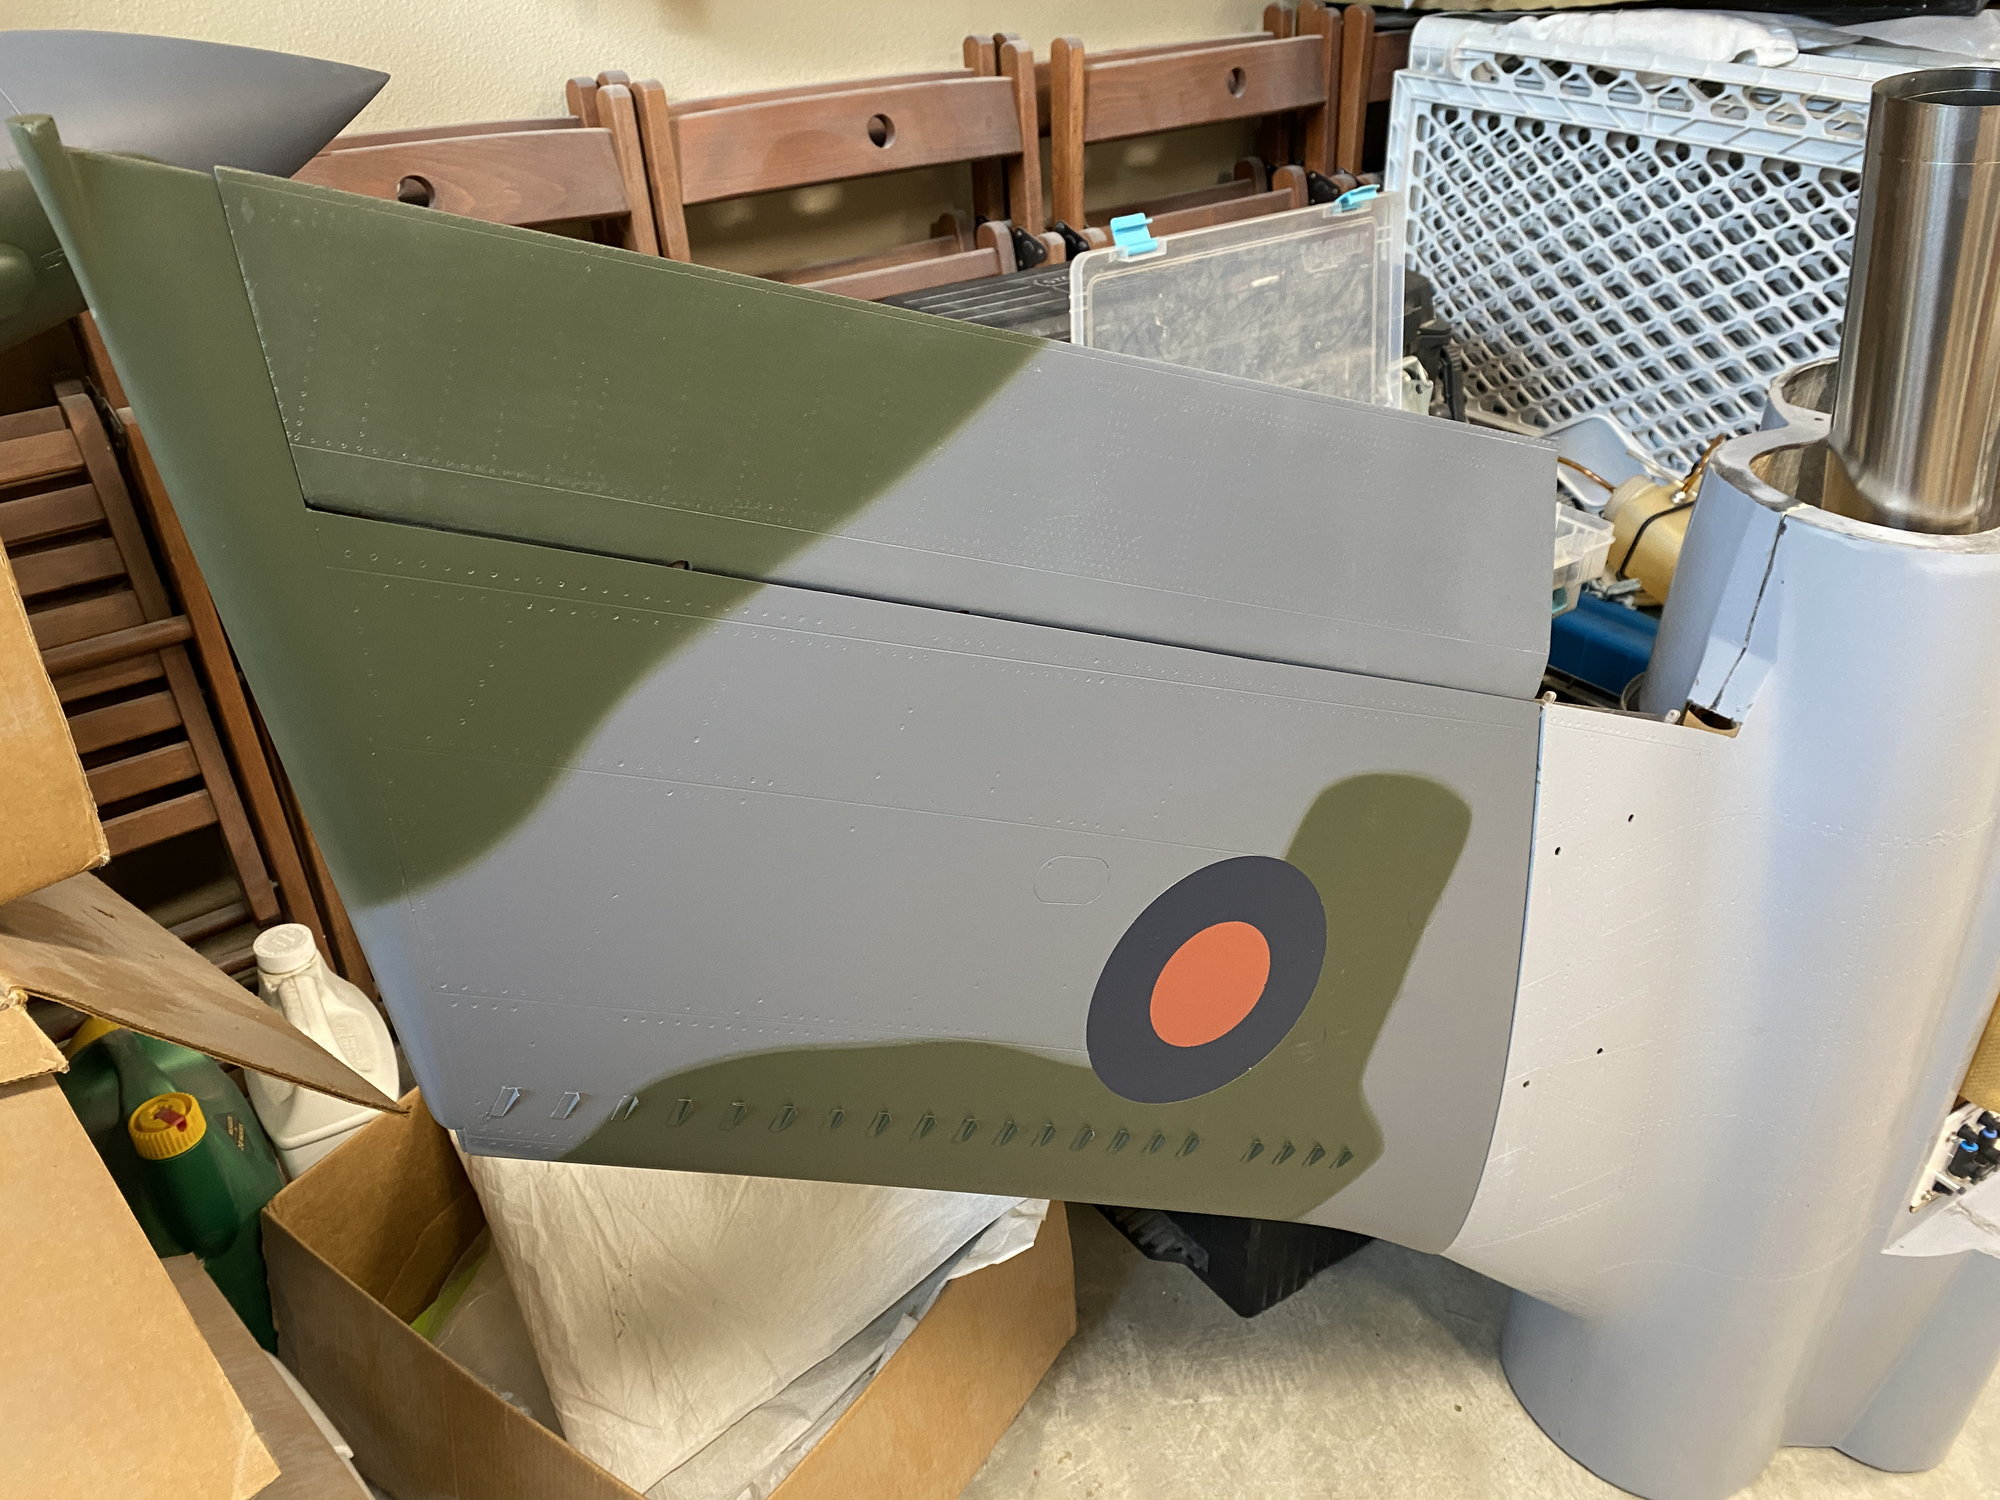
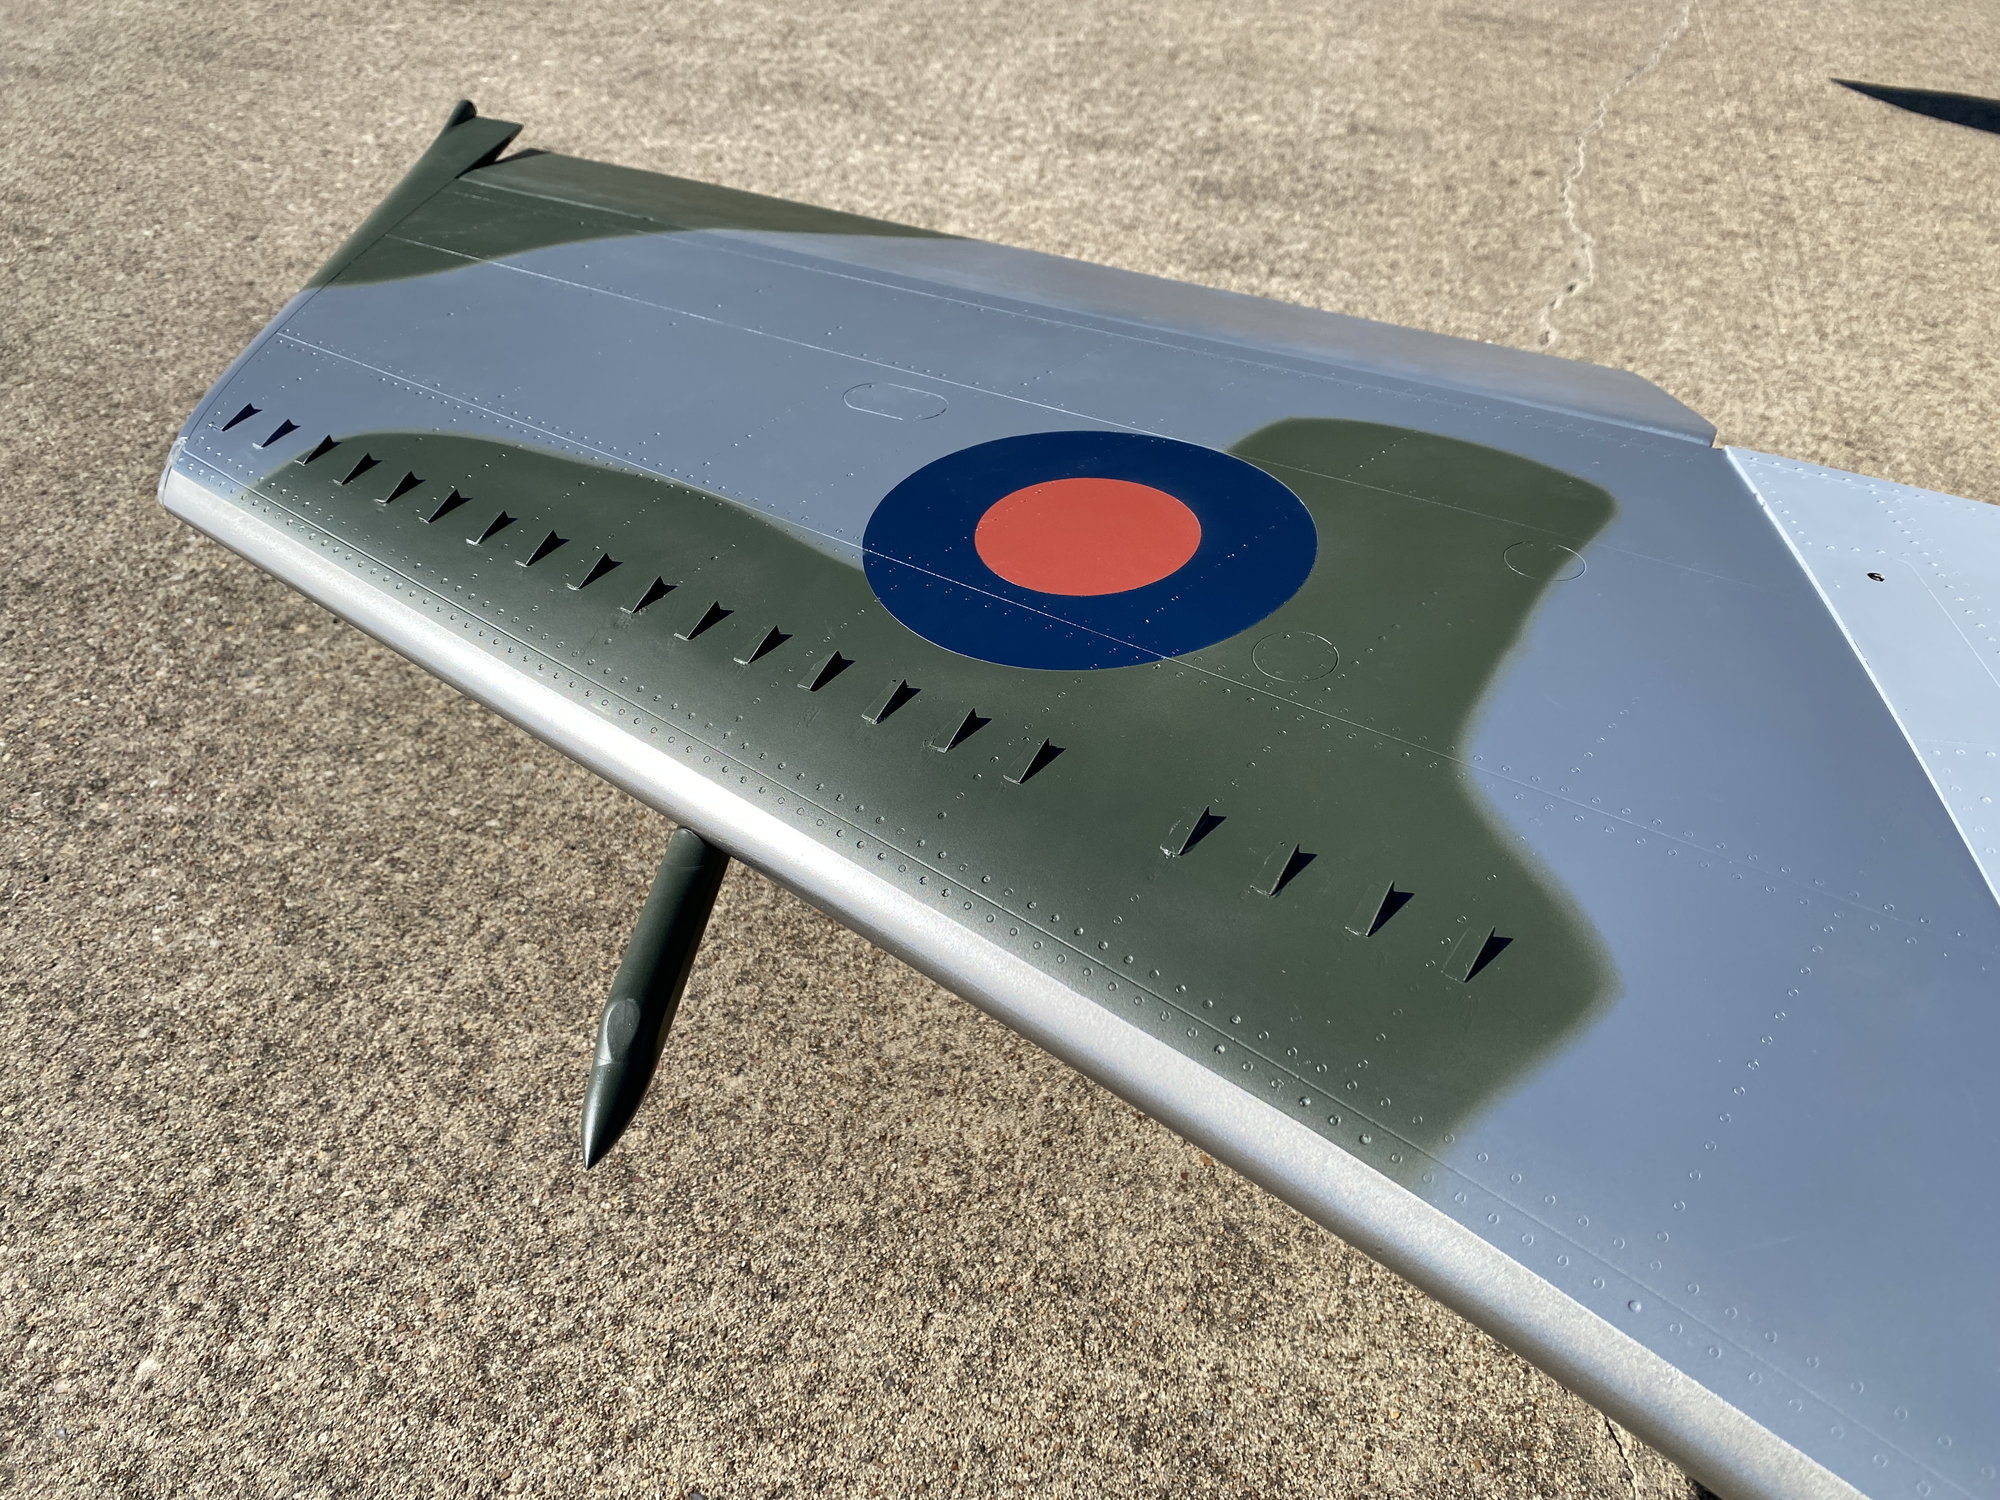
As for finishing the model, I have worked on various parts as separate efforts. The wings were finished first, with gaps, and seams cleaned up and an overall rub-down with scotchbrite. The very distinctive vortex generators were then added, made from brass angle, cut into individual lengths and then sanded down one side to make the angled edge. These were then CA’d to the wing, using a CAD drawn template based on the full scale maintenance manual. Wingtip navigation lights (Unilight) and clear lenses were then installed. I still have to go back and add in the trailing edge blue formation lights.
The mid-span electronic warfare pods that protrude from the leading edge were designed in CAD and 3D printed using a resin printer, then attached using a couple of recessed screws.
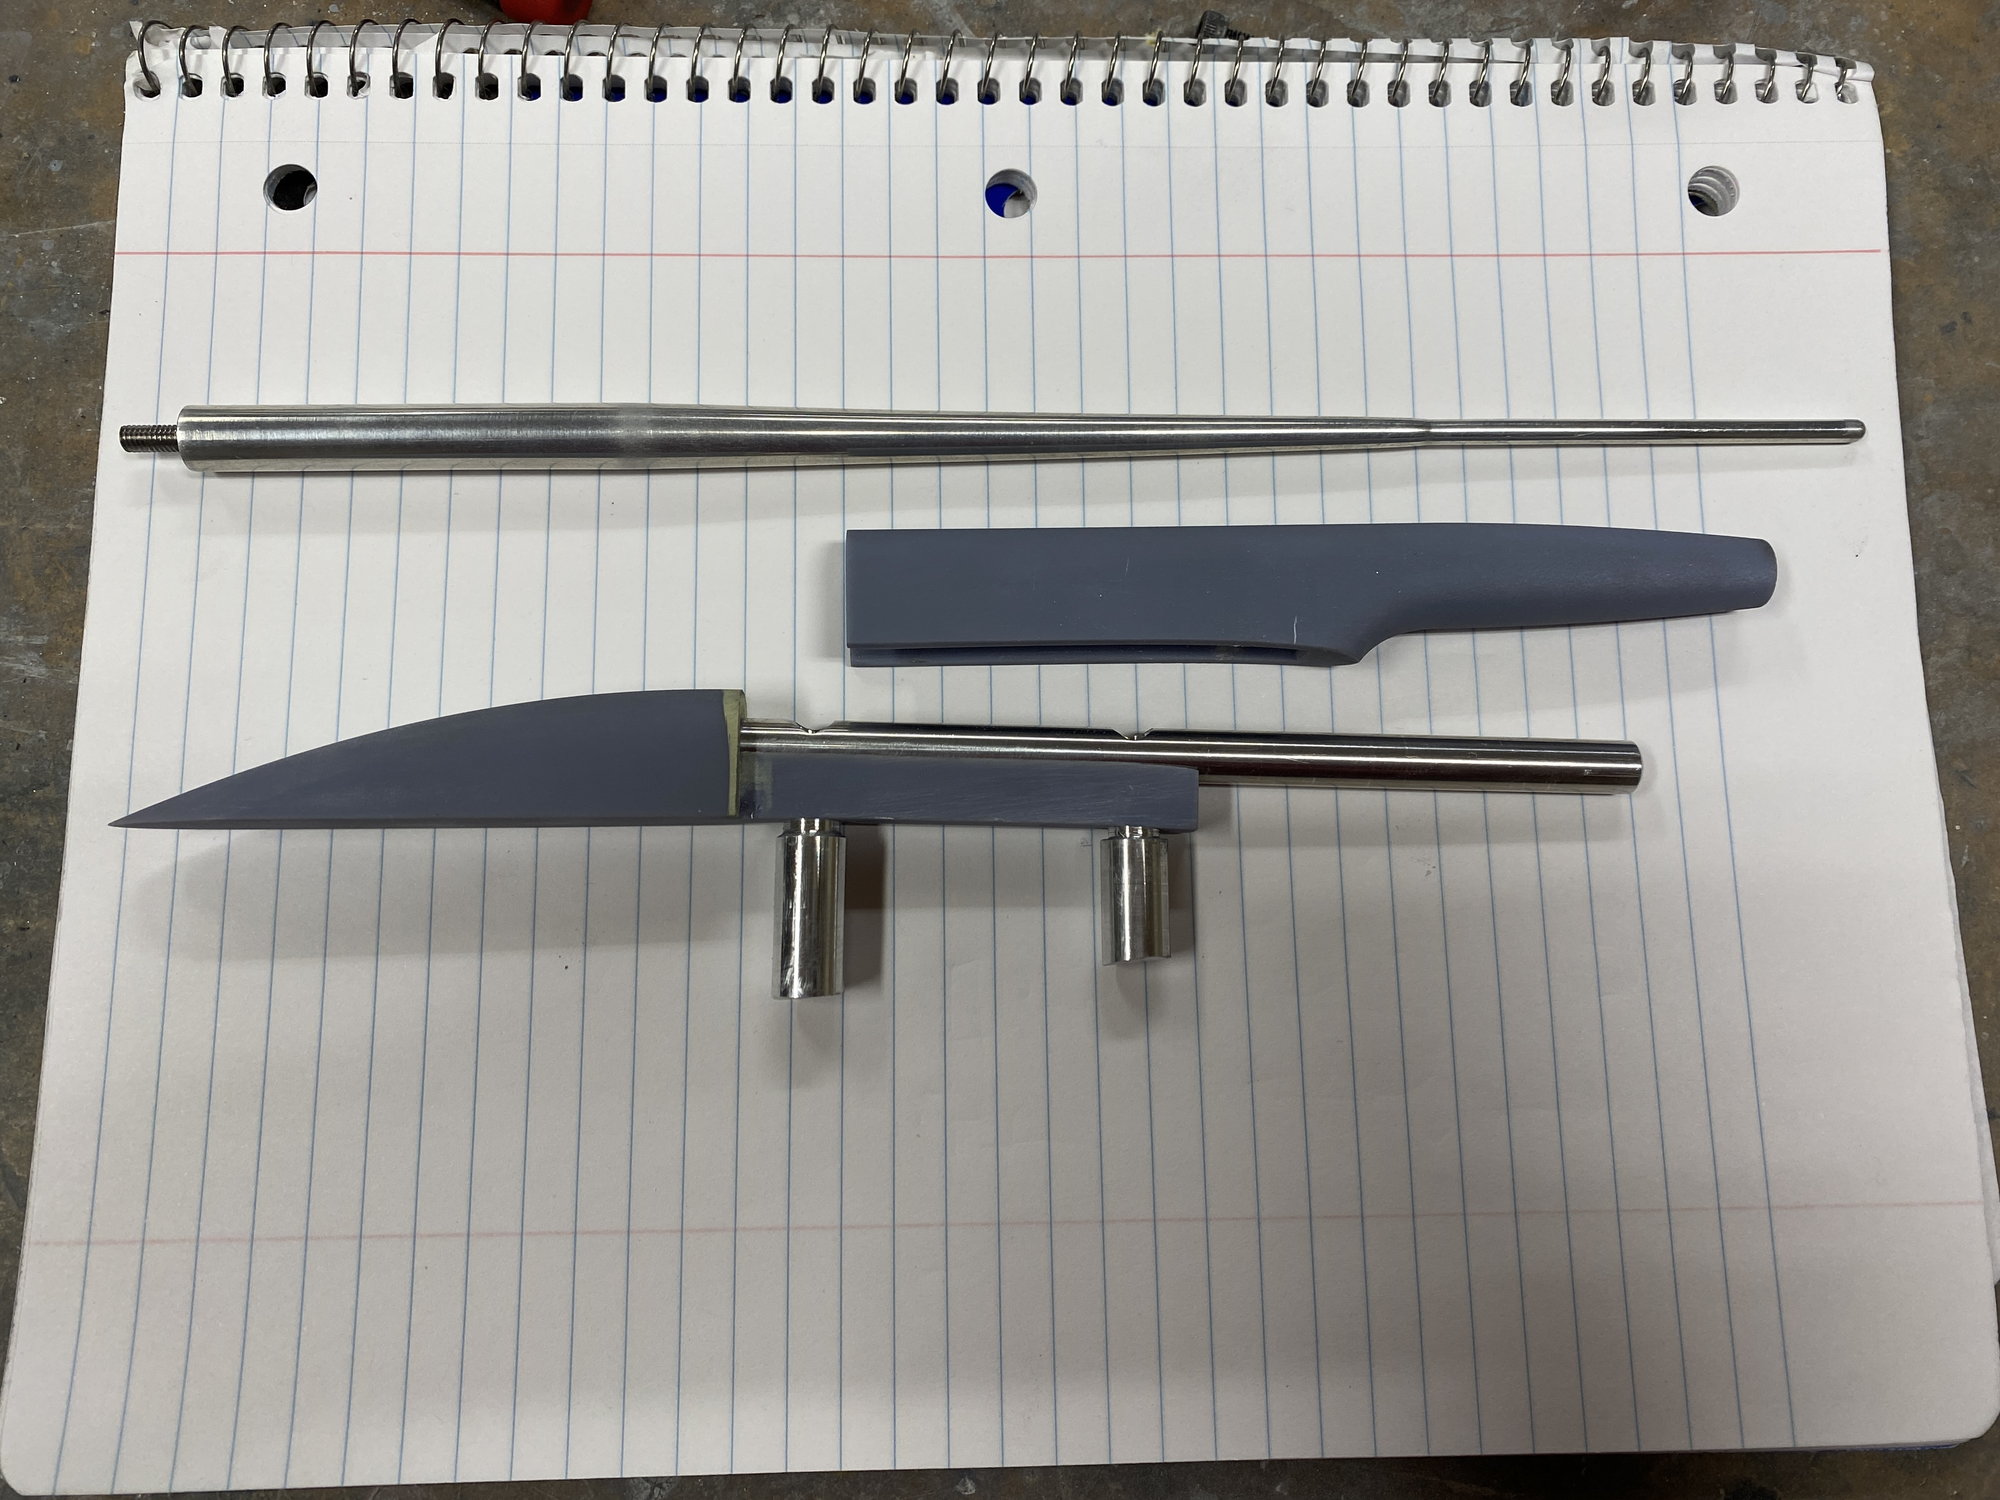
The very distinctive air data probe was then installed, using a pair of aluminum rods to tie the upper and lower wing skins together and tapped for a M3 screw to mount the fixed potion under the left wing. Scale fairings were then designed and printed, allowing the main probe to screw on/ off as required.
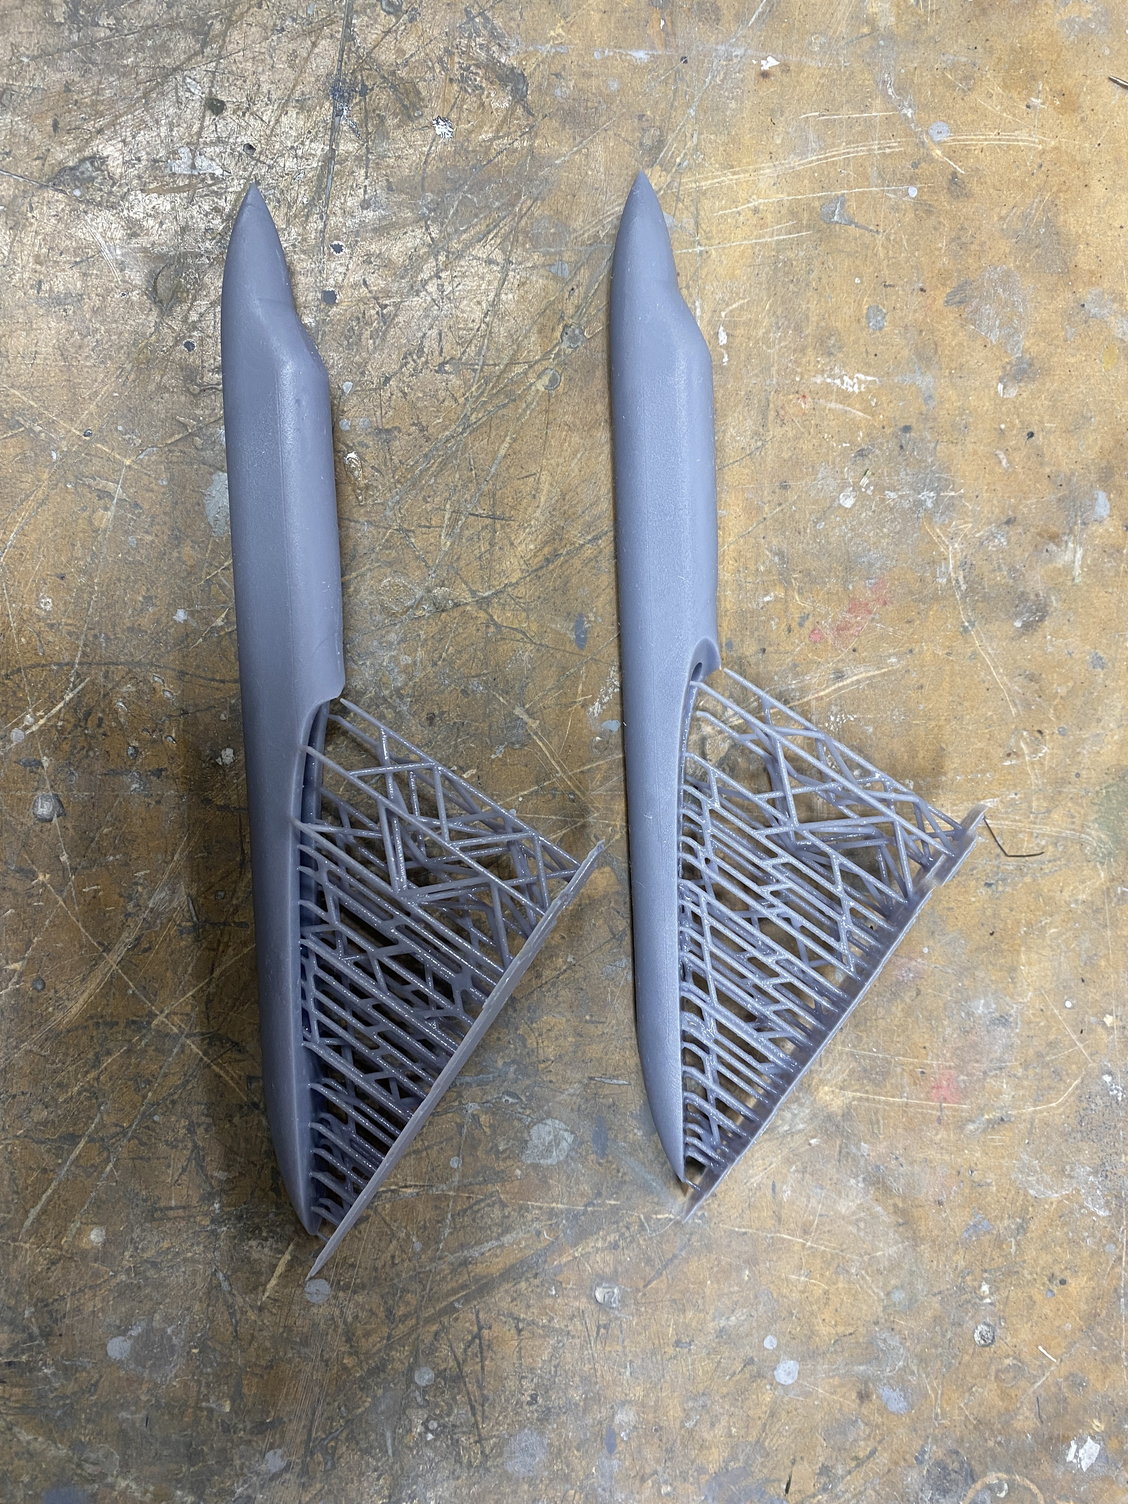
The mid-span electronic warfare pods that protrude from the leading edge were designed in CAD and 3D printed using a resin printer, then attached using a couple of recessed screws.
The very distinctive air data probe was then installed, using a pair of aluminum rods to tie the upper and lower wing skins together and tapped for a M3 screw to mount the fixed potion under the left wing. Scale fairings were then designed and printed, allowing the main probe to screw on/ off as required.
The following users liked this post:
grbaker (02-07-2023)
02-06-2023, 05:59 PM
#724
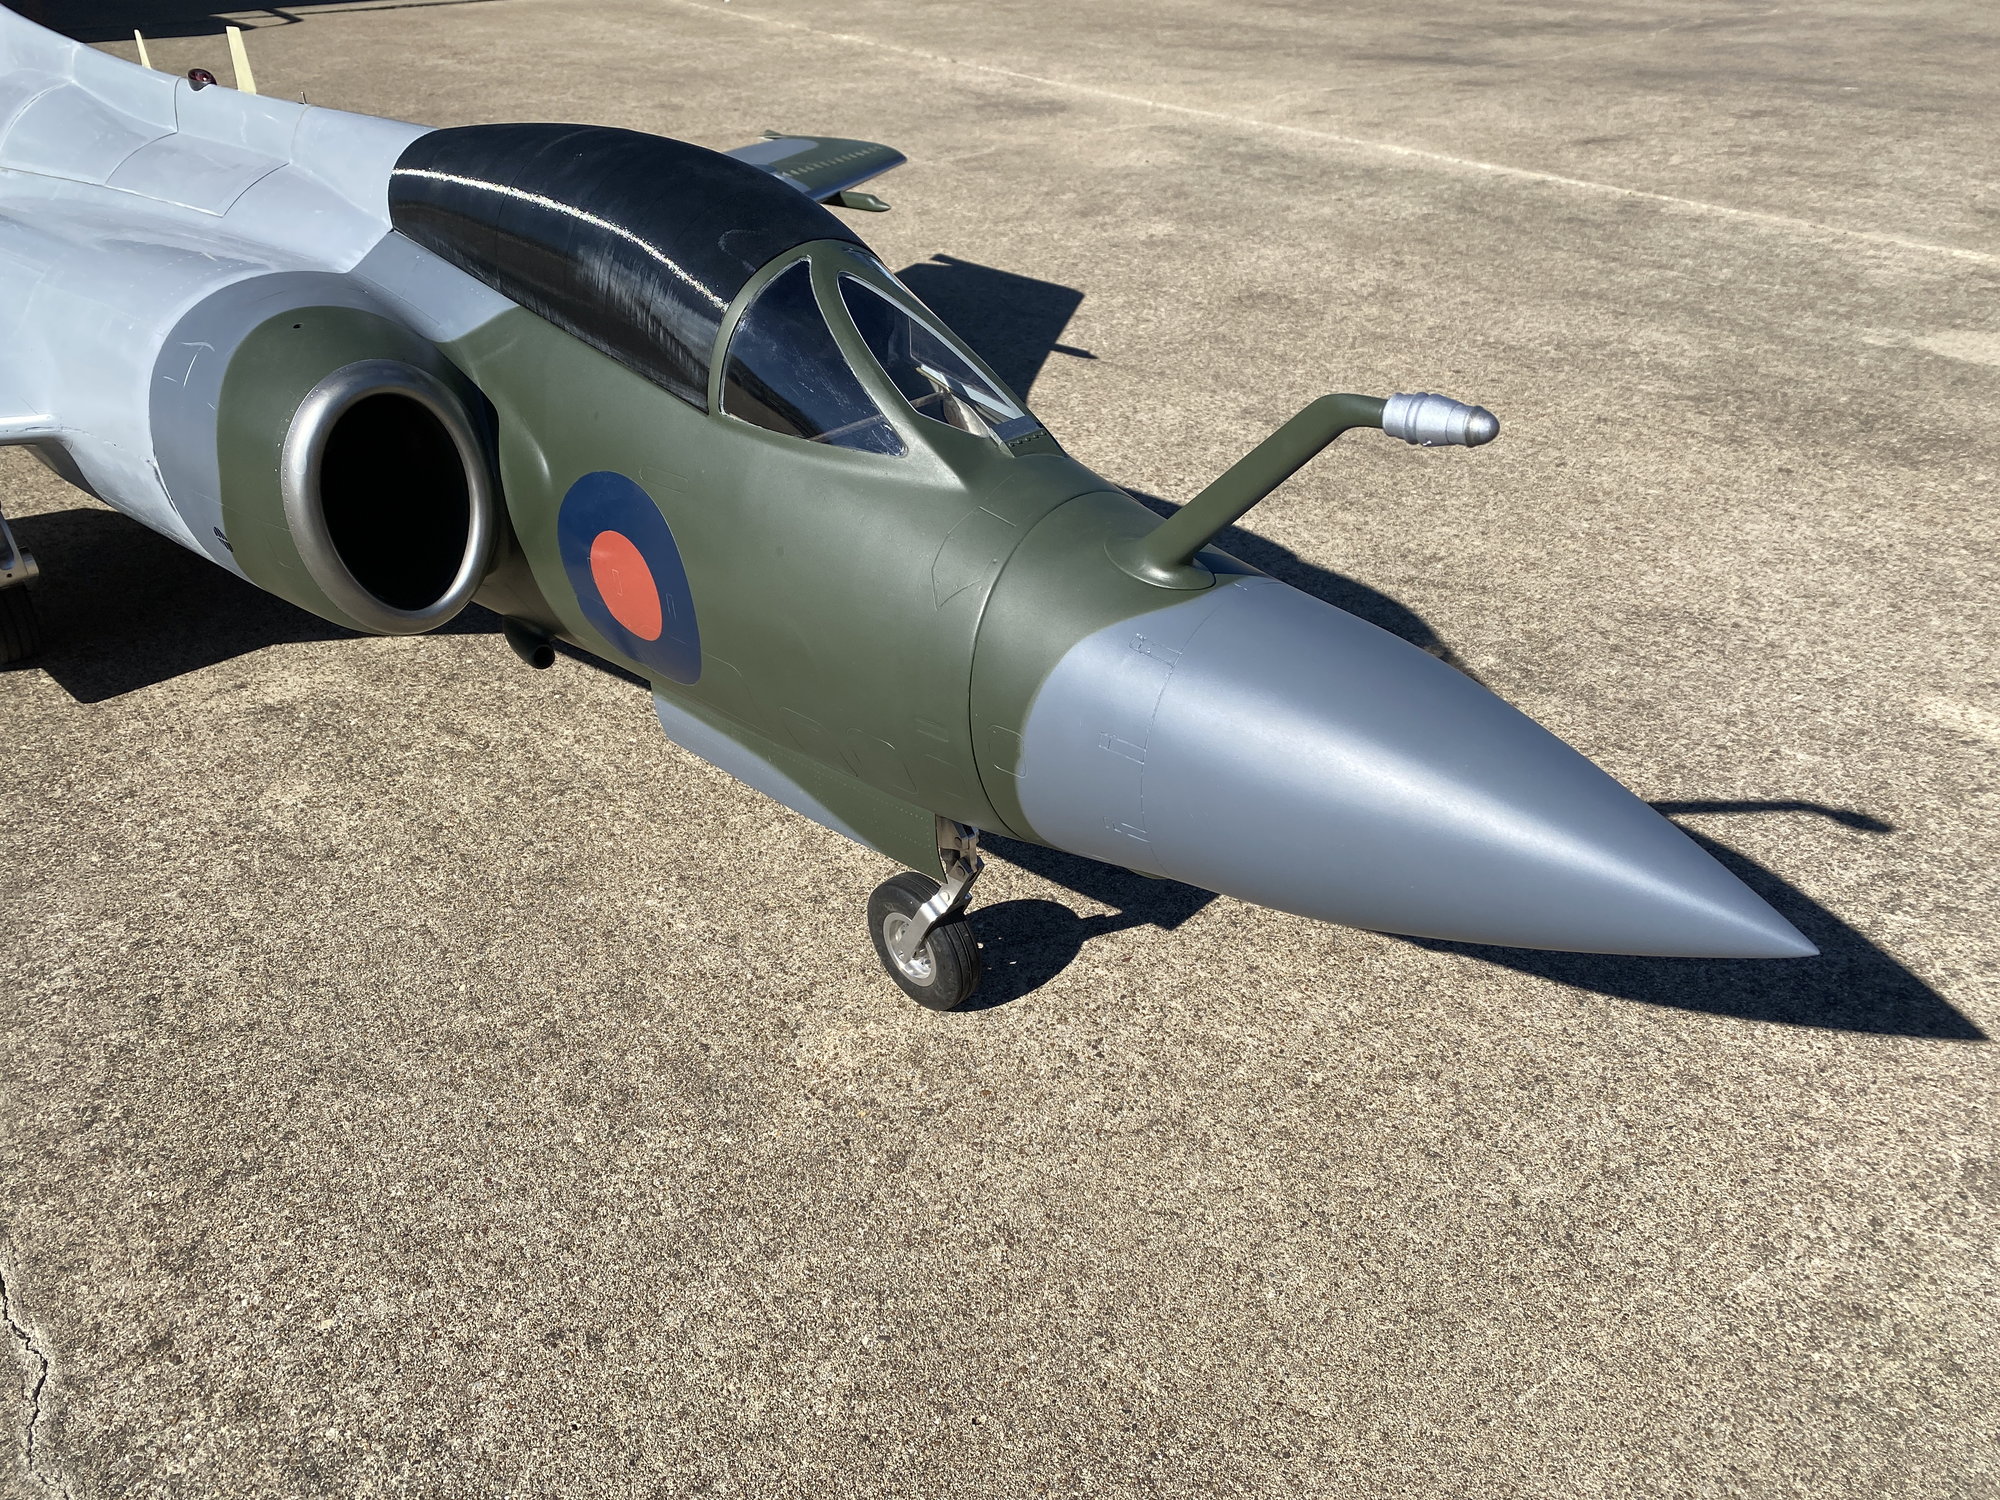
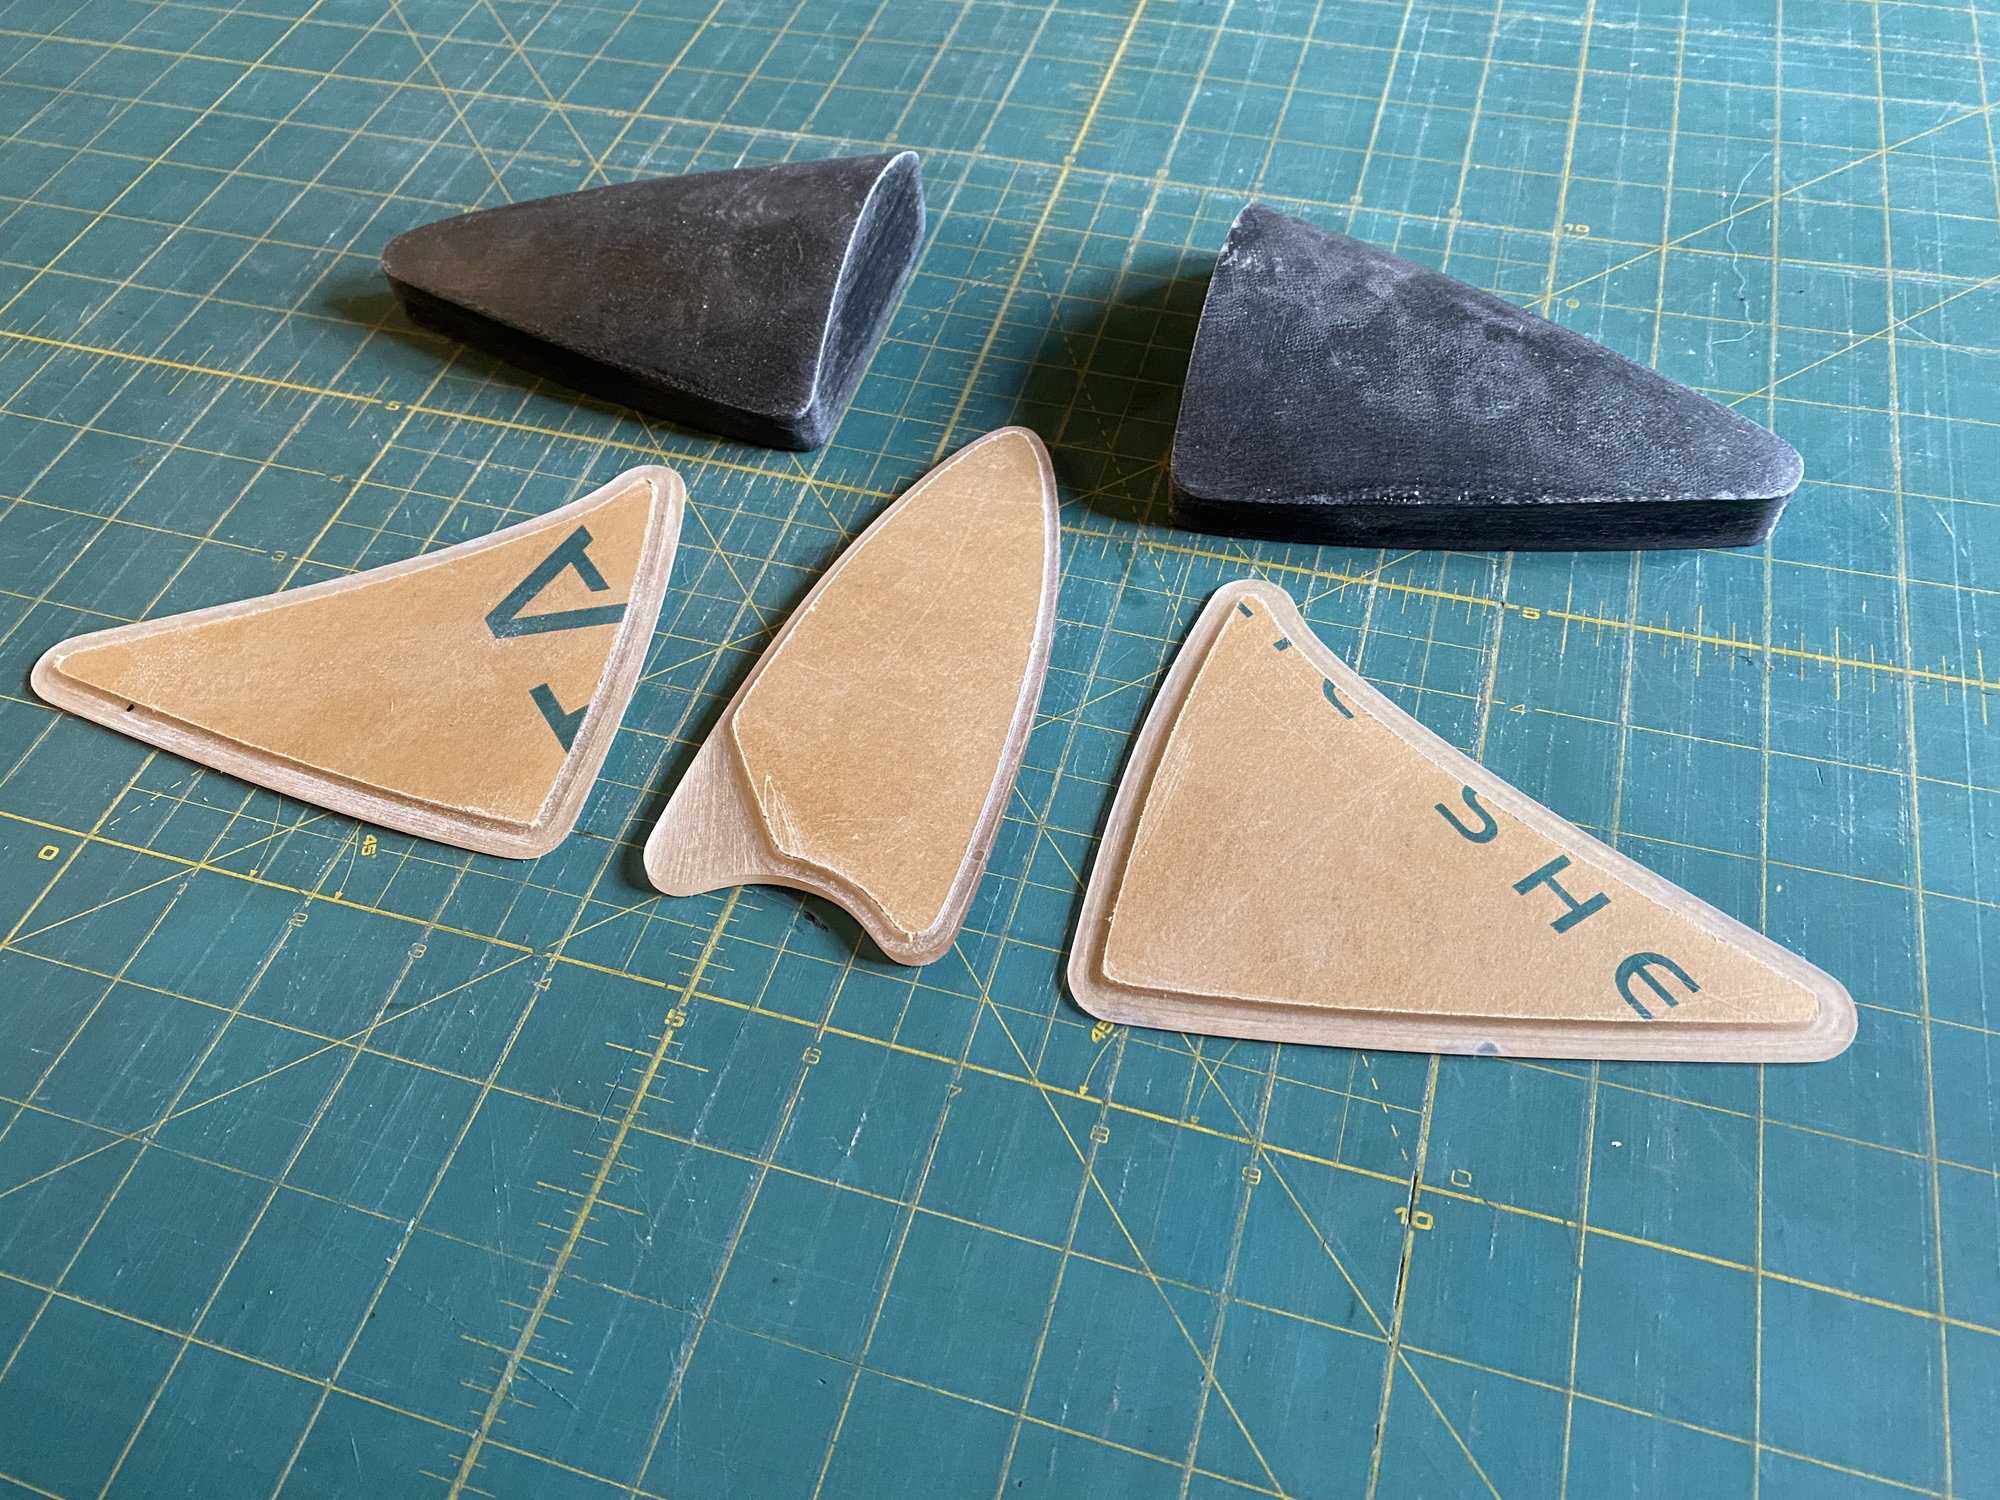
Before painting the forward fuselage, a number of the more prominent surface details and vents were designed and printed using a resin printer. These were mounted from the inside and once the epoxy had set were sanded flush with the outer surface.
The forward cockpit windshield and side windows were an experiment. I wanted them flush mounted and to also replicate the very thick forward glass section used on the full scale. I used �” clear poly carbonate and with my CNC router I machined the outline and a rebate around the edge that would allow it to sit inside the fuselage frame while being flush with the outside. The center piece was easy as it was flat, but the two side pieces needed molding over a form to get the curvature. These forms were 3D printed and sealed with glass/ epoxy before sanding to a smooth surface. The side windows were developed into a flat layout and CNC routed out of 1/8” clear. On all 3 pieces (2 sides and the center), paint masks were used on both sides to allow painting with the cockpit internal colors for the edges, before then forming the 2 side windows over the forms to get the curvature. This took a number of attempts before I was happy with the result, mainly fine tuning the rebate depth. Once I had a set that I was happy with, they were bonded into the fuselage using Zap canopy glue and magnets. Overall, I am really happy with the way the clear front windows have turned out. A scale front windscreen rain clearing blower vent was then 3D printed and bonded onto the fuselage before final painting.
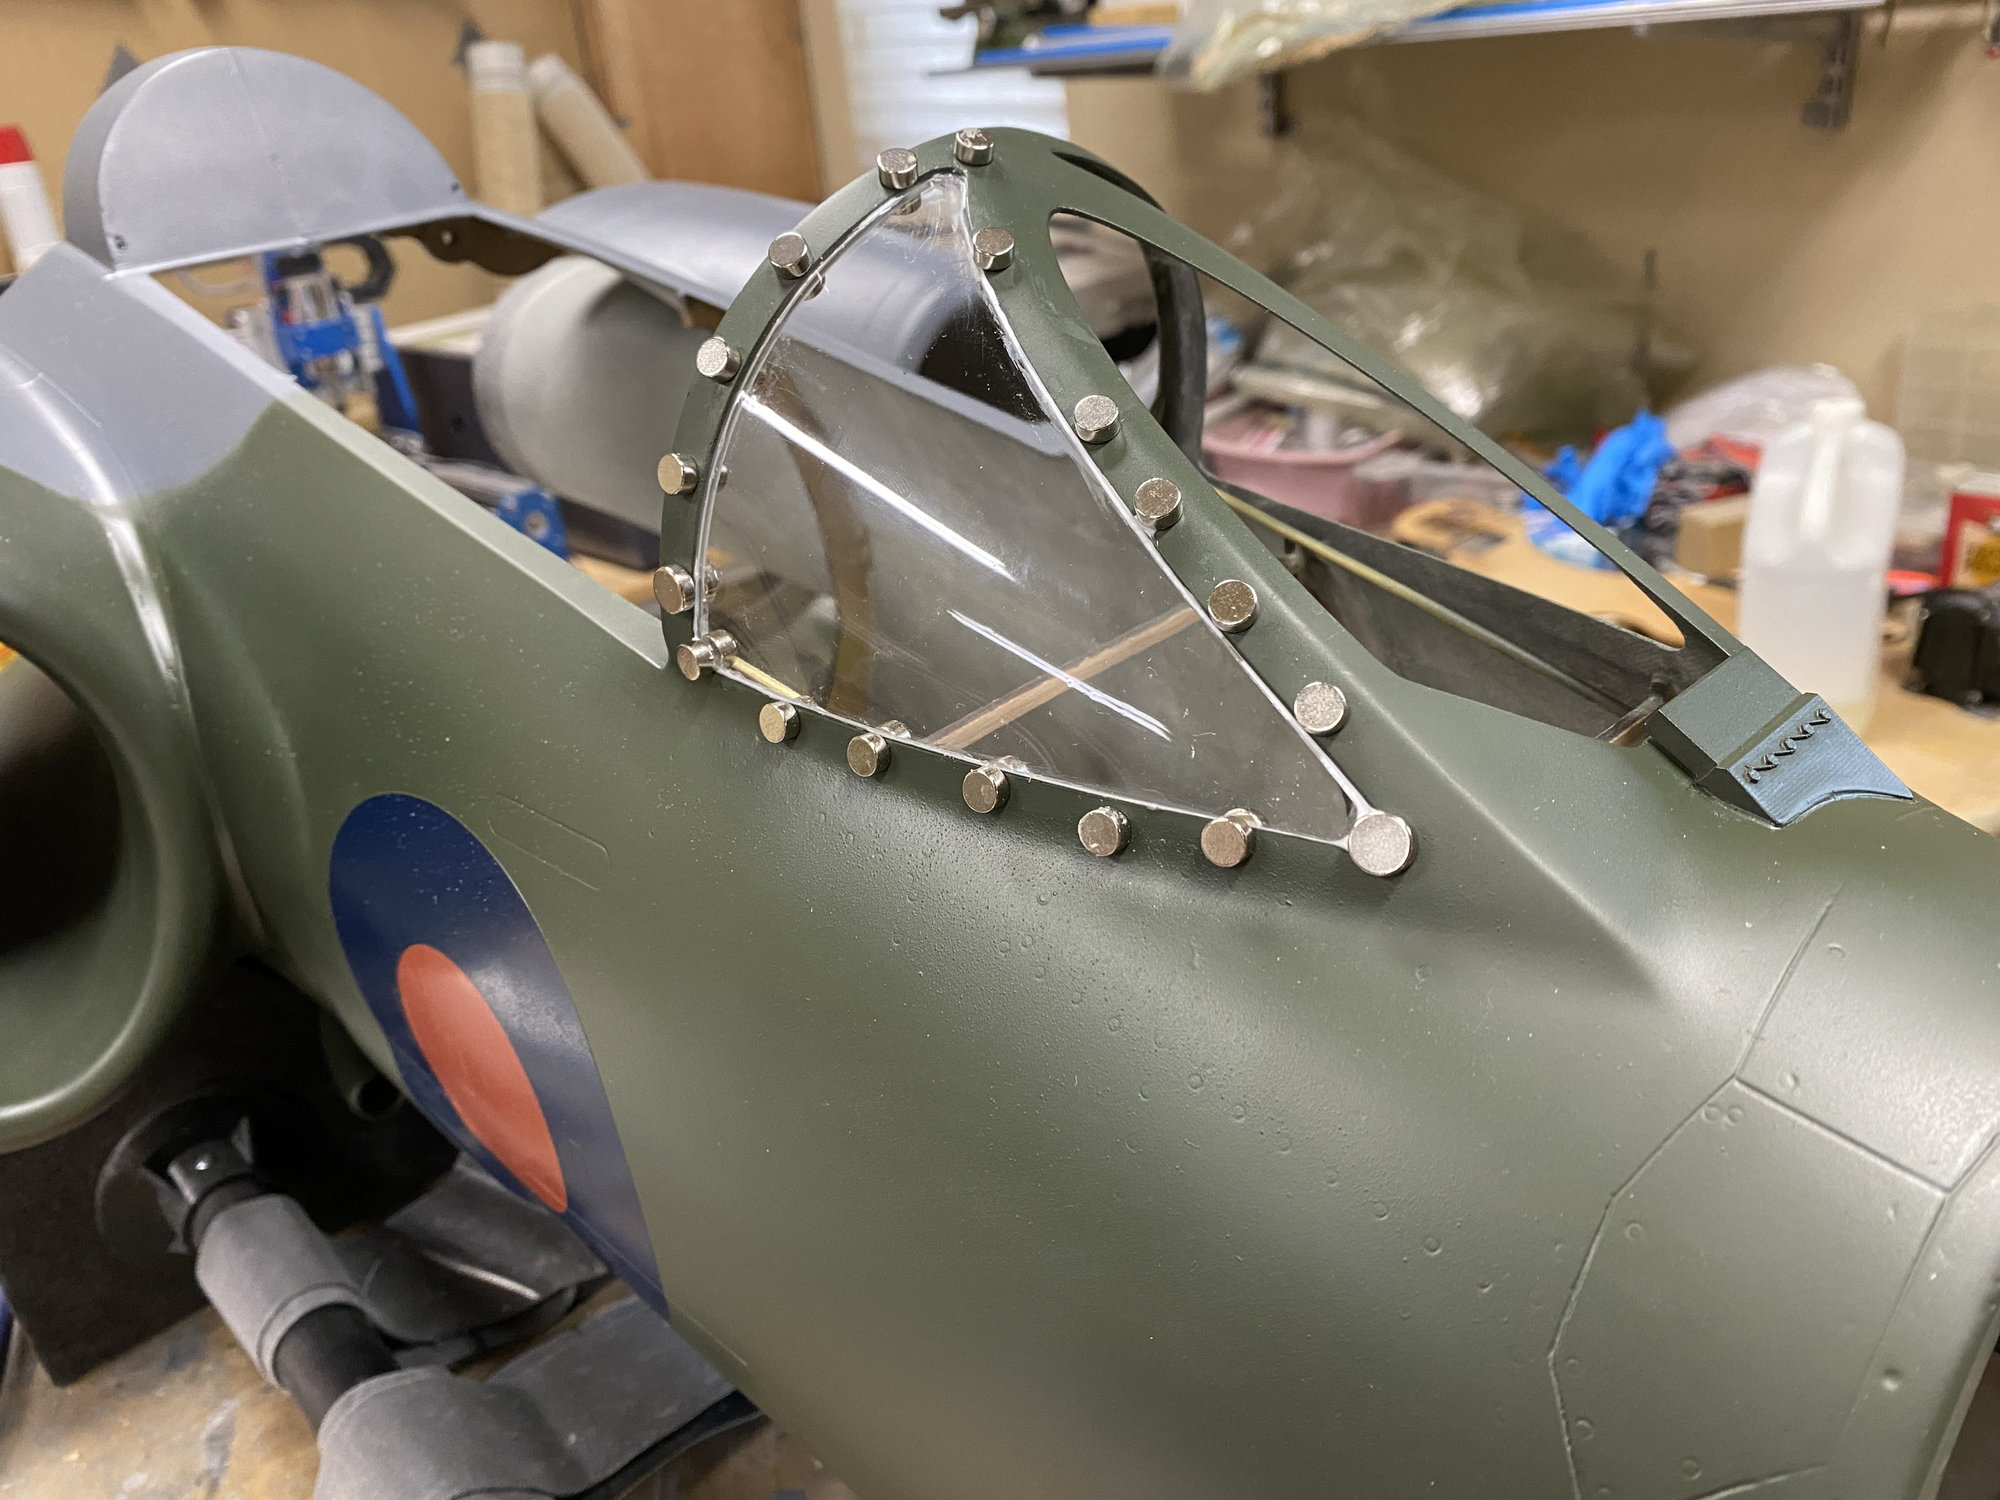
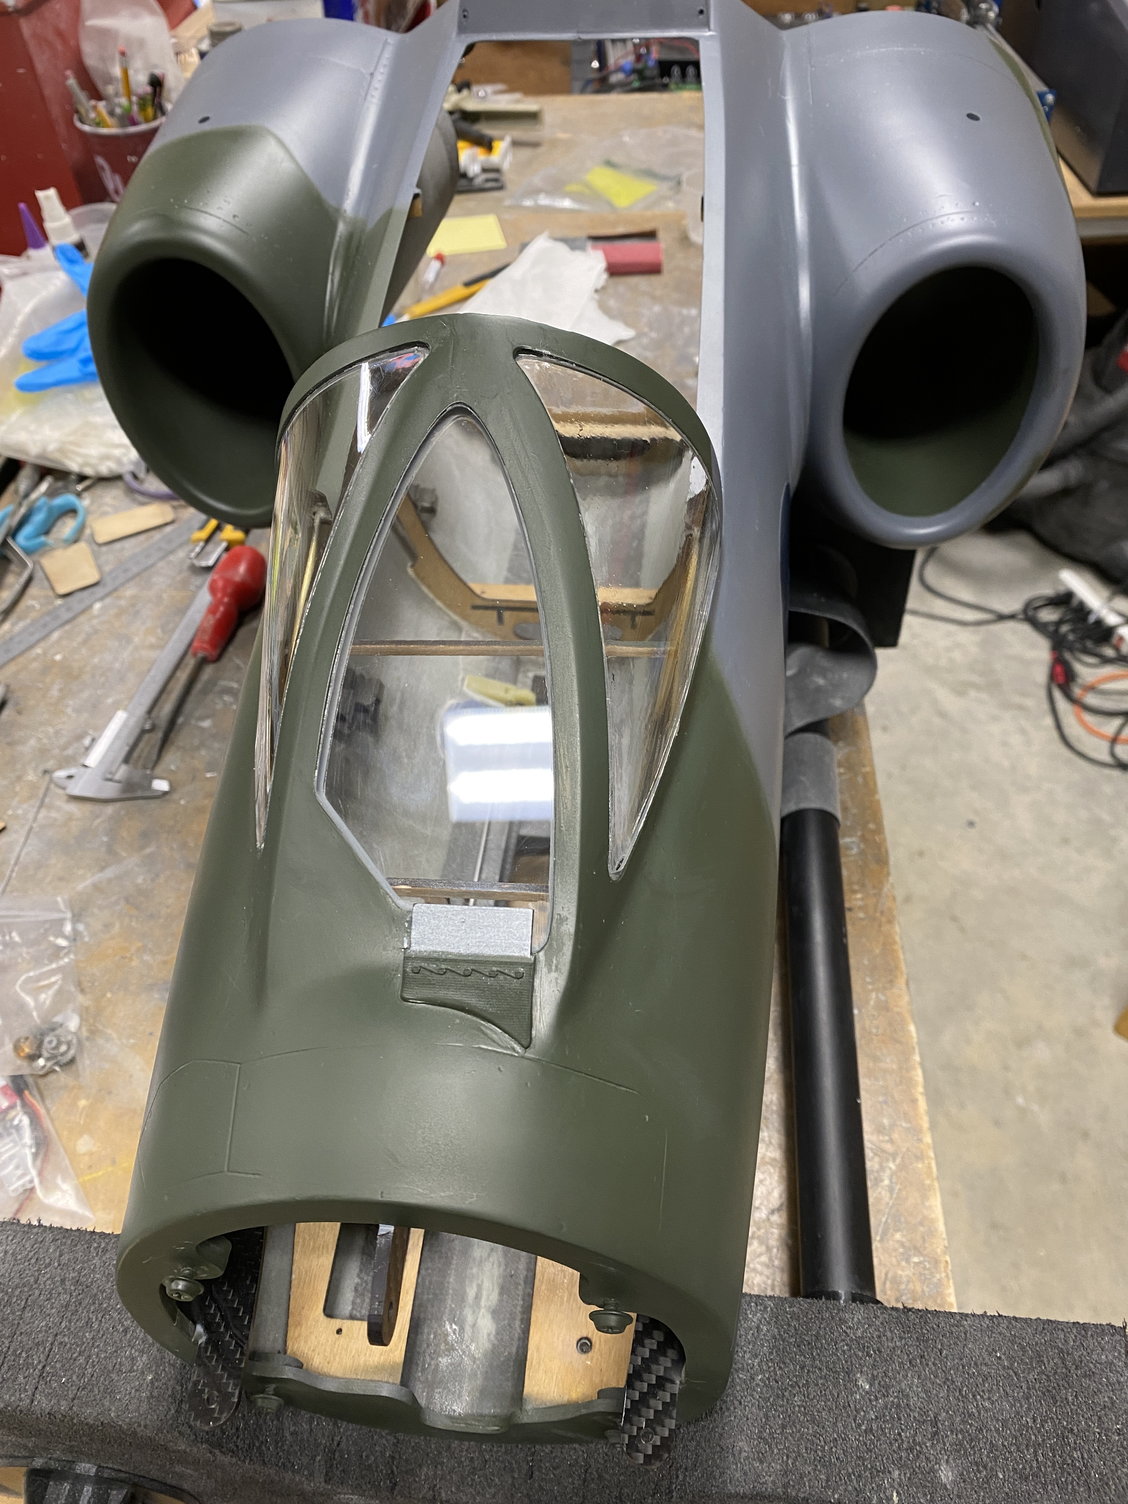

The forward cockpit windshield and side windows were an experiment. I wanted them flush mounted and to also replicate the very thick forward glass section used on the full scale. I used �” clear poly carbonate and with my CNC router I machined the outline and a rebate around the edge that would allow it to sit inside the fuselage frame while being flush with the outside. The center piece was easy as it was flat, but the two side pieces needed molding over a form to get the curvature. These forms were 3D printed and sealed with glass/ epoxy before sanding to a smooth surface. The side windows were developed into a flat layout and CNC routed out of 1/8” clear. On all 3 pieces (2 sides and the center), paint masks were used on both sides to allow painting with the cockpit internal colors for the edges, before then forming the 2 side windows over the forms to get the curvature. This took a number of attempts before I was happy with the result, mainly fine tuning the rebate depth. Once I had a set that I was happy with, they were bonded into the fuselage using Zap canopy glue and magnets. Overall, I am really happy with the way the clear front windows have turned out. A scale front windscreen rain clearing blower vent was then 3D printed and bonded onto the fuselage before final painting.
The following 3 users liked this post by JSF-TC:
02-06-2023, 06:14 PM
#725
I finished the lower bulged weapon bay plug, made a mold and laid up a part, along with the internal structure to allow bolting it to the fuselage. This definitely helps with the overall look of the model and significantly increases the bulk and presence of the plane. It is made from carbon/ glass, just like the main fuselage, and it should be able to take a gear-up landing should I need to.
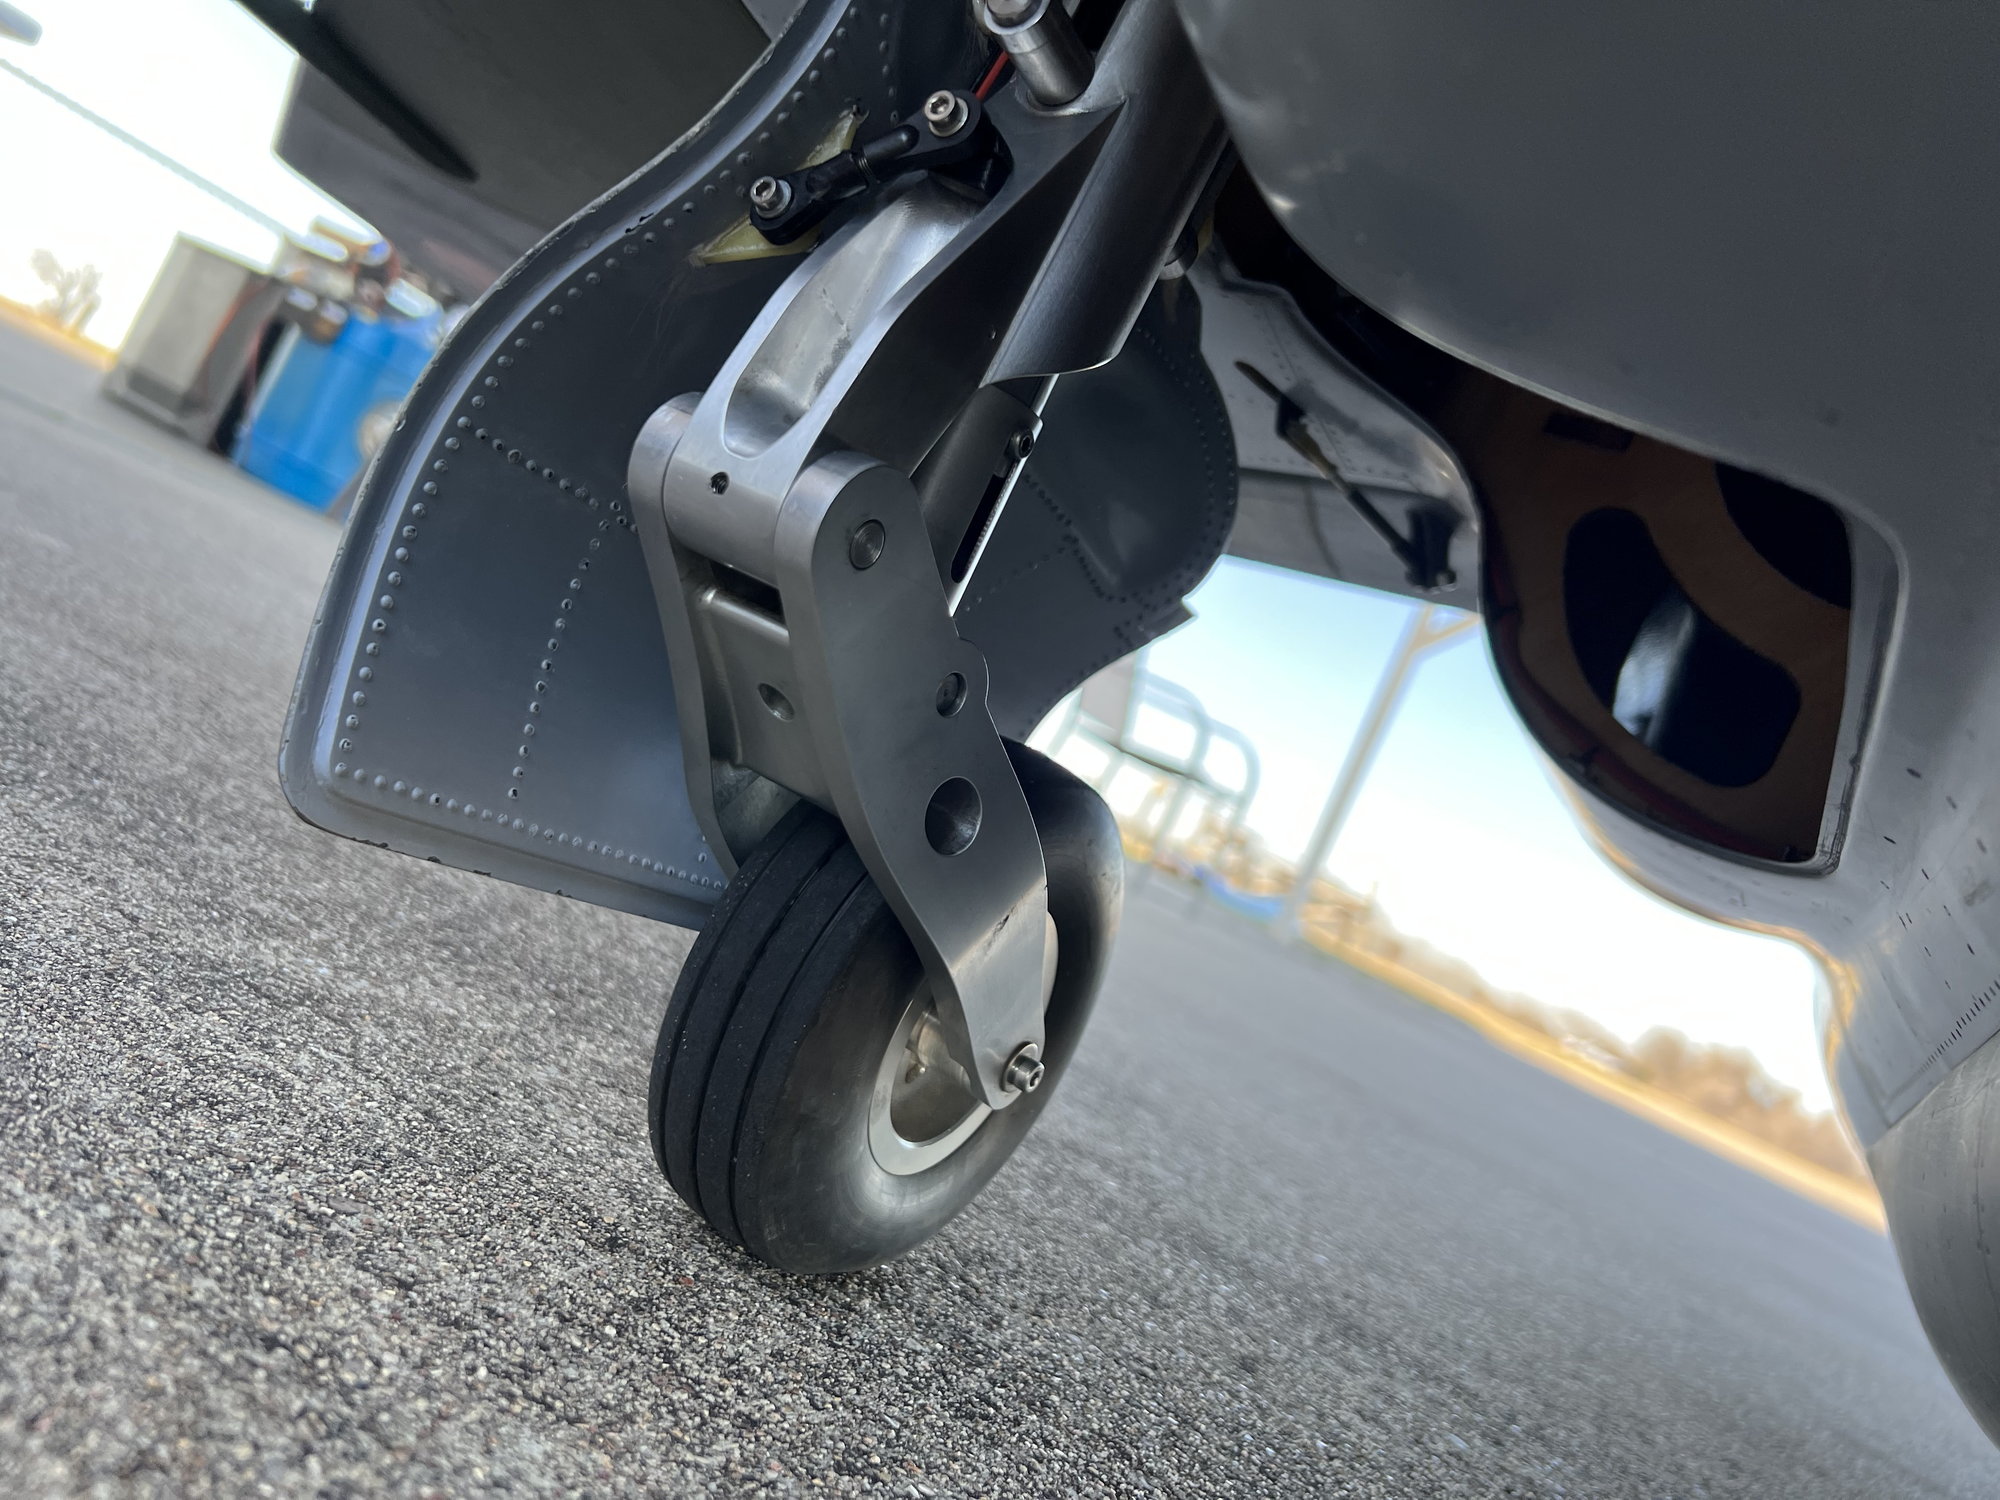
I have made no significant changes to the model as I have been flying it. The only changes I have made are to modify the main gear door hinges – they are now fixed to the inner wing rib rather than the lower wing skin to give a much more rigid mount, plus I also added a 3rd hinge for better support. I have also increased the main gear shock strut spring compression pre-load, and not the model does not squat under normal full fuel load. Earlier landings showed that the main gear doors were a bit vulnerable to damage, even though the gear has compression stops supposedly to avoid contacting the gear doors on the ground.
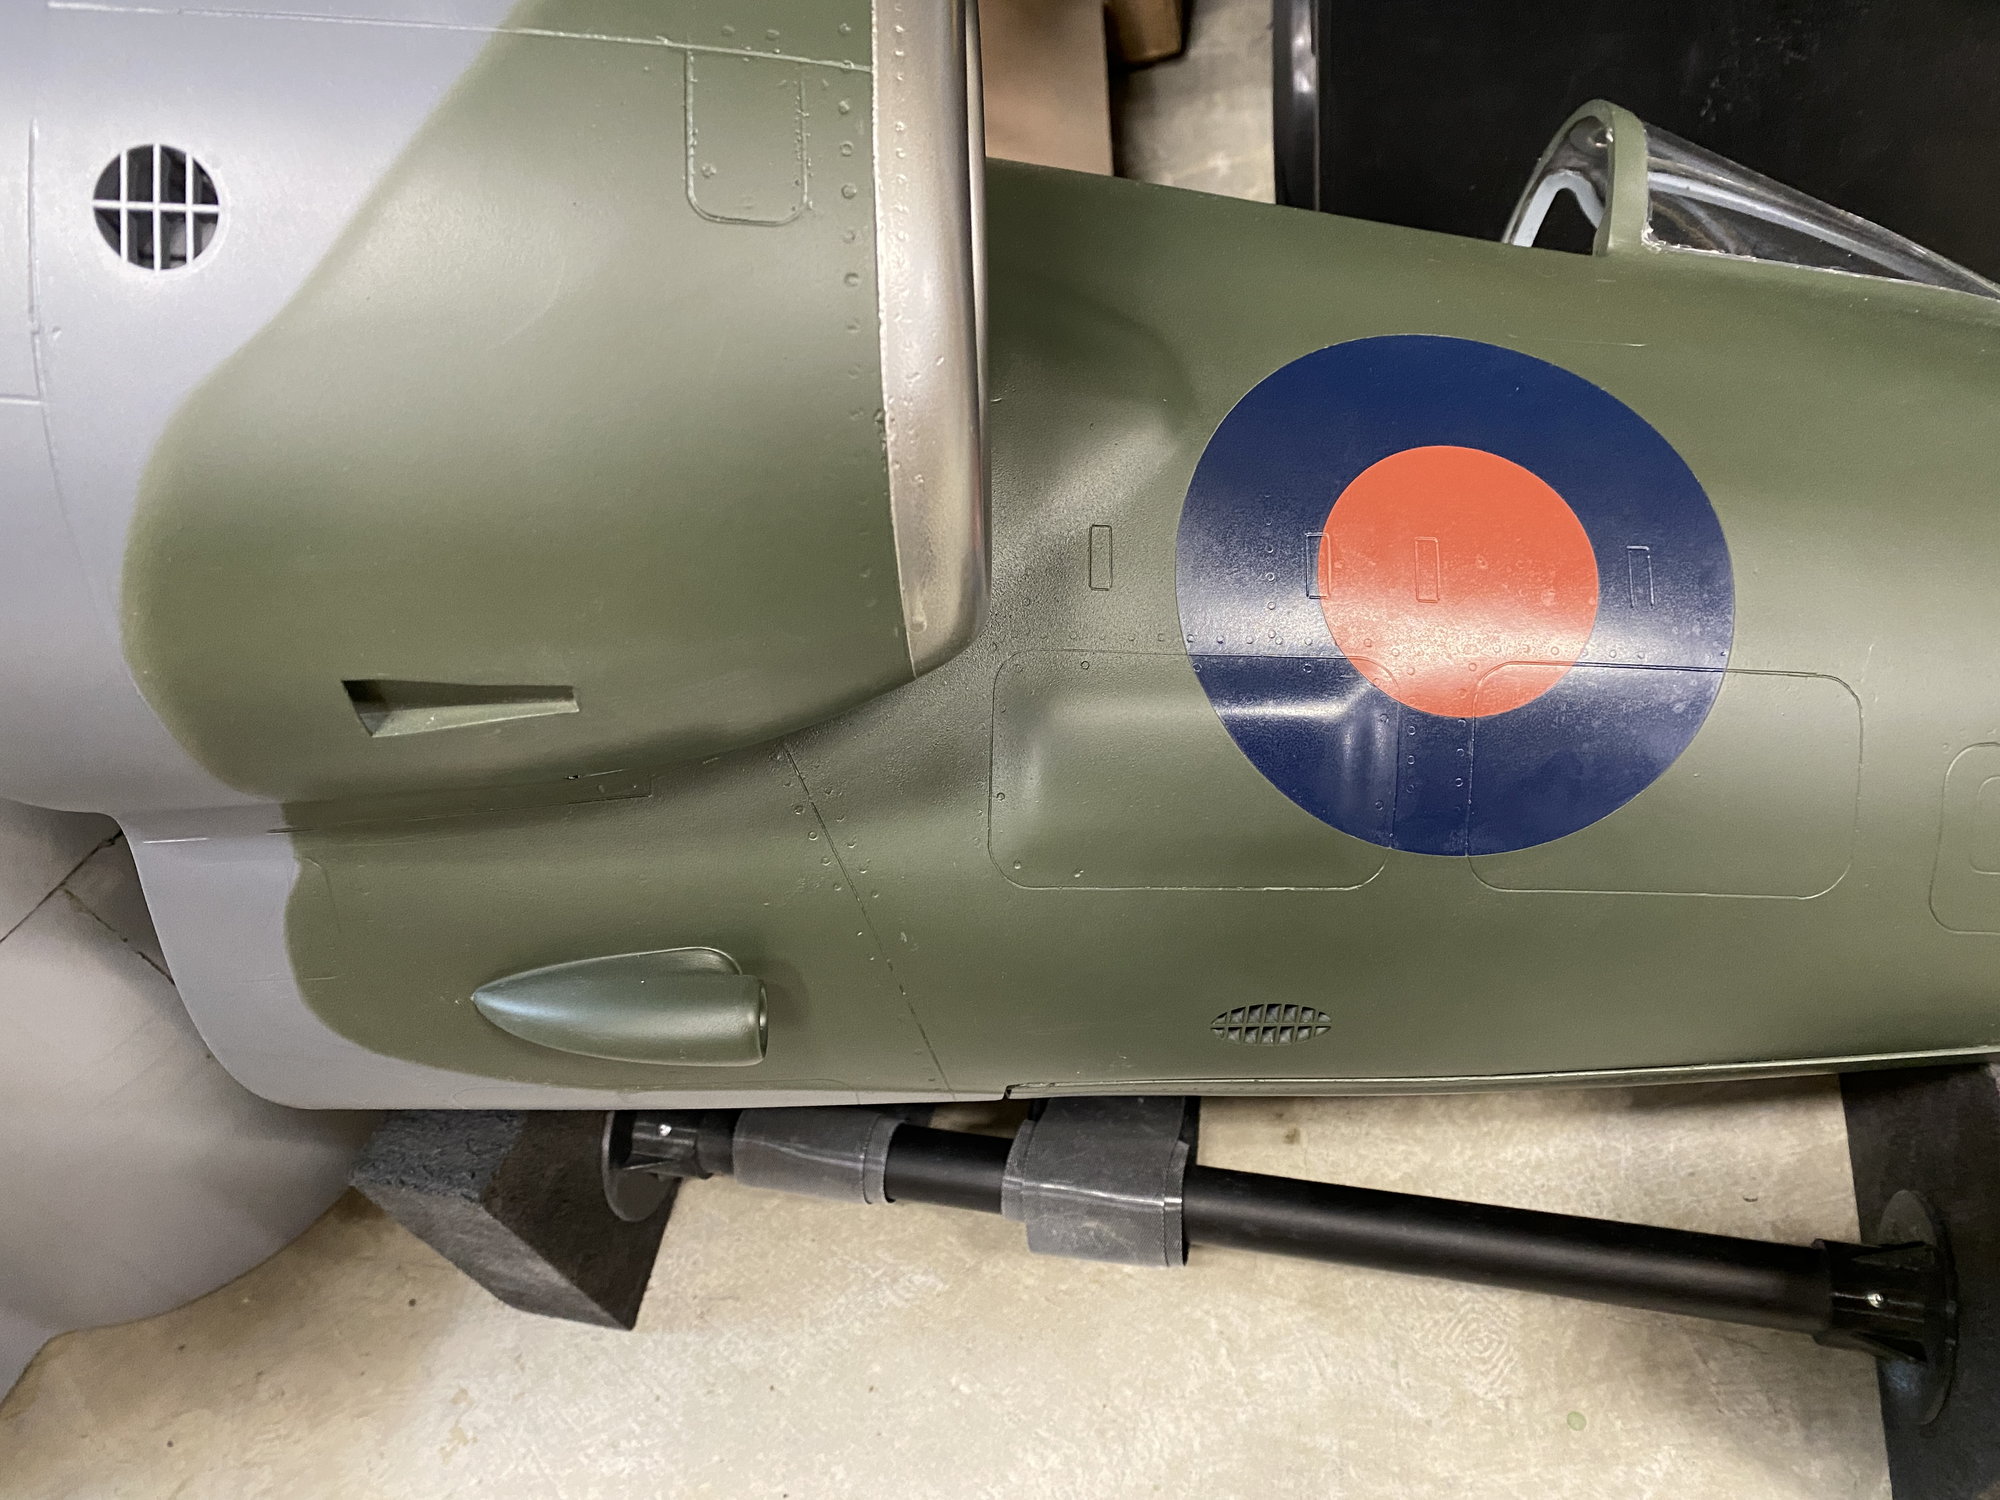
The model is being painted with KlassKote epoxy paint using their scale colors and a satin finish. I designed the paint masks and used my cutter to produce the custom masks, The roundels were painted first, starting with the red, then masking for the blue, then then masking the blue before applying the overall grey and green. The green camouflage was masked out using the �” round foam paint masks which gives a nice feathered edge.
I have made no significant changes to the model as I have been flying it. The only changes I have made are to modify the main gear door hinges – they are now fixed to the inner wing rib rather than the lower wing skin to give a much more rigid mount, plus I also added a 3rd hinge for better support. I have also increased the main gear shock strut spring compression pre-load, and not the model does not squat under normal full fuel load. Earlier landings showed that the main gear doors were a bit vulnerable to damage, even though the gear has compression stops supposedly to avoid contacting the gear doors on the ground.
The model is being painted with KlassKote epoxy paint using their scale colors and a satin finish. I designed the paint masks and used my cutter to produce the custom masks, The roundels were painted first, starting with the red, then masking for the blue, then then masking the blue before applying the overall grey and green. The green camouflage was masked out using the �” round foam paint masks which gives a nice feathered edge.
The following users liked this post:
grbaker (02-07-2023)