


Question on F18F from X-Treme Jets
 09-07-2019, 04:34 AM
#1
Hey guys,
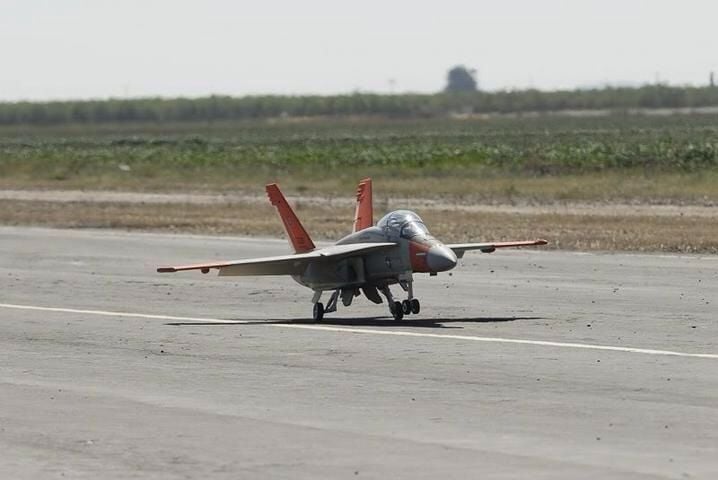
I am restoring an F18F from X-Treme Jets (the entry model from Skymaster Jets) : http://www.skymasterjets.net/f18e.htm
I am stuck at the tanks plumbing, there is 1 big kevlar tank, 2 smaller kevlar tanks and one UAT. I will be using a Jets Munt M166TS.
Can someone share or explain how should I plumb all the tanks together ? What size of tubing do I need to use, 4mm or 6mm ?
I have to order a new UAT and I was thinking about the Intairco iTrap but I wonder whch size I should pick : https://www.final-modellbau.de/en/ac...cessories.html
I was thinking about the iTrap 175ml Basic, but what kind of fitting would you recommand festo 4mm ? 6mm ? Barb fitting ?
Thanks a lot for any help guys.
Regards,
Jimi
 09-07-2019, 05:54 AM
#2


Depends on the tank locations. Allot of times though you can plumb them all in series. So you can go from vent line to the small saddle tank. Then the other saddle tank. Then the main center tank to the uat.
Plumbing this way drians each tank 1 at a time. This helps with keeping the last tank full longer getting less air in the system.
Plumbing this way drians each tank 1 at a time. This helps with keeping the last tank full longer getting less air in the system.
09-07-2019, 06:16 AM
#3
Depends on the tank locations. Allot of times though you can plumb them all in series. So you can go from vent line to the small saddle tank. Then the other saddle tank. Then the main center tank to the uat.
Plumbing this way drians each tank 1 at a time. This helps with keeping the last tank full longer getting less air in the system.
Plumbing this way drians each tank 1 at a time. This helps with keeping the last tank full longer getting less air in the system.
The UAT is in front of the main tank and the saddle tanks are behind the main tank on the side of the turbine.
Mind sharing a diagram or something, I must say it is not pretty clear

EDIT : Nevermind, I got the plumbing in series
 09-07-2019, 01:08 PM
#5

Series is good. You can also plumb the saddle tanks to drain into the front tank. I would choose series because it simplifies the tubing. The last tank in series has to vent to the outside of the jet. I like to make the vent accessible so I can hook up my jersey modeler to catch the overflow
In the tanks, use BVM in tank tubing (cut it 3/4” shorter as it expands in the tank) but it stays pliable for the life of the jet. Use large or extra large Tygon for the rest.
You will only need 6mm from the front of the UAT to your pump. Your turbine will be fine with a medium sized UAT. Once you get to 180N+ turbines will it become critical to use large fittings.
I like barbed fittings on the suction side secured with safety wire. Many people use festo on the suction side, so it probable doesn’t matter. It helps me sleep better at night though!
09-16-2019, 02:03 PM
#7
Where can I get a tank for this plane ? I just sent a mail to Xtremjet but they are usually long to answer.
09-17-2019, 07:32 AM
#10

I fly one of these powered by jet cat 160. Rear tanks empty into front tank then to small INTAIRCO header. Only 6mm festo tubing. If you go smaller you are asking for cavitation problems, especially if plumbed in series. Plumbed in series can introduce lateral balance issues on flight. Not my choice of setup but others have apparently used this successfully.
09-17-2019, 10:42 AM
#11
I really don't want to repair it or even go with the 3 tanks setup. I would prefer to use only one bigger tank. What size of tank would you recommand ?
According to Jet Munts, the M166TS has a fuel comsumption: @160N: 460g/min. 3Liters might be a little low ? 4Liters ?
09-20-2019, 03:05 PM
#14
I wouldn’t have all of that fuel sitting way in front of the c of g. The super hornet has a tendency to leap off the ground and this is exacerbated if you have a nose heavy model on takeoff.
09-20-2019, 10:05 PM
#15
I agree with you but the 4L tank is sitting at the same place as the old bigger one, which is not that far from the CG. I'll try to balance the plane with bearing in mind the heavier tank in front.
What do you think Craig ?
I really don't want to mess with 3 tanks + UAT ...
What do you think Craig ?
I really don't want to mess with 3 tanks + UAT ...
09-21-2019, 06:08 AM
#17
It will still leap off the ground with flaps if the fuel load makes it appreciably nose heavy. I had a bad experience with a yellow hornet for the exact same reason. Superhornet is worse than the C model in that respect because it was aerodynamically designed to stand on its tail with large LEXs.
Just my experience....
Just my experience....
09-24-2019, 01:50 PM
#18
Ok guys, another issue ...
I've installed the elevator servos, it looks ok but I wonder if the small play is normal ?
I assume it was flying like that, any chance of flutter ? i'm using the stock command ... with aluminium control horn and MP Jet link ball ...
Is the "shaking" normal ?
I've installed the elevator servos, it looks ok but I wonder if the small play is normal ?
I assume it was flying like that, any chance of flutter ? i'm using the stock command ... with aluminium control horn and MP Jet link ball ...
Is the "shaking" normal ?
09-24-2019, 03:46 PM
#19
That amount of play looks pretty normal. Those full moving stabs will transmit even small gear train slop.
And what people are saying about hoping off on take off is real. Use lots of flap for take off. Landing is around 45 degrees and take off is 35-40 degrees.
We’ve had lots of hornet experience around here.
And what people are saying about hoping off on take off is real. Use lots of flap for take off. Landing is around 45 degrees and take off is 35-40 degrees.
We’ve had lots of hornet experience around here.
09-25-2019, 07:16 AM
#20
It will still leap off the ground with flaps if the fuel load makes it appreciably nose heavy. I had a bad experience with a yellow hornet for the exact same reason. Superhornet is worse than the C model in that respect because it was aerodynamically designed to stand on its tail with large LEXs.
Just my experience....
Just my experience....
Or the only option is to keep the 3 tanks ?
09-25-2019, 08:41 AM
#21
My Feedback: (1)

Here is what I did to solve the problem.
- Flaps on take off as has been suggested.
- Make sure the plane has a decent positive angle of attack when full of fuel. I added an extender to my nose gear to ensure
the positive angle. Even with the front strut compressing about 1/2 way on the nose when full of fuel.
- Get up to a decent speed and pull gently back on the elevator. Dont mash the elevator.
These things made for a beautiful smooth take offs.
Jonathan
09-26-2019, 01:55 AM
#22
I fly a Tams F18 Hornet. 1/8 Scale. when I first got the plane I experience the jump off the ground. All fuel is in the stock location between intakes and it's about 5L of fuel with stock tanks.
Here is what I did to solve the problem.
- Flaps on take off as has been suggested.
- Make sure the plane has a decent positive angle of attack when full of fuel. I added an extender to my nose gear to ensure
the positive angle. Even with the front strut compressing about 1/2 way on the nose when full of fuel.
- Get up to a decent speed and pull gently back on the elevator. Dont mash the elevator.
These things made for a beautiful smooth take offs.
Jonathan
Do not under any circumstances move your c of g back to compensate for forwards fuel placement. I maintain you are best to go with the 3 tanks, plumbed in parallel a the back feeding the front tank in the super hornet.
BTW, that slop in your stab is no good. The stock skymaster arms are way too short and this leads to poor holding power, poor stab resolution and slop as you have seen. I ALWAYS lengthen my control arms on my skymaster jet's stabs. Will see if I can find some pics on how I did it to show you. All you need is some 3mm aluminium sheet and a few bolts....dead easy. I end up pretty much doubling the effective length of the control arm. No way would I fly it like that but others have and gotten away with it. Just asking for trouble though in my view.
09-26-2019, 02:14 AM
#23
09-26-2019, 05:58 AM
#24