Go Back  RCU Forums > RC Airplanes > RC Jets
Reload this Page >

Skymaster F-18 1/5.75 scale build/assembly video thread. F18

Community
Search
Notices
RC Jets Discuss RC jets in this forum plus rc turbines and ducted fan power systems

Skymaster F-18 1/5.75 scale build/assembly video thread. F18

Thread Tools
 
Search this Thread
 
Old 05-29-2020, 03:38 PM
  #26  
FenderBean
 
FenderBean's Avatar
 
Join Date: Feb 2006
Location: Huntsville AL
Posts: 7,140
Likes: 0
Received 79 Likes on 52 Posts
Default

I was gonna mention that the other night but got side tracked all mine at less than half inch.
Old 05-29-2020, 07:50 PM
  #27  
Canadian Man
Thread Starter
My Feedback: (1)
 
Canadian Man's Avatar
 
Join Date: Aug 2008
Location: Calgary, AB, CANADA
Posts: 838
Received 206 Likes on 146 Posts
Default

Originally Posted by Ceeray
I think you would have benefited a lot by putting a reaaally short servo arm for the flaps and installing the pushrod pushing through the trailing edge of the wing. That way you would have gotten a full movement range for the servo and mechanical lock for down or up , depending how much your servo´s angle range is.

Now you get 30 degrees out of your servo movement and also a long arm--> much more force needed.

I have done a couple of wings that way. Harder to setup but..
That's what I did on the primary flap. on the aileron flap the pocket is only the thickness of the servo itself so a setup similar to what I did on the primary flap wouldn't work.
I did move the ball down on the servo horn to get more resolution.
Old 06-04-2020, 06:25 AM
  #28  
Canadian Man
Thread Starter
My Feedback: (1)
 
Canadian Man's Avatar
 
Join Date: Aug 2008
Location: Calgary, AB, CANADA
Posts: 838
Received 206 Likes on 146 Posts
Default

Elevator on one side complete.
Old 06-04-2020, 06:32 AM
  #29  
Canadian Man
Thread Starter
My Feedback: (1)
 
Canadian Man's Avatar
 
Join Date: Aug 2008
Location: Calgary, AB, CANADA
Posts: 838
Received 206 Likes on 146 Posts
Default

Here are some pics relating to the elevator install.

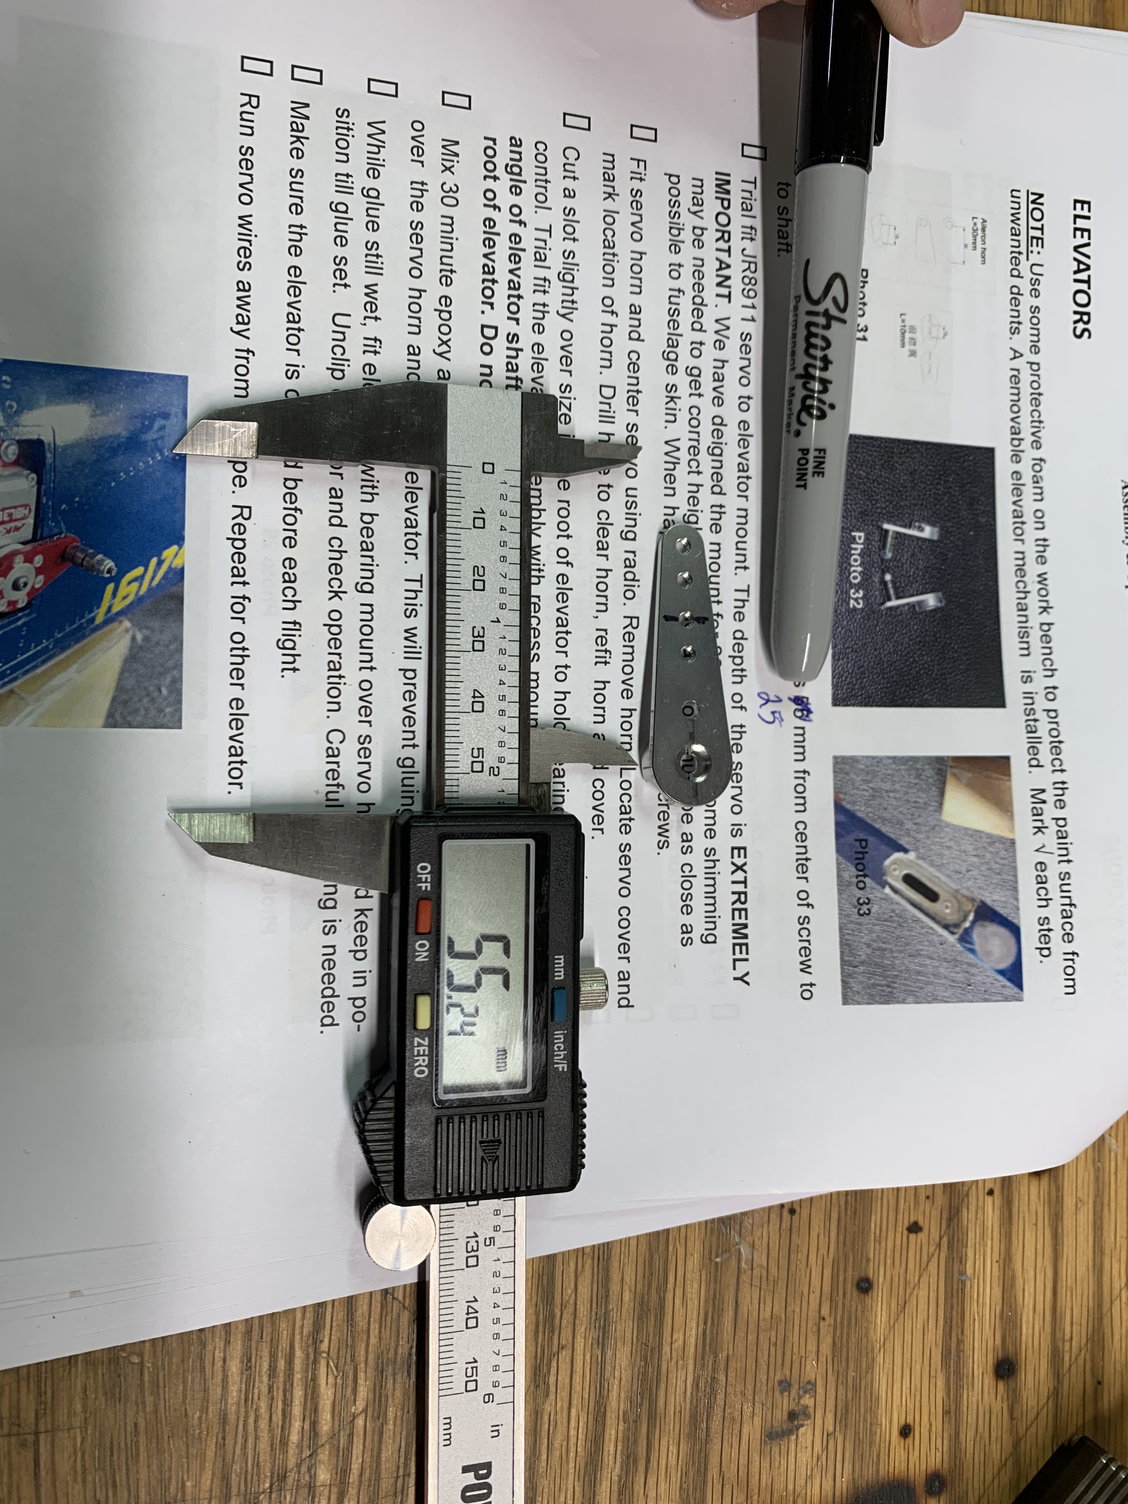
Manual says 55mm and this is incorrect. I assumed it should be 25mm and this is correct. That measurement worked.

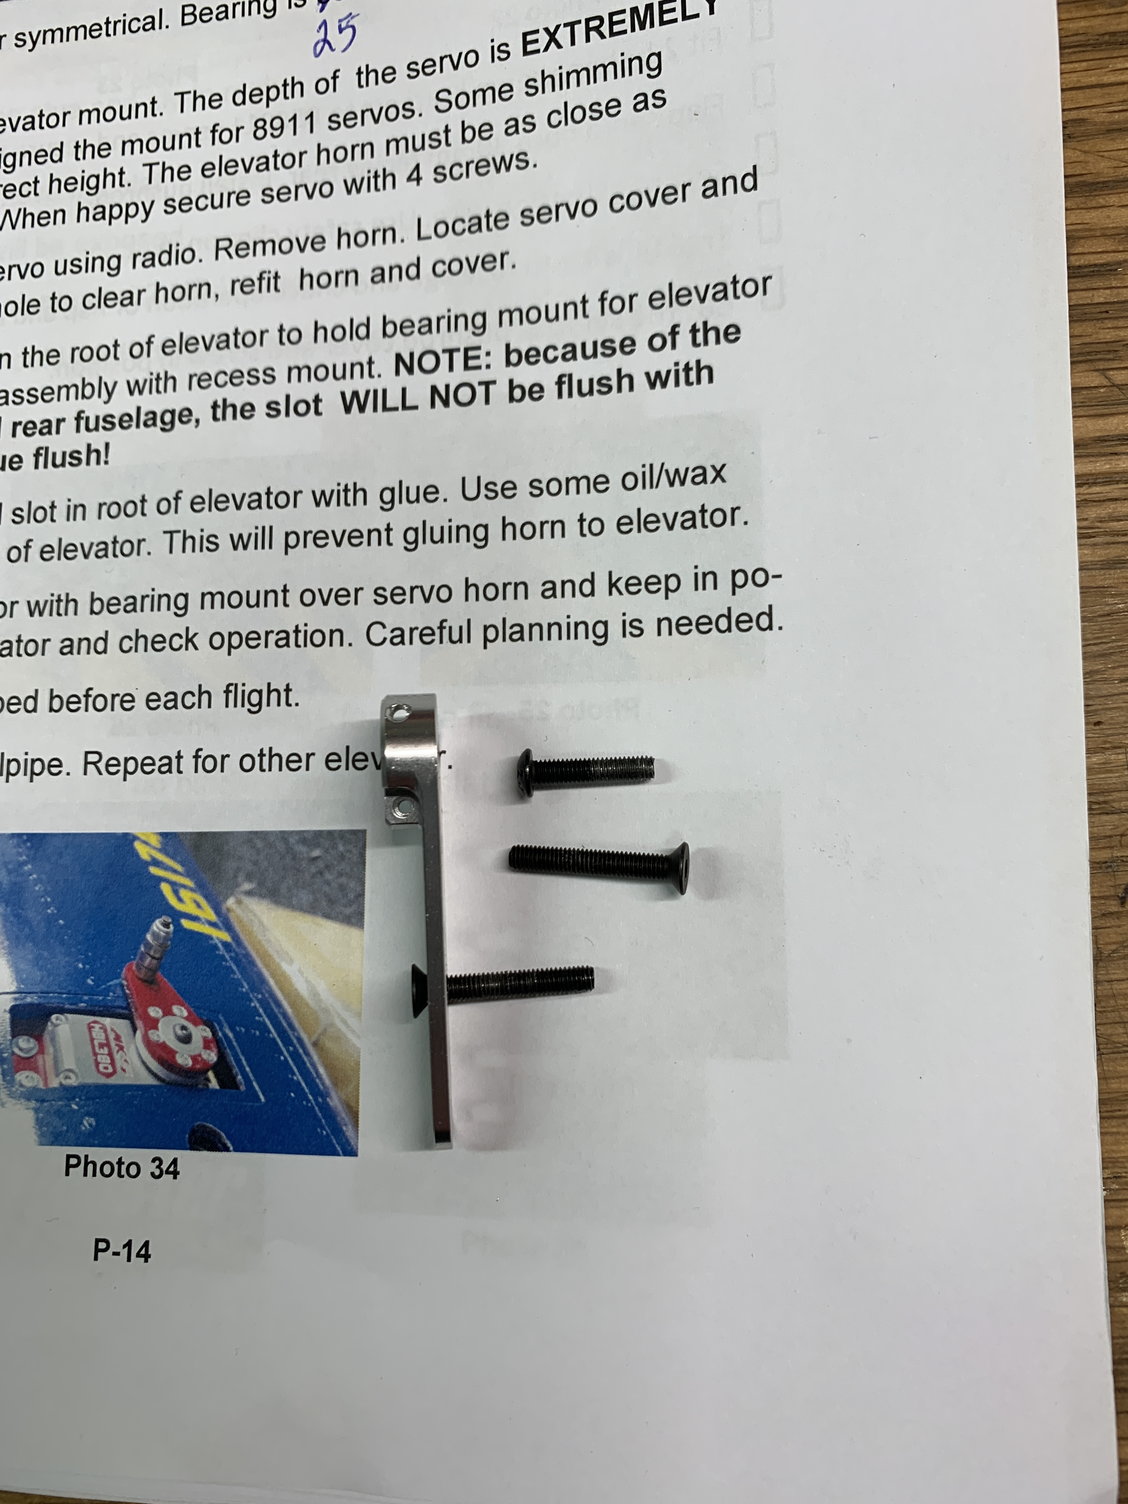
Angle head screws are the ones to use on the elevator. Button head are for the leading edge flaps. In order to get the servo arm close to the fuse a counter sink needs to be created on the servo horn.

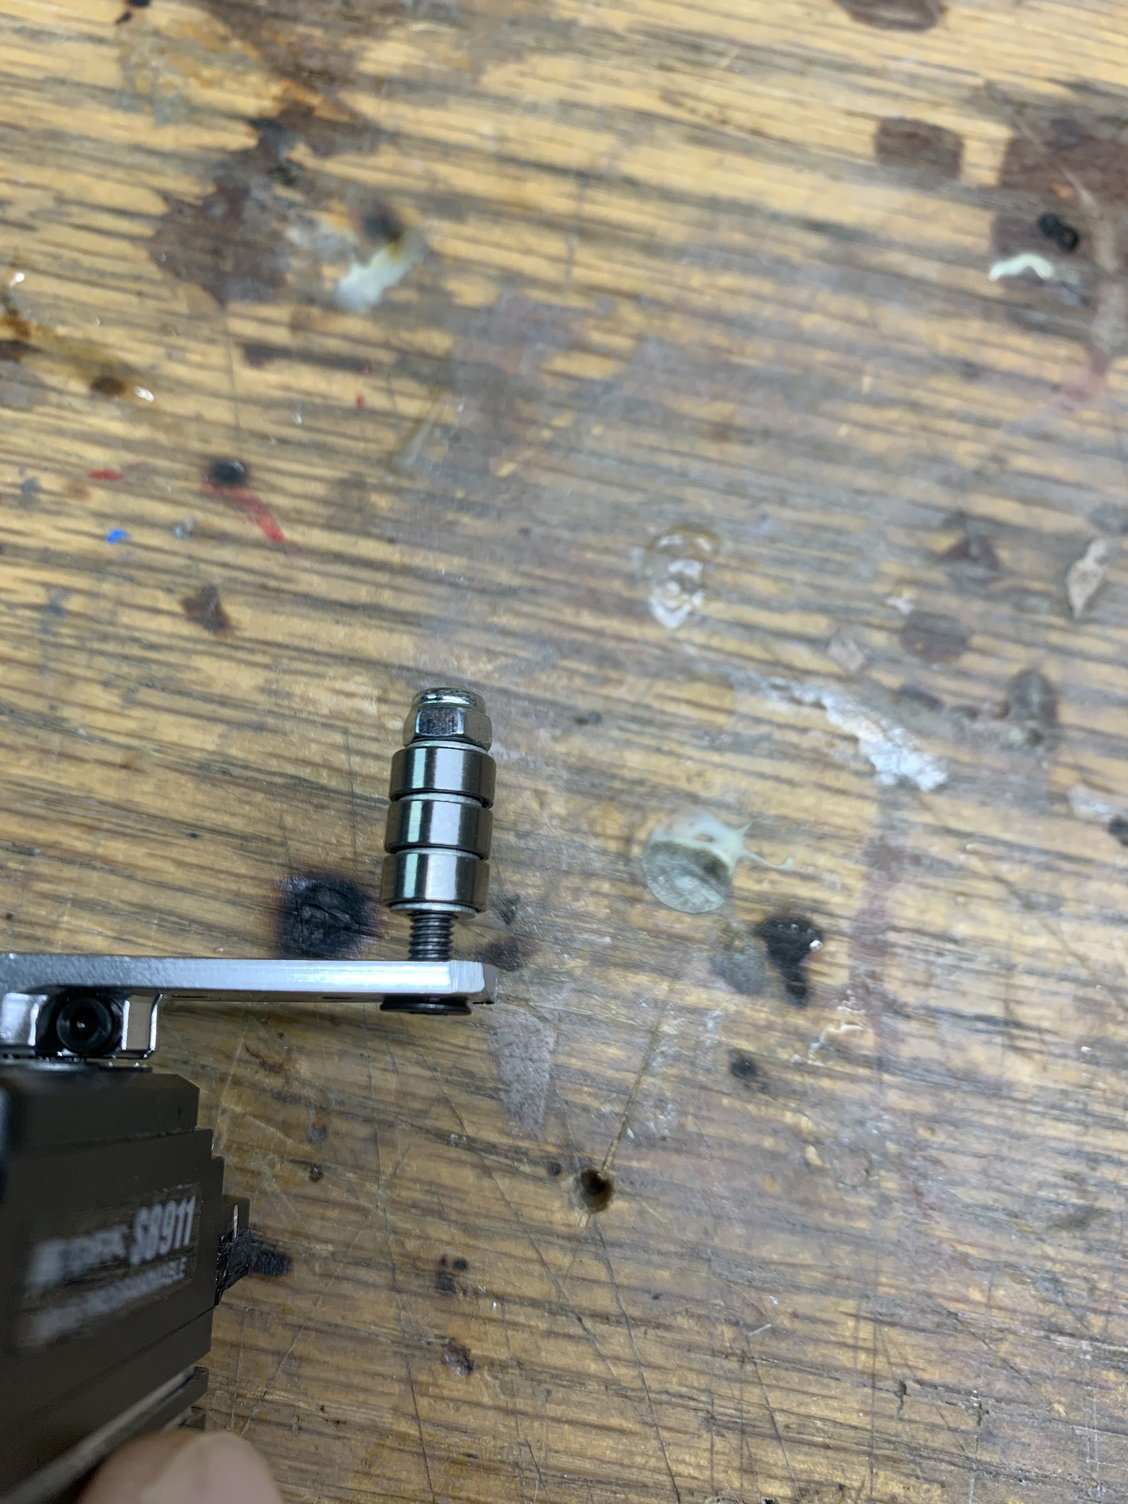
Don't forget the washers inbetween all the bearings, servo arm and nut.

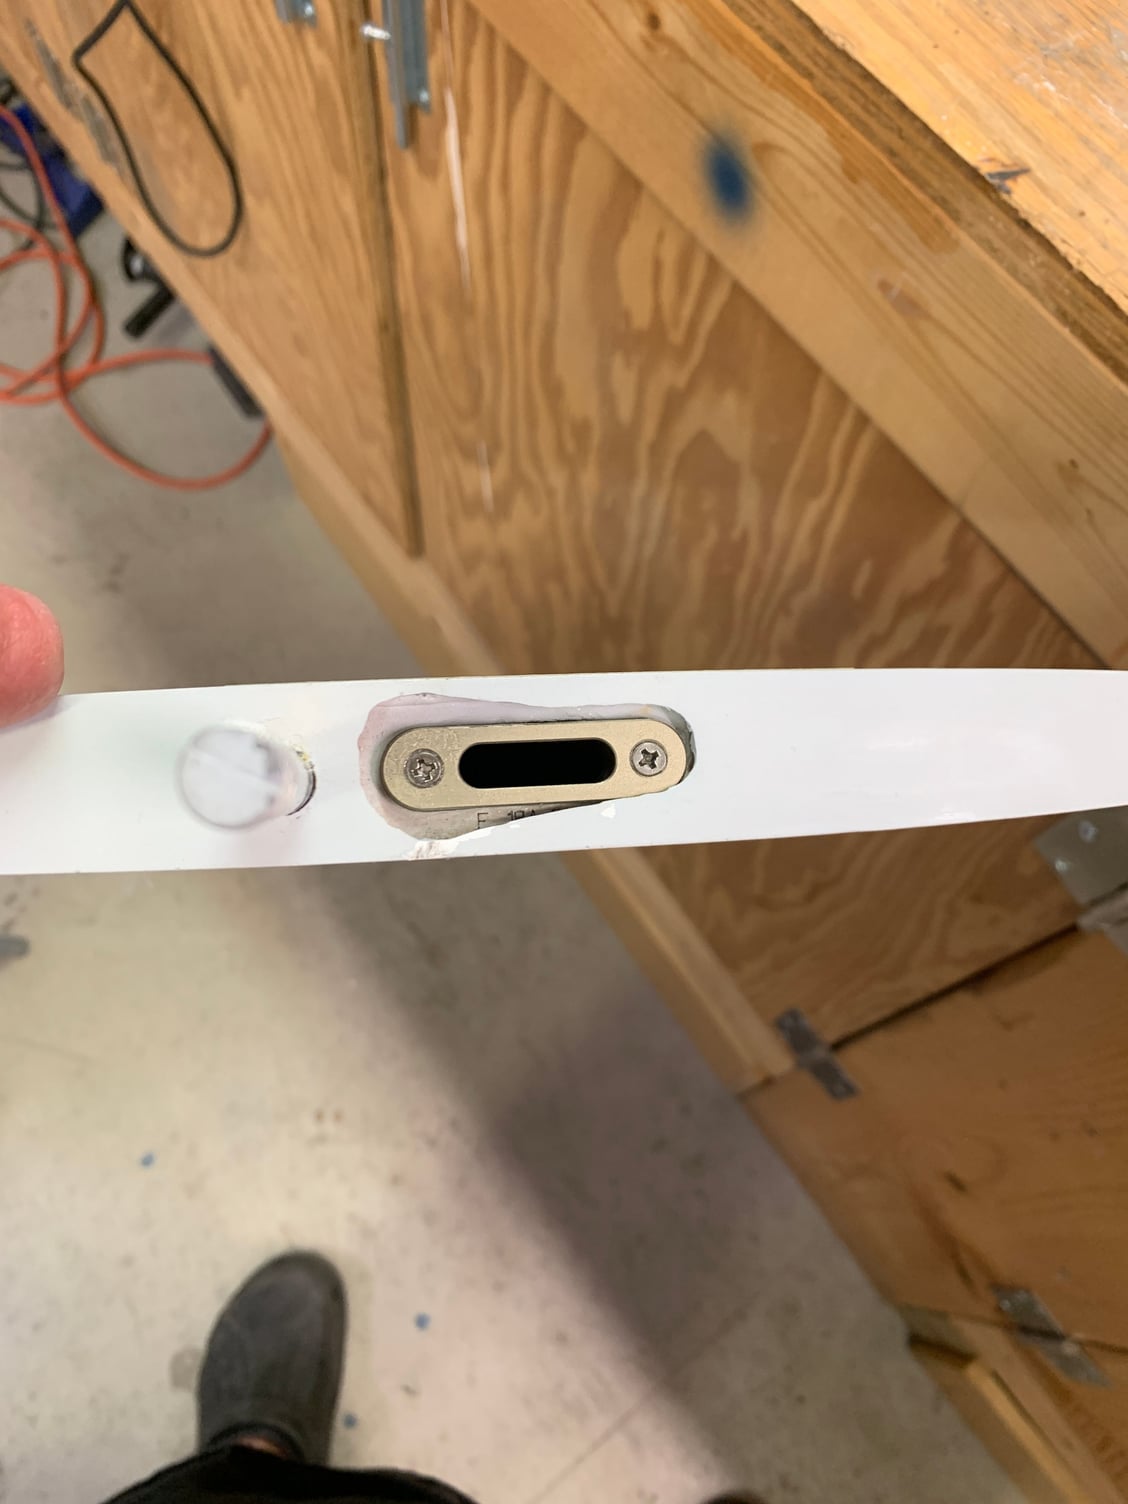
Manual talks about cutting a slot etc but the slot is already made and all lined up.
The following users liked this post:
gpman (06-04-2020)
Old 06-12-2020, 07:10 AM
  #30  
Canadian Man
Thread Starter
My Feedback: (1)
 
Canadian Man's Avatar
 
Join Date: Aug 2008
Location: Calgary, AB, CANADA
Posts: 838
Received 206 Likes on 146 Posts
Default

Elevator Redone. Airbrake Setup. Tank fittings installed.
Old 06-12-2020, 08:38 AM
  #31  
FenderBean
 
FenderBean's Avatar
 
Join Date: Feb 2006
Location: Huntsville AL
Posts: 7,140
Likes: 0
Received 79 Likes on 52 Posts
Default

I learned this on my F-14 the stab mounts were stupid and not safe, using light ply for servo mounting makes you wonder what they are thinking. So when I did my f-18 like this I knew from the get go it had to be done. Plus you need to make sure you make the bearing on the servo arm parallel to the shaft of the stab don’t trust the mount angle in the fuse, they can be off a lot.
Old 06-14-2020, 08:43 AM
  #32  
Canadian Man
Thread Starter
My Feedback: (1)
 
Canadian Man's Avatar
 
Join Date: Aug 2008
Location: Calgary, AB, CANADA
Posts: 838
Received 206 Likes on 146 Posts
Default

Originally Posted by FenderBean
I learned this on my F-14 the stab mounts were stupid and not safe, using light ply for servo mounting makes you wonder what they are thinking. So when I did my f-18 like this I knew from the get go it had to be done. Plus you need to make sure you make the bearing on the servo arm parallel to the shaft of the stab don’t trust the mount angle in the fuse, they can be off a lot.
Thanks Keith! I appreciate your input!
Old 06-14-2020, 08:44 AM
  #33  
Canadian Man
Thread Starter
My Feedback: (1)
 
Canadian Man's Avatar
 
Join Date: Aug 2008
Location: Calgary, AB, CANADA
Posts: 838
Received 206 Likes on 146 Posts
Default

Rudders installed. Wiring bundles complete from the rear.
Old 06-14-2020, 10:43 AM
  #34  
FenderBean
 
FenderBean's Avatar
 
Join Date: Feb 2006
Location: Huntsville AL
Posts: 7,140
Likes: 0
Received 79 Likes on 52 Posts
Default

probably too late, but I always replace their ball ends with dubro hvy duty and then use titanium rods. May want to look at my build on the rudder stuff as well.

Last edited by FenderBean; 06-14-2020 at 10:45 AM.
Old 06-17-2020, 06:32 AM
  #35  
Canadian Man
Thread Starter
My Feedback: (1)
 
Canadian Man's Avatar
 
Join Date: Aug 2008
Location: Calgary, AB, CANADA
Posts: 838
Received 206 Likes on 146 Posts
Default

Hot Section complete!

Old 06-17-2020, 07:03 AM
  #36  
FenderBean
 
FenderBean's Avatar
 
Join Date: Feb 2006
Location: Huntsville AL
Posts: 7,140
Likes: 0
Received 79 Likes on 52 Posts
Default

Dear god what an easier motor install compared to mine.
Old 06-17-2020, 07:55 AM
  #37  
Canadian Man
Thread Starter
My Feedback: (1)
 
Canadian Man's Avatar
 
Join Date: Aug 2008
Location: Calgary, AB, CANADA
Posts: 838
Received 206 Likes on 146 Posts
Default

Originally Posted by FenderBean
Dear god what an easier motor install compared to mine.
HAHA! rear mounted turbines i'm assuming? This mid mounting is slick!
Old 06-24-2020, 06:38 AM
  #38  
Canadian Man
Thread Starter
My Feedback: (1)
 
Canadian Man's Avatar
 
Join Date: Aug 2008
Location: Calgary, AB, CANADA
Posts: 838
Received 206 Likes on 146 Posts
Default

Tanks, Tanks, Tanks!
Old 06-28-2020, 06:48 AM
  #39  
Canadian Man
Thread Starter
My Feedback: (1)
 
Canadian Man's Avatar
 
Join Date: Aug 2008
Location: Calgary, AB, CANADA
Posts: 838
Received 206 Likes on 146 Posts
Default

Rear End is complete!
Old 07-06-2020, 06:25 AM
  #40  
Canadian Man
Thread Starter
My Feedback: (1)
 
Canadian Man's Avatar
 
Join Date: Aug 2008
Location: Calgary, AB, CANADA
Posts: 838
Received 206 Likes on 146 Posts
Default

The following users liked this post:
gpman (07-06-2020)
Old 07-06-2020, 07:39 AM
  #41  
FenderBean
 
FenderBean's Avatar
 
Join Date: Feb 2006
Location: Huntsville AL
Posts: 7,140
Likes: 0
Received 79 Likes on 52 Posts
Default

Everyone is using my idea on the canopy, trend setter lol nice work I recommend putting longer pins on the front the stock are too short and can pull out.
And if you havent figured it out already you have to induce some slop in the open/close or the it doesnt work correctly or at least mine didnt.

Last edited by FenderBean; 07-06-2020 at 07:43 AM.
Old 07-07-2020, 06:21 AM
  #42  
Canadian Man
Thread Starter
My Feedback: (1)
 
Canadian Man's Avatar
 
Join Date: Aug 2008
Location: Calgary, AB, CANADA
Posts: 838
Received 206 Likes on 146 Posts
Default

Originally Posted by FenderBean
Everyone is using my idea on the canopy, trend setter lol nice work I recommend putting longer pins on the front the stock are too short and can pull out.
And if you havent figured it out already you have to induce some slop in the open/close or the it doesnt work correctly or at least mine didnt.
One thing I found that I really like about using servo/linear actuator for both lock and the opening is I found I can adjust the curve in my 28X to compensate for the "slop" needed for it to work. So I can make the lock go too far and than back off when needed. I'll include it with one of the videos when it's all complete but I understand what your saying.
Keith, did yours have the 3 side hooks as well on each side?
Old 07-07-2020, 08:01 AM
  #43  
FenderBean
 
FenderBean's Avatar
 
Join Date: Feb 2006
Location: Huntsville AL
Posts: 7,140
Likes: 0
Received 79 Likes on 52 Posts
Default

Originally Posted by Canadian Man
One thing I found that I really like about using servo/linear actuator for both lock and the opening is I found I can adjust the curve in my 28X to compensate for the "slop" needed for it to work. So I can make the lock go too far and than back off when needed. I'll include it with one of the videos when it's all complete but I understand what your saying.
Keith, did yours have the 3 side hooks as well on each side?
Yes it did, but I removed them, I already had to butcher the cockpits enough to install them just didnt feel like do even more for the hooks
The following users liked this post:
Canadian Man (07-08-2020)
Old 07-10-2020, 06:05 AM
  #44  
Canadian Man
Thread Starter
My Feedback: (1)
 
Canadian Man's Avatar
 
Join Date: Aug 2008
Location: Calgary, AB, CANADA
Posts: 838
Received 206 Likes on 146 Posts
Default

The following 2 users liked this post by Canadian Man:
Ad Clark (07-10-2020), gpman (07-16-2020)
Old 07-16-2020, 08:39 AM
  #45  
Canadian Man
Thread Starter
My Feedback: (1)
 
Canadian Man's Avatar
 
Join Date: Aug 2008
Location: Calgary, AB, CANADA
Posts: 838
Received 206 Likes on 146 Posts
Default

Getting closer to the end!
The following users liked this post:
gpman (07-16-2020)
Old 07-22-2020, 07:36 AM
  #46  
Canadian Man
Thread Starter
My Feedback: (1)
 
Canadian Man's Avatar
 
Join Date: Aug 2008
Location: Calgary, AB, CANADA
Posts: 838
Received 206 Likes on 146 Posts
Default

2 Videos Left!
Old 07-23-2020, 10:42 PM
  #47  
jetspud
 
jetspud's Avatar
 
Join Date: Dec 2001
Location: shreveport , LA
Posts: 1,127
Received 2 Likes on 2 Posts
Default

Great videos
Is the guy your building for local if so could you maybe do a video of the first flights. I may be wrong in this statement but it seem to be very few success stories on this particular F-18.

Thanks
David
Old 07-24-2020, 04:41 PM
  #48  
MarkF
 
Join Date: Jan 2004
Location: Las Vegas, NV
Posts: 252
Likes: 0
Received 20 Likes on 16 Posts
Default

CM, do you 3d print those grommets on your electronics board or are they regular grommets? I think they really clean up the wire install.
Thanks.
Old 07-26-2020, 05:15 AM
  #49  
Canadian Man
Thread Starter
My Feedback: (1)
 
Canadian Man's Avatar
 
Join Date: Aug 2008
Location: Calgary, AB, CANADA
Posts: 838
Received 206 Likes on 146 Posts
Default

Originally Posted by jetspud
Great videos
Is the guy your building for local if so could you maybe do a video of the first flights. I may be wrong in this statement but it seem to be very few success stories on this particular F-18.

Thanks
David
Yea he is one of my good friends. At this point not sure if he will be keeping it or selling it. It he keeps it and flies it I will video the maiden for sure!
His previous one was successful once it was flying but it wasn't a long success story.
Old 07-26-2020, 05:19 AM
  #50  
Canadian Man
Thread Starter
My Feedback: (1)
 
Canadian Man's Avatar
 
Join Date: Aug 2008
Location: Calgary, AB, CANADA
Posts: 838
Received 206 Likes on 146 Posts
Default

Originally Posted by MarkF
CM, do you 3d print those grommets on your electronics board or are they regular grommets? I think they really clean up the wire install.
Thanks.
Hey Mark.
The plugs for the GSU's are just standard servo connector plugs you can buy. I purchased these from Dreamworks but they are available many places. It would definitely be an easy print for a 3D printer.
I believe this is what you were talking about?


Contact Us - Archive - Advertising - Cookie Policy - Privacy Statement - Terms of Service -

Copyright © 2024 MH Sub I, LLC dba Internet Brands. All rights reserved. Use of this site indicates your consent to the Terms of Use.