


Carf rebel pro
 03-30-2023, 06:58 AM
#651


Join Date: Oct 2003
Location: Mesa Arizona
Posts: 61
Likes: 0
Received 0 Likes
on
0 Posts
I bought this from a friend of mine who also has a Rebel Pro. He had a complete layout laser cut plywood for everything, including battery trays and the strengthening section which is glued on below the top section where you are inquiring
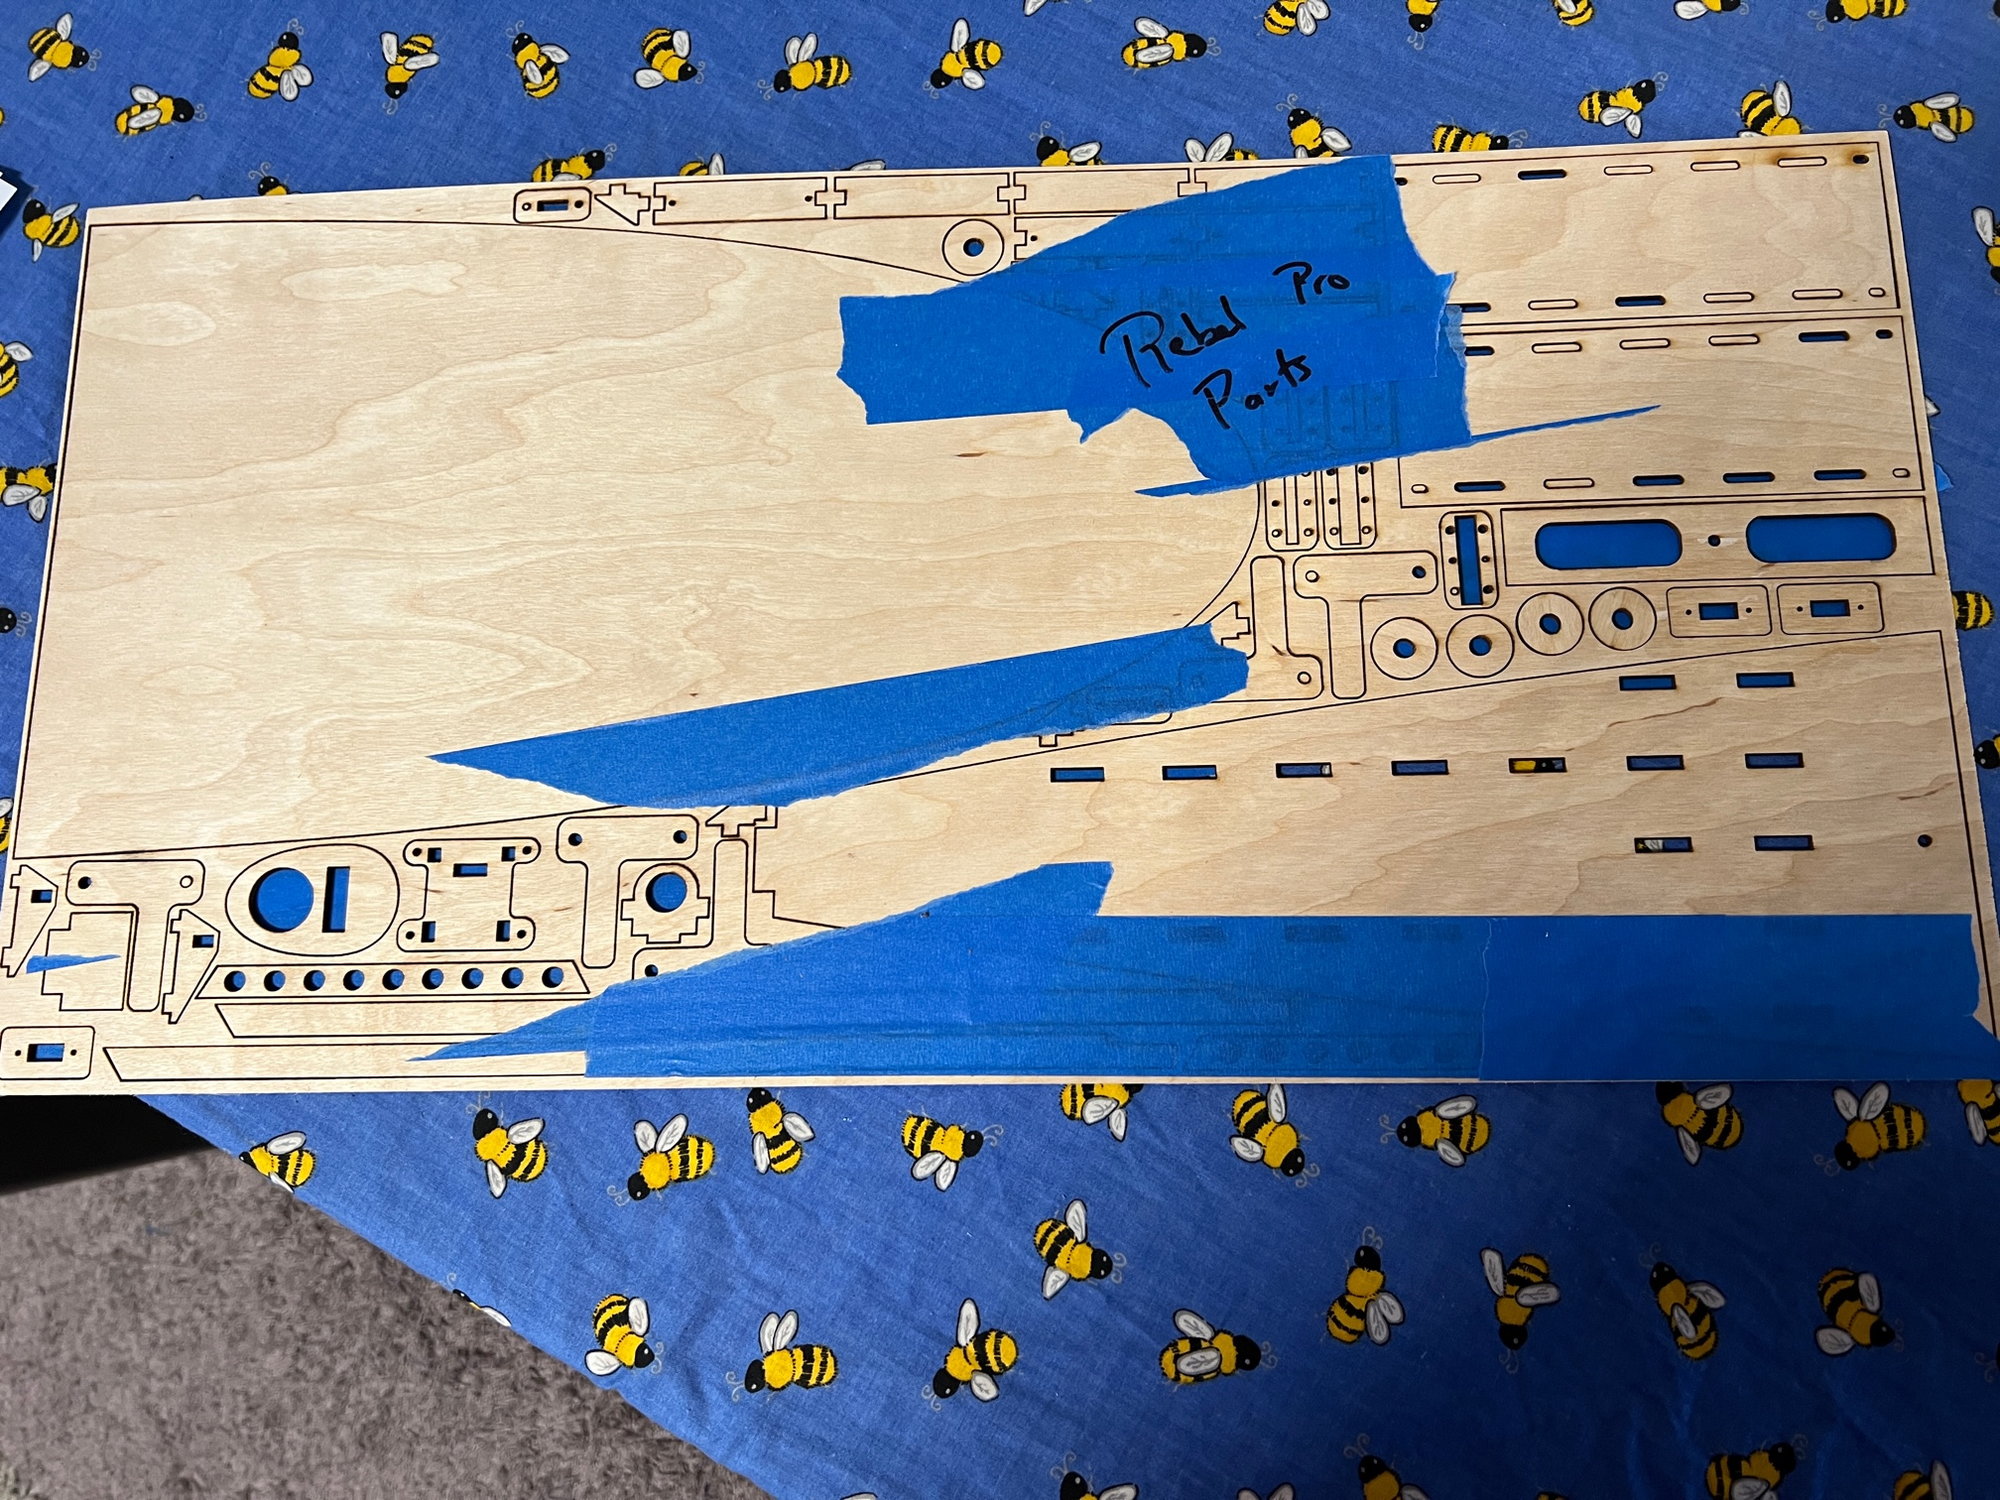
about. If you would like, I can check him (Joe Allen) to see if he would do some more for anyone interested. If he wants to, I will give you the direct contact so you can talk with him.
Wayne
about. If you would like, I can check him (Joe Allen) to see if he would do some more for anyone interested. If he wants to, I will give you the direct contact so you can talk with him.
Wayne
Regards
Steve G
 03-30-2023, 07:46 AM
#653
I did the initial balance test on Tuesday to see exactly where we were prior to finalizing everything for the turbine start. We used a ply plate jig for the balance test. I did not put fuel in the UAT as yet and this was the FIRST time that the Pro was fully assembled with both wings. She balances exactly on the rear of the wing tube...So I am expecting that when I fill the UAT and also put some fuel in the tank, I will have to move a battery (or maybe 2) from way up in the nose to a bit further backwards before the first flight.
We will start up the KT 235 this weekend and have next week scheduled for the maiden (weather in GA permitting). I'm very happy with how she turned out and look forward to trimming it out for F3S competition.
Wayne


We will start up the KT 235 this weekend and have next week scheduled for the maiden (weather in GA permitting). I'm very happy with how she turned out and look forward to trimming it out for F3S competition.
Wayne
The following users liked this post:
smcharg (03-30-2023)
04-06-2023, 05:37 AM
#654

I wonder if they have changed the way they lay up the fuse since I got mine, because I was 3/8-1/2" behind the tube with a full uat, 1/8 tank of fuel, 3S 5200mah li-ion all the way up in the nose, forward of the former, and two 5200mah li-ions mounted on the nose gear plate. It still flew fine but was a little 'loose' feeling. Hopefully my next one balances as nicely as yours(my dumbass sold my first one!).
04-06-2023, 07:38 AM
#655
Member
Can anyone tell me how far forward of the main spar they installed their CMJets 5L(FIVE) tank and where their batteries ended up? I'm installing a 1700 g 220N turbine with it.
04-06-2023, 08:40 AM
#656
I wonder if they have changed the way they lay up the fuse since I got mine, because I was 3/8-1/2" behind the tube with a full uat, 1/8 tank of fuel, 3S 5200mah li-ion all the way up in the nose, forward of the former, and two 5200mah li-ions mounted on the nose gear plate. It still flew fine but was a little 'loose' feeling. Hopefully my next one balances as nicely as yours(my dumbass sold my first one!).
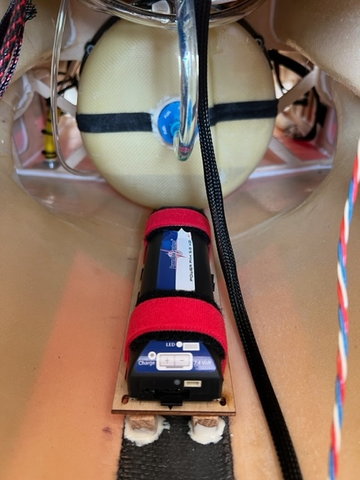
So, I was MORE than surprised (after checking Russell & Scott where they have their Rebel Pro & MAX balanced) on finding that I was nose heavy. Yesterday I added fuel to the 250ml Digitech UAT and also added about 1/6th fuel to the tank & rechecked the balance. I had to move one of the 5000Mah (PowerBox) battery back 30 inches for her to balance in the middle, exact center of the wing tube.I fully understand that it is recommended by CARF and flyers to have it at the back of the tube....but for my first flight, I wanted to err on a little nose heavy side of things rather than have to clean shorts after the first flight!
These photos are where one of the batteries is located just in front of the 6L tank and the other 3 batteries up front on the tray.
The weather sucks this weekend in GA so the maiden will be deferred to the following weekend.
Wayne
 04-06-2023, 08:55 AM
#657
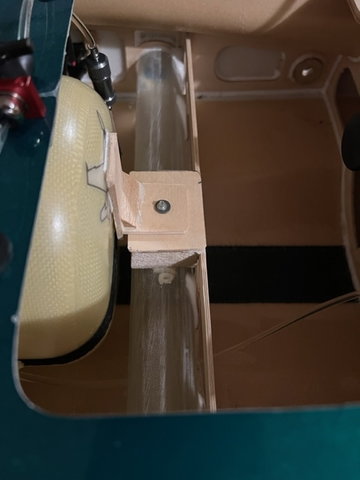
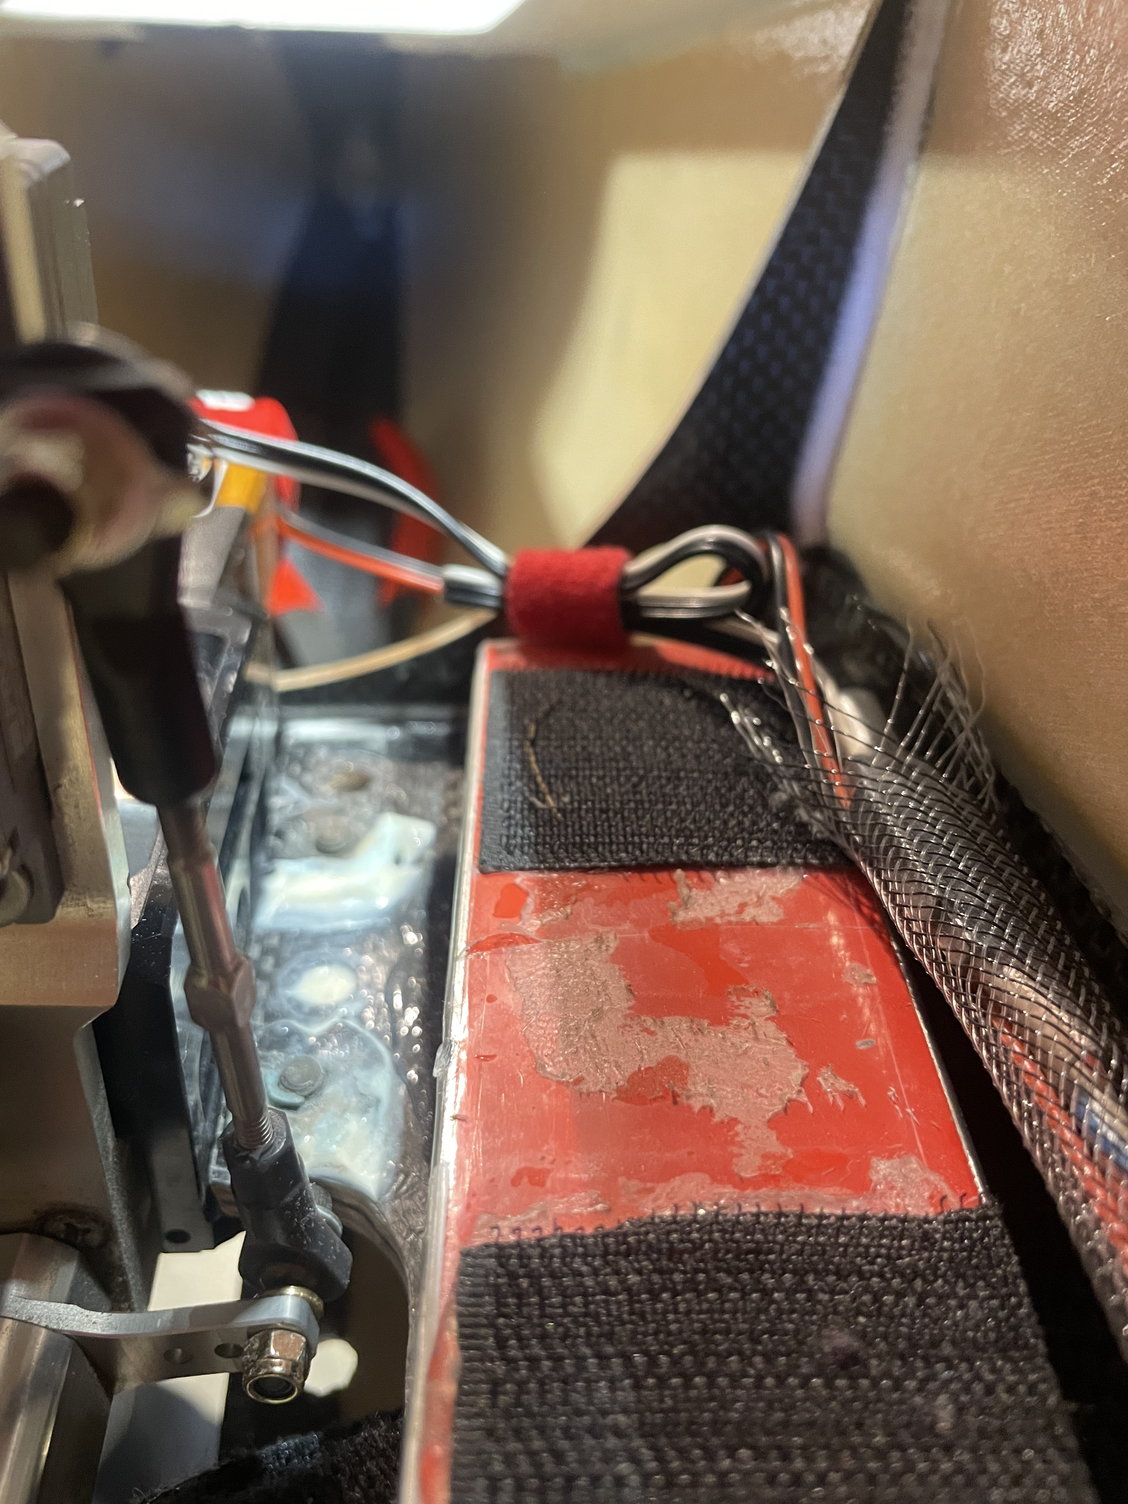
I also copied Dansy's method of securing the back of the tank instead of the CARF. My tank is 3/8 of an inch forward of the leading edge of the main spar.... Photos are included, but remember, this is the 6L tank.
Wayne

 04-06-2023, 09:16 AM
#658

My Feedback: (1)

My biggest suggestion for everyone is that the CARF Rebel Pro and Max have a very large CG Range! I realize on a lot of jets that, if you don't get it perfect, you're going to experience a static margin that is too high (overly stable) or too low (highly unstable). I would suggest that the Pro will fly just fine from +/- 20mm from the back of the spar tube. From there, tune it as you like to fly. If you like long knife edge passes with low speed and high alpha, slow landing, move the CG to ~10-20mm aft of the back of the tube. If you like a more stabile and docile plane, move it forward. You can't really go wrong with that sort of range and even if you are outside that, the plane is flyable.
The following 3 users liked this post by smcharg:
04-06-2023, 10:21 AM
#659
Senior Member
If Wayne has issues with nose heavy he can move the batteries to the front gear brackets . There's enough room for a rectangle 3800 mah pack, I mounted three 3800 on top of the brackets.
Mine Pro is balanced 5mm forward of rear spar , beside the MAP tank is were the electron pack rides.
Now after installing a smoke tank, i will have to check my balance, but not till the beginning of May as it's not the flying season.

Mine Pro is balanced 5mm forward of rear spar , beside the MAP tank is were the electron pack rides.
Now after installing a smoke tank, i will have to check my balance, but not till the beginning of May as it's not the flying season.
Last edited by Skunkwrks; 04-06-2023 at 10:27 AM.
The following users liked this post:
sewbusy (04-06-2023)
04-07-2023, 07:12 AM
#660
Elite Aerosport Rebel Pro Build
04-07-2023, 07:38 AM
#661
I totally agree with you about selling your first one! :-) I'm not sure if CARF changed how they lay it up....However, I definitely did not add any extra "back-end" weight other than what is required for installing the thrust tube and the needed sets of wires for the servos there. I did use a ceramic sleeve (from McMasterCarr) which protects the servo wires for up to 2400F heat.
So, I was MORE than surprised (after checking Russell & Scott where they have their Rebel Pro & MAX balanced) on finding that I was nose heavy. Yesterday I added fuel to the 250ml Digitech UAT and also added about 1/6th fuel to the tank & rechecked the balance. I had to move one of the 5000Mah (PowerBox) battery back 30 inches for her to balance in the middle, exact center of the wing tube.I fully understand that it is recommended by CARF and flyers to have it at the back of the tube....but for my first flight, I wanted to err on a little nose heavy side of things rather than have to clean shorts after the first flight!
These photos are where one of the batteries is located just in front of the 6L tank and the other 3 batteries up front on the tray.
The weather sucks this weekend in GA so the maiden will be deferred to the following weekend.
Wayne
Last edited by bodywerks; 04-07-2023 at 07:40 AM.
04-07-2023, 04:14 PM
#662
Member
You ALWAYS want your tank as close to the CG as possible, regardless of size. In the case of most jets, that means the back of the tank against the wing tube. My entire build of my CARF was posted under the Elite aerosports Rebel pro thread, but this is the post showing how I mounted mine. I basically copied how CARF mounts the stock tank:
Elite Aerosport Rebel Pro Build
Elite Aerosport Rebel Pro Build
Cheers,
Peter
04-07-2023, 05:29 PM
#663
Senior Member
If you go to thread #362 post on the page, you will see F1 Rocket posted on how he installed the batteries beside the front gear on his Rebel .
This were I got the idea after I had my 3800mah in the nose area and was too heavy.
Moved them to the gear support like F1 did and got my balance point and placed my 2200mah Li-ion battery for the electron beside my MAP tank.
This were I got the idea after I had my 3800mah in the nose area and was too heavy.
Moved them to the gear support like F1 did and got my balance point and placed my 2200mah Li-ion battery for the electron beside my MAP tank.
04-07-2023, 05:47 PM
#664
Senior Member
With this 6 liter tank and bracket hysol to my CMJETS tank, I found it's too large of a diameter to go through the front tank bracket, so i can only move my tank about 12-15cm forwards for doing maintenancelike clunk line changing and such.
If you guys look back in the post you can see the photos of the tank install
Rusty
04-09-2023, 01:21 PM
#665
This may be a dumb question but here goes. I just received my Rebel Pro on Friday. I a trying to set up my wiring and equipment layout and was curious to know how difficult it is to get to the knurled nuts that hold on the wings. Any pitfalls to look out for? Also, it looks like I will need plywood spacers for the aileron servos to allow the arms to reach the correct area. I thought this was fixed with the wing rib placement or is that normal?
Thanks,
Tone
Thanks,
Tone
04-09-2023, 01:25 PM
#666
My Feedback: (53)

If you have big hand and the smoke tank the back one are a little challenge but quite feasibly…
For the ailerons on the one I build I used a Secraft servo mount on the cover and that still work very well after a few years and lots of flights.
For the ailerons on the one I build I used a Secraft servo mount on the cover and that still work very well after a few years and lots of flights.
04-09-2023, 03:36 PM
#667
Has anyone else used this cover method to mount the aileron servo's? I remember that this is how the servo's were installed on my Rebel classic. Is this enough for the Pro? The aileron screws look like it's going to be a pain to get in.
Thanks,
Tone
04-09-2023, 06:55 PM
#668
Senior Member
I switched out the Carf nuts for two pairs of Secraft wing bolts, and metric thread. With the original plastic nurl nut it was very hard to tighten, I too have large fingers and had great difficultly getting them snug .
If needed cut some 1/8 plywood and shim and hysol to the desired height or change servo arms as some arms are closer to the servo base and other are farther away giving better clearance. The servo screw I used had a 2.5 head hex and i used a small 1/4" racket from princesses Auto and 1/4 drive, sockets are from gear wrench that it all fits inside that tight space.
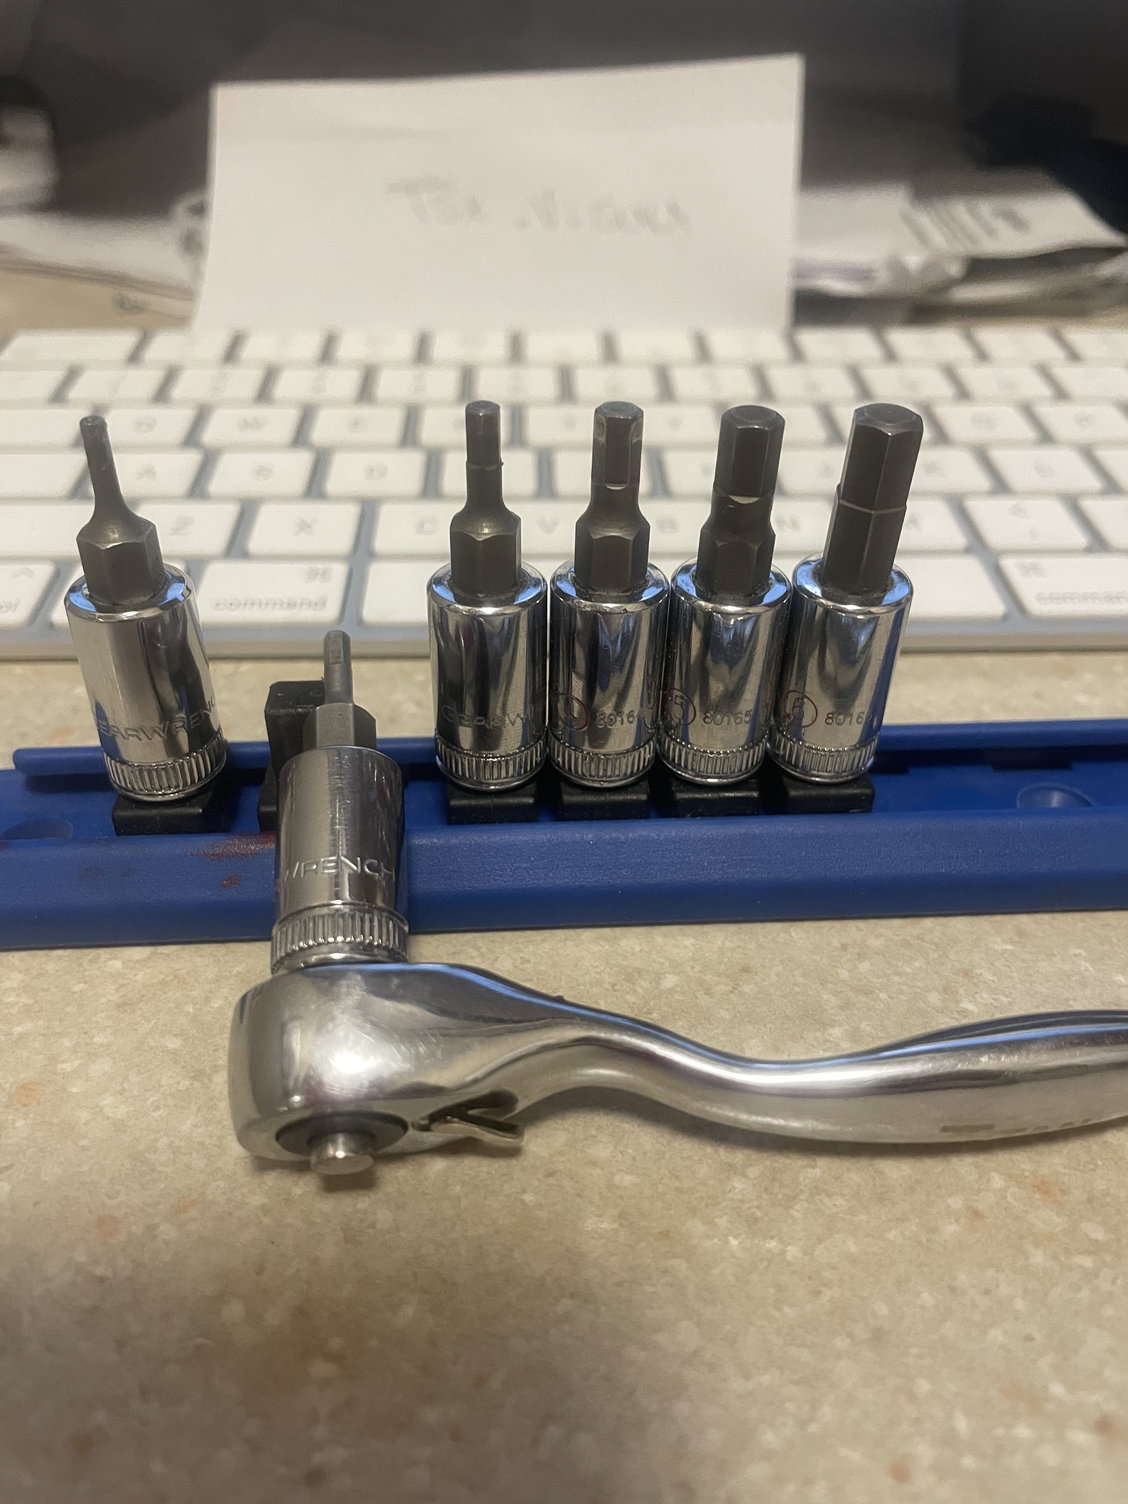
If needed cut some 1/8 plywood and shim and hysol to the desired height or change servo arms as some arms are closer to the servo base and other are farther away giving better clearance. The servo screw I used had a 2.5 head hex and i used a small 1/4" racket from princesses Auto and 1/4 drive, sockets are from gear wrench that it all fits inside that tight space.
04-10-2023, 04:40 AM
#669
Thanks for the info Dansy. I have really big hands and have been curious if I will have a problem getting the wing nuts on.
Has anyone else used this cover method to mount the aileron servo's? I remember that this is how the servo's were installed on my Rebel classic. Is this enough for the Pro? The aileron screws look like it's going to be a pain to get in.
Thanks,
Tone
Has anyone else used this cover method to mount the aileron servo's? I remember that this is how the servo's were installed on my Rebel classic. Is this enough for the Pro? The aileron screws look like it's going to be a pain to get in.
Thanks,
Tone
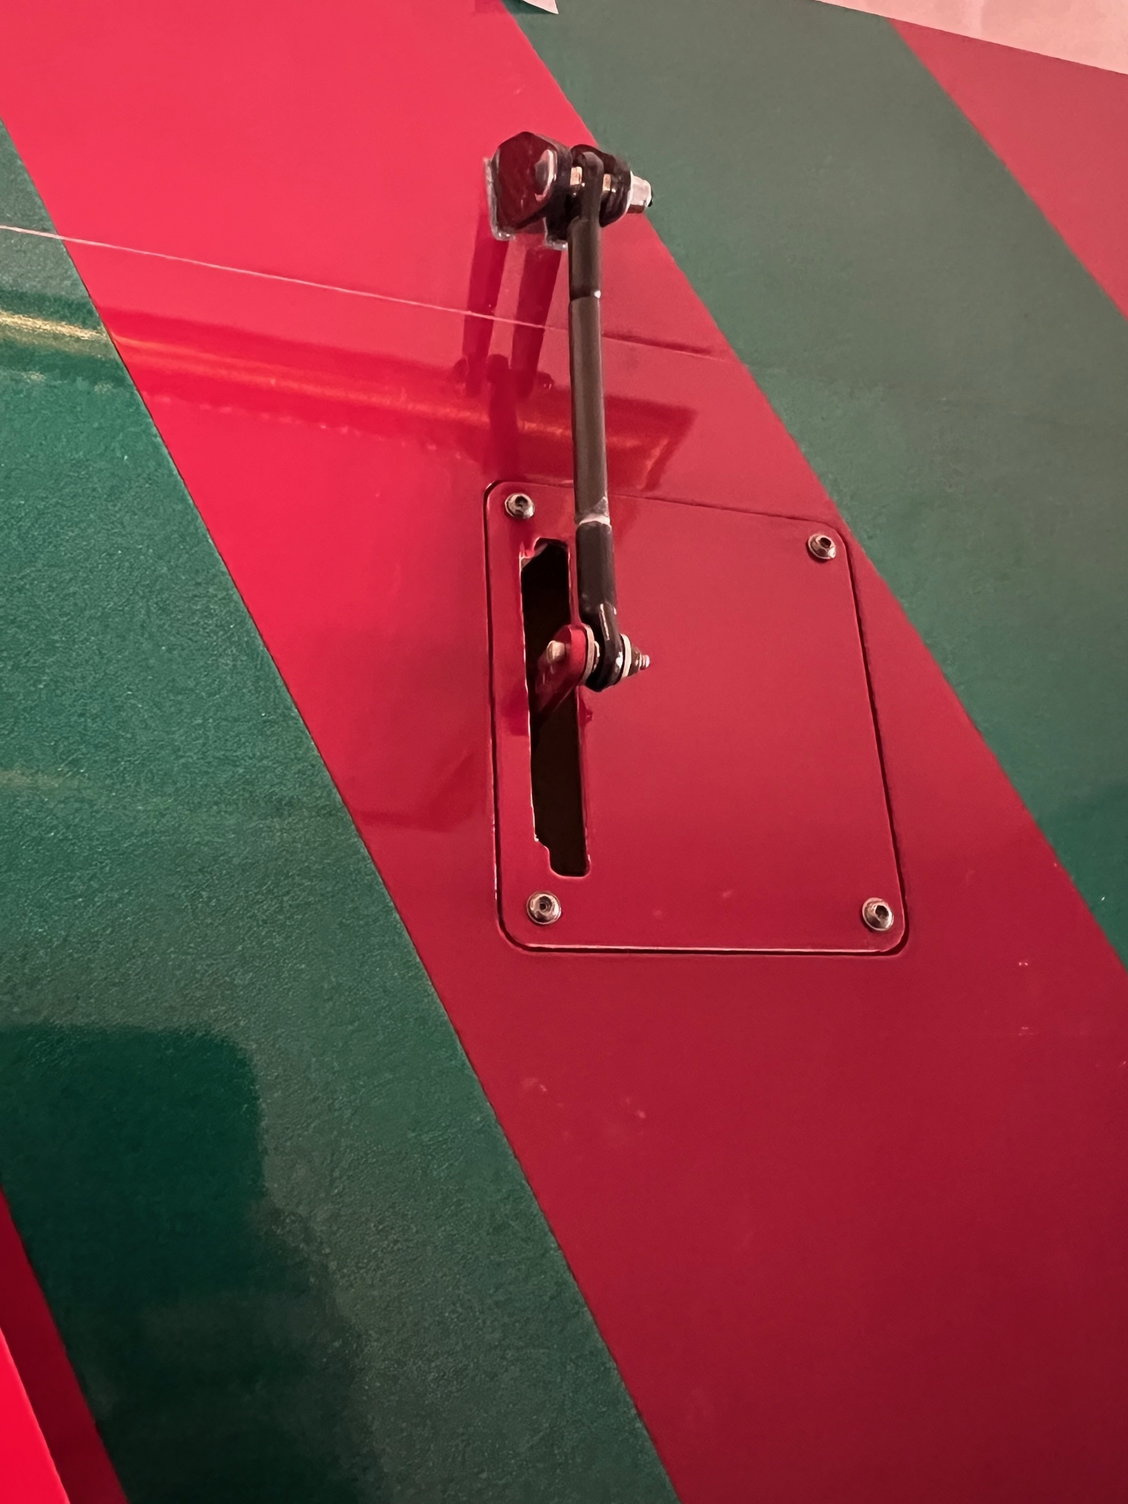
I used the CARF ball link on the aileron horn and different ball link (without the built-in standoff) on the servo arm. Since the servo was a little off-set, I placed the ball link on the side that would bring the travel closer to straight. It really is not straight, but close enough where the ball will swivel a little.I did have to open up one side of the cover's slot so that the servo arm would have free travel. I used a 1.25" servo arm which had a bolt lock on the back of the arm to ensure a secure fit on the servo output spline. I also used the 3mm rod that CARF sends, but I added carbon fiber outer shaft glued with AeroPoxy.
Wayne
The following users liked this post:
Skunkwrks (04-10-2023)
04-10-2023, 12:28 PM
#670
Senior Member
Well stated Wayne , did mine very similar but those tensil steel 3mm rods Carf supply are very stiff compared to the 3 mm stainless steel rods now.
I didn't use the carbon on the Ailerons but on the rudder I did. It's alot longer and now stiffer .
I didn't use the carbon on the Ailerons but on the rudder I did. It's alot longer and now stiffer .
04-18-2023, 09:36 AM
#671
Well... Last Saturday was the day to get the new Rebel Pro up in the air.It was an eventful day, ending up with only one flight. The morning was spent with the usual triple checking of all pushrods/connections...etc...Then on to range check with turbine off & also on, plus failsafe (turbine shuts down) as required by the AMA!
All checked out as required...so there was no other option but to take her up on her maiden voyage. I purposely had her a bit nose heavy for the first flight (balancing in the center of the wing tube) as I didn't want any undue surprises. With the nose gear installed on top of the platform, I had expected to put in more elevator for the lift-off as I did not use take-off flaps. Feeding in power on the KT235 slowly...she tracked true and gently lifted off in front of me with no surprises. I was calm as she showed no tendencies to move around. She was as SOLID as a rock with NO gyro on at all.
I tested out the roll rate (a bit too fast for me with 15 degrees of up and 16 degrees of down (ailerons). It needed no aileron trim and 2 clicks of down elevator trim, which surprised me as it was supposed to be nose heavy. Pulling to 45 degrees....I tested the differential...roll right & left stayed on the line without wandering off. This thing flies SWEET!!!
It is as all you previous owners have stated! This Pro, is a step above what I was flying before. I really thought that the Leonardo was precise......well, let me tell you,..... THIS baby goes where you point it.....and, more importantly, I have done NO trimming at all on it as yet!!
With the KT235 on board, I never went past 3/4 throttle...even on an extended upline with a full roll for a Humpty Bump over the top. Excitement starts to rumble in! I next checked the take-off flaps and also the landing flaps. All seemed to work well using the down trim installed on the ground with flaps. So I pulled everything back up and did 2 more minutes of flying. Then I set up for landing and the fun begins!
Wheels down & flaps down and all seemed well...... turning on base leg, all of a sudden she rolled by herself.....I quickly corrected and she still wanted to roll...so holding in the aileron correction, I was able to line up...THAT was when my caller shouted....FLAPS UP....FULL POWER....repeating it 3 more times loudly. I almost crapped....One of the brand new flap servo failed (on the first flight) and the other was the full 55 degrees down.....I MUST have done something good in my past, to be able to wrench her back to flying (from the open arms of the ground) during the spool up from idle and the slow 4 seconds for the flap to go up. Fortunately, she's alive and no damage but took some coaxing to slow down enough to land without flaps.
Before someone asks...Yes, I followed the CARF instructions to have the servo arm straight back when fully deployed...so that was not the problem. I have since changed thos servos (JR 8955SS) to S8911 servos which have 753 oz/in of torque for my next flight, and I've also moved another battery back in front of the fuel tank.
Overall, I'm extremely happy (and lucky) on the first flight and can see where the Pro will take me to a higher level in F3S jet competition. Again, I'll mention, that I did not turn on the gyro and she tracked better than my Leo with the gyro on!
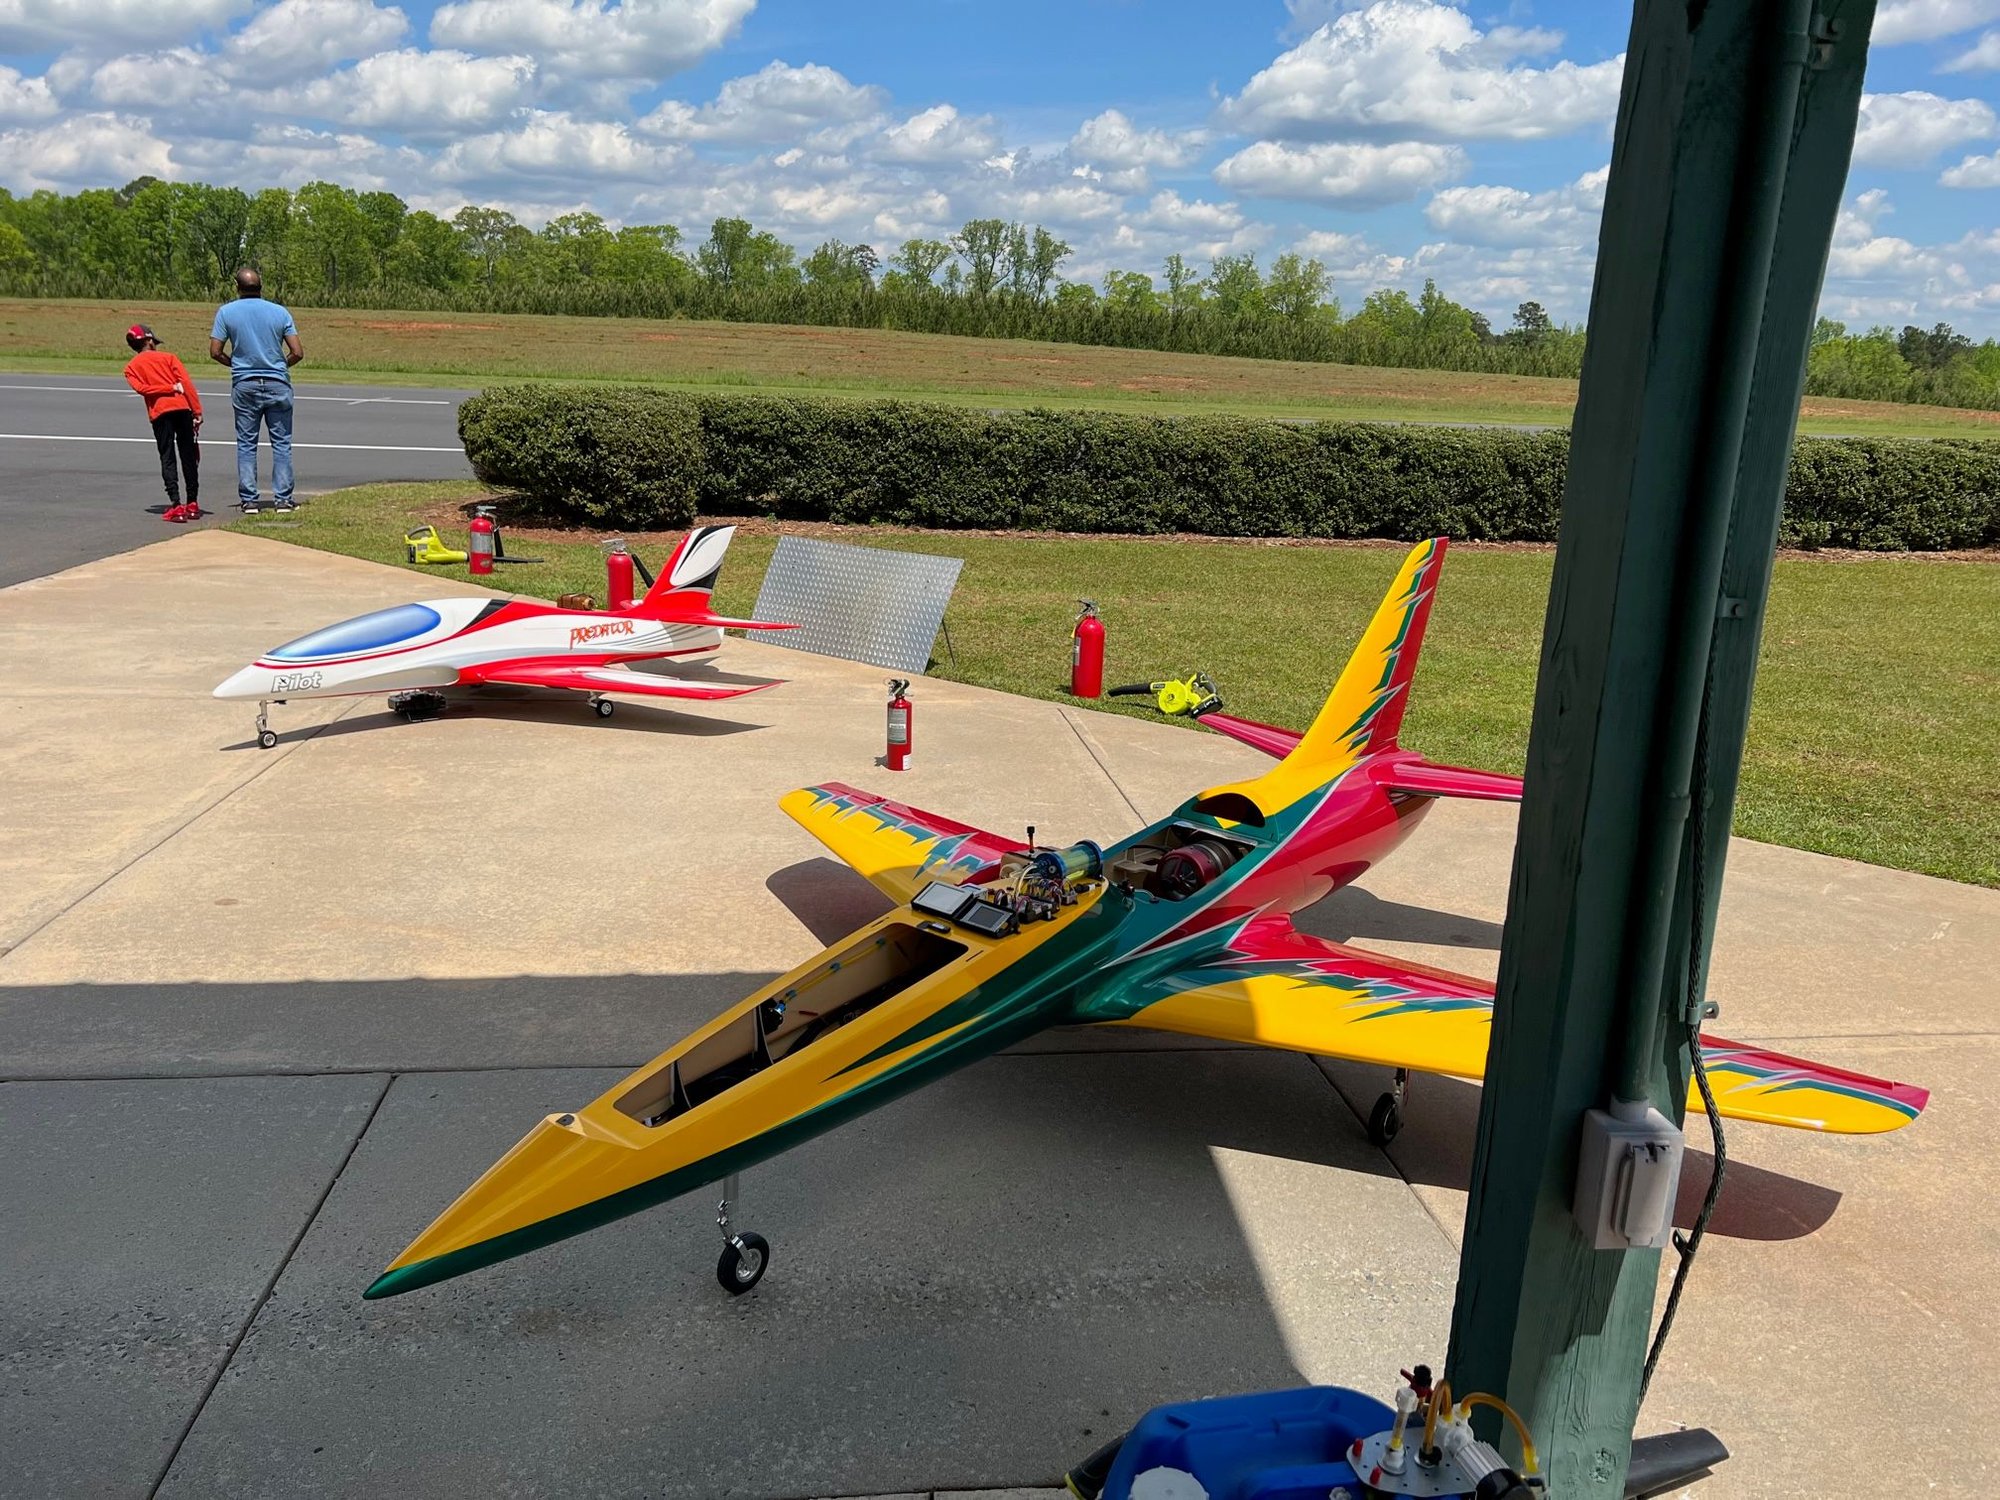
Setting up for the first flight.

My caller, Dan Baker's note on the Flaps.
Wayne
All checked out as required...so there was no other option but to take her up on her maiden voyage. I purposely had her a bit nose heavy for the first flight (balancing in the center of the wing tube) as I didn't want any undue surprises. With the nose gear installed on top of the platform, I had expected to put in more elevator for the lift-off as I did not use take-off flaps. Feeding in power on the KT235 slowly...she tracked true and gently lifted off in front of me with no surprises. I was calm as she showed no tendencies to move around. She was as SOLID as a rock with NO gyro on at all.
I tested out the roll rate (a bit too fast for me with 15 degrees of up and 16 degrees of down (ailerons). It needed no aileron trim and 2 clicks of down elevator trim, which surprised me as it was supposed to be nose heavy. Pulling to 45 degrees....I tested the differential...roll right & left stayed on the line without wandering off. This thing flies SWEET!!!
It is as all you previous owners have stated! This Pro, is a step above what I was flying before. I really thought that the Leonardo was precise......well, let me tell you,..... THIS baby goes where you point it.....and, more importantly, I have done NO trimming at all on it as yet!!
With the KT235 on board, I never went past 3/4 throttle...even on an extended upline with a full roll for a Humpty Bump over the top. Excitement starts to rumble in! I next checked the take-off flaps and also the landing flaps. All seemed to work well using the down trim installed on the ground with flaps. So I pulled everything back up and did 2 more minutes of flying. Then I set up for landing and the fun begins!
Wheels down & flaps down and all seemed well...... turning on base leg, all of a sudden she rolled by herself.....I quickly corrected and she still wanted to roll...so holding in the aileron correction, I was able to line up...THAT was when my caller shouted....FLAPS UP....FULL POWER....repeating it 3 more times loudly. I almost crapped....One of the brand new flap servo failed (on the first flight) and the other was the full 55 degrees down.....I MUST have done something good in my past, to be able to wrench her back to flying (from the open arms of the ground) during the spool up from idle and the slow 4 seconds for the flap to go up. Fortunately, she's alive and no damage but took some coaxing to slow down enough to land without flaps.
Before someone asks...Yes, I followed the CARF instructions to have the servo arm straight back when fully deployed...so that was not the problem. I have since changed thos servos (JR 8955SS) to S8911 servos which have 753 oz/in of torque for my next flight, and I've also moved another battery back in front of the fuel tank.
Overall, I'm extremely happy (and lucky) on the first flight and can see where the Pro will take me to a higher level in F3S jet competition. Again, I'll mention, that I did not turn on the gyro and she tracked better than my Leo with the gyro on!
Setting up for the first flight.
My caller, Dan Baker's note on the Flaps.
Wayne
04-18-2023, 10:16 AM
#672

Congrats on the maiden and I'm happy that everything turned out ok with the flap issue to get the bird back on the ground. The more you fly the Pro, the more you will like it.
I like my C/G at trailing edge of wing tube. Hope you can get it dialed in for your liking quickly to be able to enjoy it on every flight.
I like my C/G at trailing edge of wing tube. Hope you can get it dialed in for your liking quickly to be able to enjoy it on every flight.
The following users liked this post:
sewbusy (04-18-2023)


The following users liked this post:
sewbusy (04-18-2023)
04-18-2023, 01:48 PM
#674
My Feedback: (11)
Glad to hear it went ok, but it sounds like the curse is starting... Lets hope its just a one time glitch. With the wires as long as they have to be for this jet, it makes me wonder.
PS Lots of people have lost this jet they are just too egotistical to admit it in public.
PS Lots of people have lost this jet they are just too egotistical to admit it in public.
04-18-2023, 03:52 PM
#675
Congrats on the maiden and I'm happy that everything turned out ok with the flap issue to get the bird back on the ground. The more you fly the Pro, the more you will like it.
I like my C/G at trailing edge of wing tube. Hope you can get it dialed in for your liking quickly to be able to enjoy it on every flight.
I like my C/G at trailing edge of wing tube. Hope you can get it dialed in for your liking quickly to be able to enjoy it on every flight.
I�m doing my trimming one step at a time, just like I�ve done with the Leonardo and also all the previous IMAC planes for competition. I started with balance and won�t go much further until I settle in with where I want that to stay (balance). I am sure I will find that sweet spot soon and move along.
W